Safety first. The following information is for educational purposes. CNC machining involves high-speed rotating cutters. Always wear eye and ear protection, never leave a running machine unattended, and verify all feeds and speeds for your specific setup.
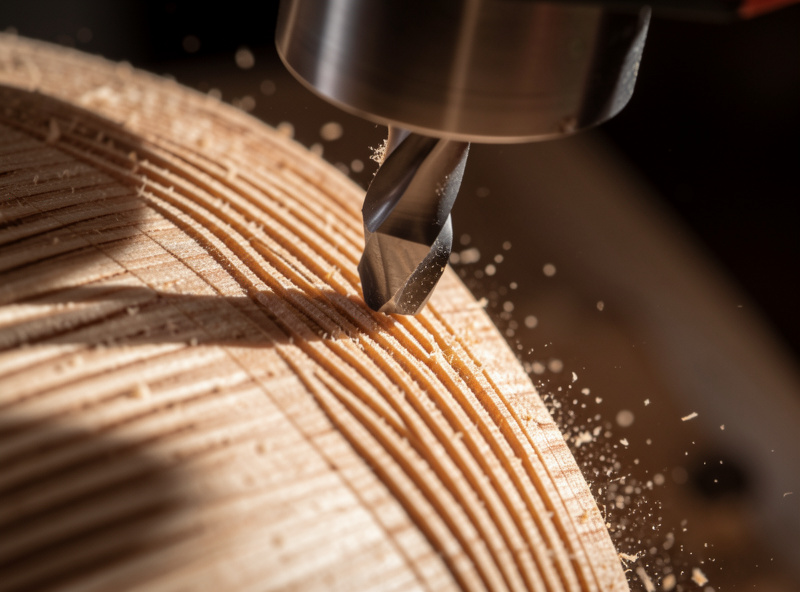
CAM toolpath mastery comes down to one idea: every cut is a deliberate choice about how the tool removes material, and the right toolpath for the job is the one that keeps the cutter loaded correctly while your workholding holds. Across the machines I run, a dialed-in toolpath strategy is worth more than a stiffer machine — I have seen a Genmitsu finish a part the operator next to me snapped three bits on, purely because the toolpath managed engagement instead of fighting it.
This is the hub for everything CAM-related on the bench. It is software-agnostic on purpose: the same logic drives Fusion 360, VCarve, Carbide Create, and Estlcam, because toolpaths are physics, not features. The buttons move; the chipload does not care what menu you found it under. Below is the full map — roughing, finishing, adaptive clearing, rest machining, tabs, ramps, 3D strategies, and V-carve inlay — with links to the deep-dive on each.
The Two Jobs Every Toolpath Does
Every toolpath in CAM does one of two jobs: it either removes bulk material fast (roughing) or it makes the final surface accurate and clean (finishing). Roughing protects finishing — a good rough pass leaves an even, predictable amount of stock so the finishing tool sees a constant load and a constant deflection. That is the whole game on a hobby gantry, where deflection, not horsepower, is the limit.
The mistake I see most often is treating one toolpath as a do-everything pass: a single contour cut at full depth that tries to rough and finish in one go. On a rigid VMC you can sometimes get away with it. On a Shapeoko or an Onefinity, the tool deflects under the heavy cut, springs back as the load drops, and leaves a wavy wall and a burned edge. Separate the jobs. Rough aggressively with a tool that clears chips, then finish with a light, even pass that the gantry can actually hold to. The full breakdown of how to balance the two lives in the roughing vs finishing toolpath guide.
Chipload First, RPM Second
The number that decides whether a toolpath survives is chipload — the thickness of material each flute removes per revolution, typically 0.001 in to 0.012 in on hobby gear depending on tool and material. Set chipload first, then back into feedrate from your RPM and flute count: feedrate = RPM × flutes × chipload. The manufacturer chart is a starting point, not a recipe, because it assumes a rigidity you do not have.
Too low a chipload is the silent killer. The flute rubs instead of cutting, heat goes into the edge instead of the chip, and the bit dulls and snaps — counterintuitively, slowing the feed often breaks more bits than speeding it up. Single-flute O-flutes exist precisely so you can hit a real chipload at the lower RPMs a hobby spindle and a flexy gantry tolerate. I keep a feeds-and-speeds reasoning framework in my head for every cut, and the material-by-material starting points live in the CNC feeds and speeds chart and the spindle RPM by material guide.
Roughing Strategies: Clear Bulk Without Crashing
Roughing is where you choose how the tool engages the stock, and the choice changes everything about tool life and cut time. The old approach — conventional pocketing or “offset” clearing — ramps the tool to full depth and pushes it through corners where engagement spikes to 180 degrees and beyond. That engagement spike is what loads up the cutter, welds chips in aluminum, and snaps tools in a corner you did not even watch.
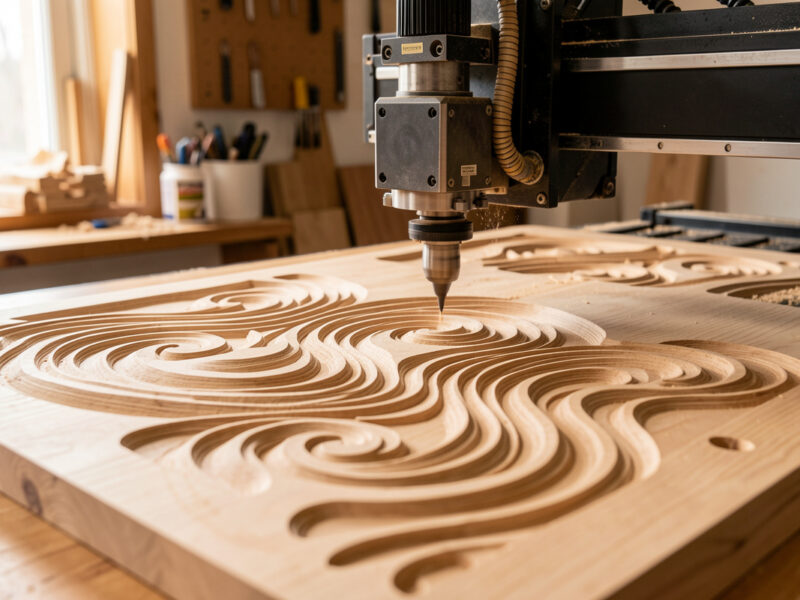
Adaptive clearing (also called trochoidal, HSM, or vortex depending on your CAM) solves this by holding tool engagement constant. Instead of a fixed step-over and shallow depth, it uses a small radial step-over and a deep axial depth, moving in controlled arcs so the cutter never exceeds a set engagement angle. You cut deeper, faster, with less heat and longer tool life — and on a hobby machine, you finally get to use the full flute length of the bit you paid for. The complete walkthrough, with the engagement-angle and step-over numbers I run, is in the adaptive and trochoidal clearing guide.
After the bulk rough, there is almost always material a big tool could not reach — inside corners, narrow slots, detail the roughing diameter stepped over. Re-running the whole job with a tiny tool is slow and pointless. Rest machining solves it: the CAM tracks what stock remains after the first tool and sends a smaller cutter only to those leftover regions. Done right it cuts job time dramatically and protects the small tool from a full-width cut it was never sized for. That sequencing logic is the rest machining guide.
Finishing Strategies: Where Accuracy Lives
Finishing is the pass the part is judged on, and the strategy depends entirely on geometry. Flat vertical walls want a contour (profile) pass with a light radial step. Flat floors want a facing or 2D pocket finish. Curved 3D surfaces are a different problem: you cannot finish a contoured surface with a flat end mill, so you reach for a ball-nose and one of two strategies — parallel (raster) passes for shallow, gentle slopes, or scallop (constant-stepover) passes that hold a uniform cusp height across changing slope angles.
The variable that controls 3D finish quality is step-over, the distance between adjacent passes, which sets the scallop height — the tiny ridge left between passes. Tighten the step-over and the surface gets smoother but the cut takes far longer; it is a direct trade you tune to the part. I treat 0.2 mm to 0.4 mm step-over as my default for a visible surface in wood with a 6 mm ball-nose, tighter for plastics that show every cusp. The full strategy comparison and the cusp-height math are in the 3D parallel and scallop toolpath guide, and ball-nose tooling itself is covered in the ball-nose end mill guide.
Getting the Tool In and Out: Ramps, Lead-Ins, and Tabs
How the tool enters the cut matters as much as the cut itself. Plunging a router bit straight down like a drill is the fastest way to snap it or burn the bottom — most end mills are poor at axial plunging, and a center-cutting plunge concentrates all the heat at the tip. The fix is to bring the tool into material at an angle: a ramp or helix for pockets, an arc or tangent lead-in for profile cuts so the cutter eases into full engagement instead of slamming into a wall. The angles and ramp types I use are in the ramping and lead-in strategies guide.
Getting parts out safely is the other half. When a profile cut goes all the way through, the part is free before the cut finishes — and a free part on a spinning cutter becomes a projectile. Tabs are small uncut bridges left in the cut to hold the part to the surrounding stock until you release it by hand. Sizing and placing tabs in CAM is a real skill: too few and the part breaks loose, too many and you spend an hour cleaning up. Onion-skinning (a thin continuous floor) is the alternative for delicate parts. The CAM-side workflow is the tabs in CAM software guide, and the workholding-side comparison is tabs vs onion skin.
V-Carve and Inlay: A Different Kind of Toolpath
V-carving is its own category because the cutting depth is not constant — a V-bit changes the width of cut as it changes depth, so the CAM varies Z continuously to make a line wider or narrower. That is how you get crisp, tapered serif lettering and prismatic carving from a single tool. Pair two V-carves — a male and a female pocket — and you get an inlay that drops together with a glue gap that closes to a hairline. It is the most satisfying toolpath in the software and the easiest to get subtly wrong. The depth math and the inlay glue-gap offset are in the V-carve and inlay toolpath guide, with bit selection in the CNC V-bits guide.
Toolpath Strategy Quick Reference
Here is how the major strategies map to the job, the tool, and the machine demand. Use it to pick a starting strategy, then read the linked deep-dive for the numbers.
| Strategy | Job | Typical Tool | Best For | Machine Demand |
|---|---|---|---|---|
| Adaptive / trochoidal clearing | Roughing | Single or 2-flute end mill | Deep bulk removal, aluminum, slots | Low strain, high path complexity |
| 2D pocket (offset) | Roughing | 2-flute end mill | Simple shallow pockets in wood | Spikes in corners |
| Contour / profile | Finishing walls | Compression or upcut | Vertical edges, perimeter cuts | Low, light pass |
| Rest machining | Cleanup | Small end mill | Corners and detail a big tool missed | Low if stock-aware |
| 3D parallel (raster) | Finishing surfaces | Ball-nose | Shallow, gentle slopes | Long runtime |
| 3D scallop (constant) | Finishing surfaces | Ball-nose | Steep and changing slopes | Long runtime |
| V-carve | Engraving / inlay | V-bit (60°/90°) | Lettering, signs, inlay | Low, depth-varying |
Climb vs Conventional: The Direction That Decides Finish
Every toolpath cuts in one of two directions relative to spindle rotation, and the choice affects finish, tool life, and how hard the cut pulls on your workholding. Climb milling (the cutter’s edge enters at the thickest part of the chip) generally leaves a cleaner finish and is the default in most modern CAM, because it loads the spindle bearings favorably and pushes chips behind the cut. Conventional milling (thin-to-thick) was the rule on old manual machines with backlash, and it still has a place on flexy hobby setups for the first roughing contact.
The trap on a hobby gantry: aggressive climb milling in soft material on a belt-driven machine can grab and pull the tool into the work, causing chatter and broken bits, because the gantry flexes and the cut self-feeds. My rule across the machines I run is climb for finishing passes where surface matters, and a conventional or light climb for heavy roughing on the flexiest setups. Diagnosing chatter back to cut direction is part of the CNC troubleshooting guide.
The CAM Learning Path: What to Master First
If you are new to CAM, learn it in this order and you will skip most of the broken-bit phase. First, operations: 2D contour, 2D pocket, and facing — these cover most flat work and teach you stock, tool, and zero. Second, the entry and exit moves — ramps, lead-ins, and tabs — because those are where beginners crash. Third, roughing-and-finishing thinking: rough adaptive, finish light. Only then move to 3D parallel and scallop, and to V-carve and inlay, which assume you already understand step-over and depth.
What to ignore early: tool libraries with hundreds of presets, exotic strategies your machine cannot use, and the urge to copy a YouTuber’s exact feeds for a machine that is not yours. The software matters less than the thinking — pick one and go deep. My software-by-software take is in the best CNC CAM software guide, with hands-on notes on Fusion 360 for hobby CNC and Carbide Create vs VCarve. The whole part-making sequence sits inside the complete CNC workflow.
Post-Processors: The Last Mile Nobody Mentions
A toolpath is only as good as the G-code it becomes, and that translation is the post-processor’s job. The post takes your CAM’s internal toolpath and writes the exact dialect of G-code your controller speaks — GRBL on most hobby machines, with quirks in how it handles arcs, tool changes, and spindle commands. Use the wrong post and a perfect toolpath produces a crash, a plunge at rapid speed, or a spindle that never turns on.
Match the post to the controller, test new posts with the spindle off and Z raised, and read the first few lines of the G-code before every unfamiliar job. I hand-edit G-code when a post does something I do not like — capping a rapid height, fixing a spindle dwell — and that comfort comes from the control software guide. Getting the post right is the difference between a toolpath that exists in simulation and one that cuts the part.
Step-Down, Step-Over, and Stock to Leave
Three CAM settings control the shape of every cut, and beginners get them backwards. Step-down (axial depth of cut, or DOC) is how deep each pass goes; step-over (radial depth) is how far the tool moves sideways between passes; stock to leave is the thin skin you deliberately keep for the finishing tool. The old-school instinct is shallow step-down and wide step-over. Adaptive flipped that: shallow step-over, deep step-down, because the deep axial engagement spreads wear along the whole flute instead of burning a ring at the tip.
For conventional pocketing I run roughly 40 to 50 percent of tool diameter as step-over and a step-down I can hold without chatter — often a full diameter in soft wood, a fraction of that in aluminum. For adaptive I drop step-over to 10 to 15 percent and push step-down to one or two times the diameter. Stock to leave is where the magic is: 0.2 mm to 0.5 mm of radial stock for the wall finish, and frequently zero on the floor if the rougher’s flat bottom is good enough. Leave a consistent skin and your finishing pass sees a constant load, which is the entire point of separating roughing from finishing.
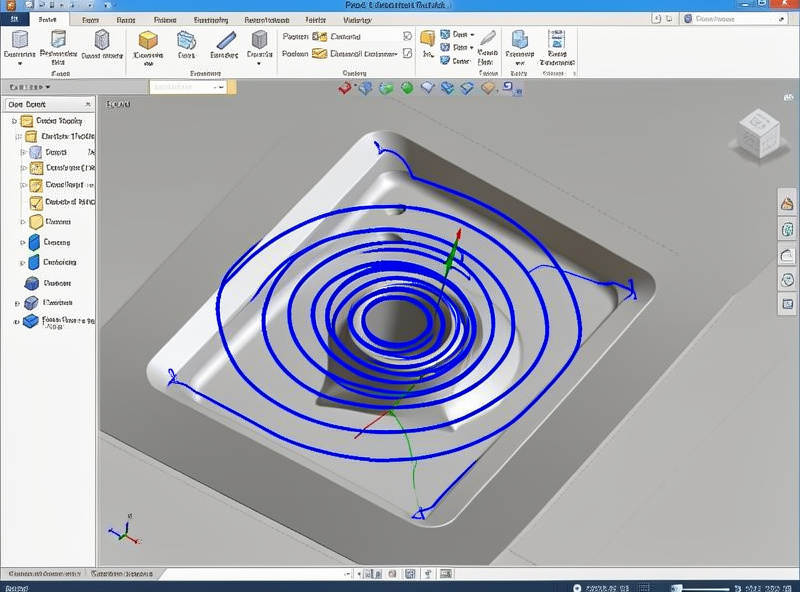
Simulate Before You Cut
Every CAM package can simulate the toolpath, and skipping that step is how a good operator still crashes. The simulation shows the tool, the holder, and the stock removing material in real time — and it will catch the gouges, the rapid moves that clip a clamp, and the plunge that should have been a ramp before they happen in steel or your spoilboard. I watch the simulation at speed once, then slow it down at every tool change and every entry move.
What I am actually looking for: rapids that pass below clamp height, a finishing pass that collides with a tab, a tool that is too short for the depth so the holder rubs the wall, and any rapid that crosses the part instead of going up and over. The simulator does not know your real clamp positions unless you model them, so the last check is always mental: where are my hold-downs, and does any move go through one. Simulation plus a dry run with the spindle off and Z raised has saved me more parts than any single upgrade. It is also the fastest way to learn what a new strategy actually does, covered further in the complete CNC workflow.
One simulation habit has paid for itself more than any other: I model my actual clamps as stock bodies before I post a job with hold-downs near the cut. The first time I skipped it, a rapid move tracked diagonally across the part at full Z-clearance — fine in the air, except a toe clamp stood 18 mm proud right in that path, and the simulation I had not run would have shown the holder clipping it in red. I caught it on the dry run with the spindle off, but a second later it would have been a bent clamp and a lost zero. Now any job with clamps inside the rapid envelope gets the clamps modeled and the rapids checked at every retract, which costs about a minute and has never once been wasted.
Workholding: The Toolpath’s Silent Partner
No toolpath survives bad workholding. The most elegant adaptive clearing pass in the world fails the instant the part shifts, and on a hobby machine the cutting forces are plenty to move a poorly held part. Match the hold to the toolpath: heavy roughing needs clamps or a vise that resists lateral push; thin sheet wants tape or a vacuum table so it does not lift; small parts want painter’s tape and CA glue because a clamp cannot reach them.
I plan workholding before I plan toolpaths, not after, because the hold dictates where I can put tabs, how aggressive I can rough, and whether climb milling is even safe. The full decision tree is in the CNC workholding guide, with specifics on clamps and hold-downs, the DIY vacuum table, and painter’s tape and CA glue. Toolpath and workholding are one decision, not two.
Frequently Asked Questions
What is the difference between roughing and finishing toolpaths?
Roughing removes bulk material fast and leaves an even stock allowance, while finishing makes the final surface accurate and clean with a light, even pass. Roughing protects finishing by leaving a constant load for the finish tool, which matters most on hobby machines where deflection is the limit.
Is adaptive clearing better than regular pocketing?
For most roughing, yes. Adaptive clearing holds tool engagement constant with small radial step-overs and deep axial depths, cutting deeper and faster with less heat and longer tool life. It is dramatically better in aluminum and slots, where conventional pocketing spikes engagement in corners and breaks tools.
Do I need different CAM software for each toolpath type?
No. Toolpaths are physics, not features, so the same strategies exist across Fusion 360, VCarve, Carbide Create, and Estlcam. The names differ (HSM, vortex, adaptive all mean trochoidal clearing) but the underlying chipload, step-over, and engagement logic is identical regardless of which program you use.
Why does my bit break in corners during roughing?
Inside corners spike tool engagement above 180 degrees as the cutter wraps the corner, overloading it instantly. Conventional pocketing causes this; adaptive clearing prevents it by arcing around corners to hold engagement constant. Slowing the feedrate often makes it worse by dropping chipload and causing rubbing instead of cutting.
What is rest machining and when should I use it?
Rest machining sends a smaller tool only to the regions a larger roughing tool could not reach, such as inside corners and narrow slots. The CAM tracks remaining stock so the small tool never takes a full-width cut. Use it after roughing to save job time and protect small cutters from overload.
Should I climb mill or conventional mill on a hobby CNC?
Climb mill for finishing passes where surface quality matters, since it leaves a cleaner finish and evacuates chips well. Use conventional or light climb for heavy roughing on belt-driven or flexy machines, where aggressive climb milling can grab and self-feed the tool, causing chatter and broken bits.