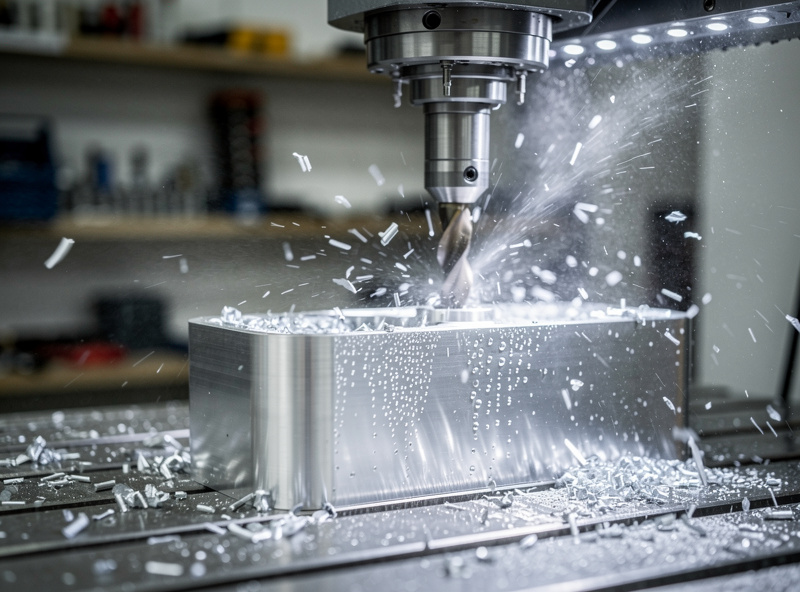
Safety first. The following information is for educational purposes. CNC machining involves high-speed rotating cutters. Always wear eye and ear protection, never leave a running machine unattended, and verify all feeds and speeds for your specific setup.
Fusion 360 is the dominant CAM application for desktop CNC users who cut metal or 3D-shaped parts. In ~40 words: download from autodesk.com, sign up for the free Personal Use license (limited to 10 active projects), import your existing CAD file or model from scratch, generate toolpaths in the Manufacture workspace, post-process to G-code matched to your CNC controller, and verify on a test cut. Total setup: 90 minutes for first part.
This guide walks through the complete Fusion 360 workflow for desktop hobby CNC users — from license setup through first finished part. Fusion 360 has a steeper learning curve than VCarve or Carbide Create, but the depth on offer (3D adaptive clearing, parametric CAD, simulation, full toolpath library) makes the learning investment pay back quickly for users with engineering ambitions.
The Free Personal Use License
Fusion 360 is technically a paid commercial product ($545/year for the full Personal subscription as of 2026). The free Personal Use license covers desktop CNC hobbyists adequately for most workflows. Sign up at autodesk.com/products/fusion-360/personal — Autodesk requires an Autodesk account but no payment info.
The free license allows up to 10 active projects at any time. “Active” means projects that haven’t been archived. Hobby CNC users typically run 1-3 active projects at a time, so the 10-project limit is rarely a constraint. When you reach the limit, archive completed projects to free up space.
Other free-tier limitations: file export limited to F3D, STL, IGES, STEP, and DXF (which covers all common CAM workflows); cloud rendering disabled; some advanced simulation features locked. None of these limits affect typical desktop CNC use. Production shops that need the locked features can upgrade later.
Renew the license annually. Autodesk emails a renewal reminder; the renewal is free, just requires confirming your hobbyist status. Skipping renewal means losing access until you re-renew. The renewal process is 2-3 minutes.
Starting With CAD or Imported Geometry
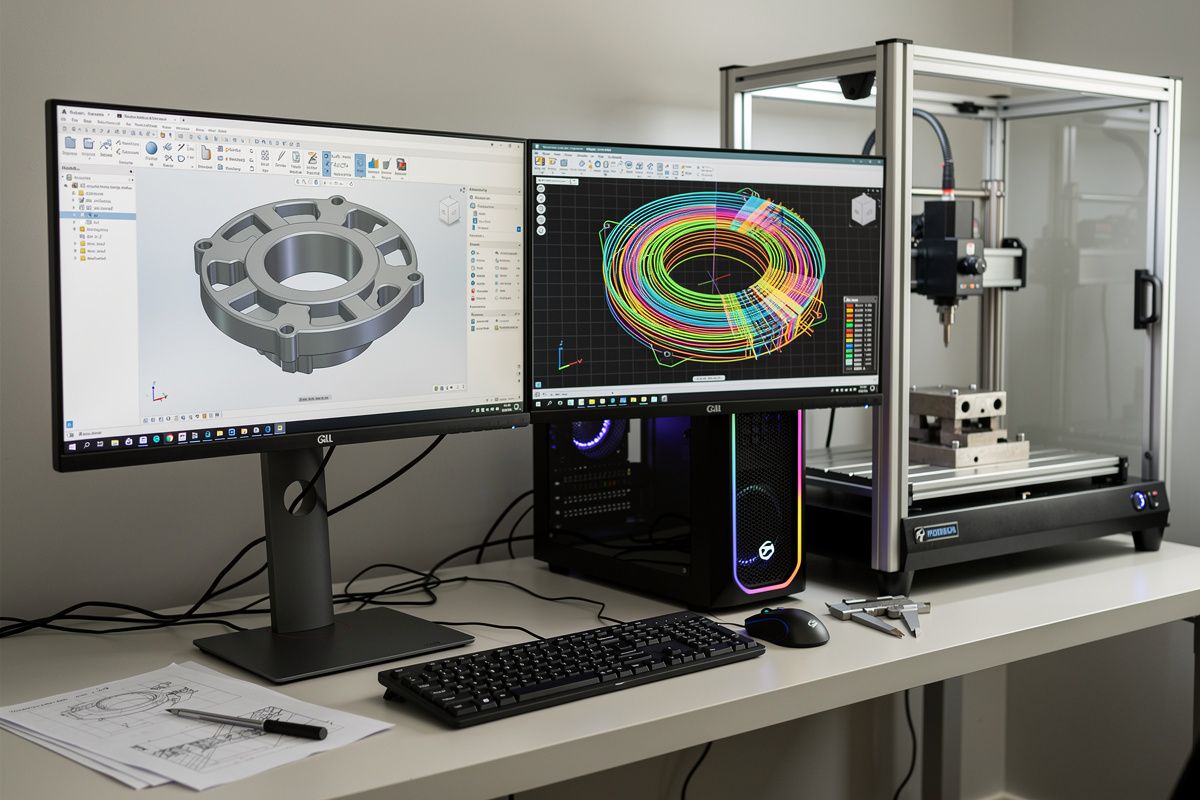
Fusion 360 combines CAD (modeling) and CAM (toolpath generation) in one application. You have three workflows: model the part from scratch in Fusion 360’s Design workspace, import a STEP/IGES file from another CAD application, or import an STL/SVG for non-parametric work.
For desktop CNC users who already model in another CAD application (SolidWorks, Onshape, FreeCAD): export STEP from your CAD, import to Fusion 360. STEP files are parametric — Fusion 360 can recognize features and generate intelligent toolpaths.
For users who design directly in Fusion 360: the Design workspace has full parametric modeling (sketch, extrude, revolve, fillet, chamfer, etc.). Plan 10-20 hours of CAD learning if you’re new to parametric modeling. The official Fusion 360 tutorials at autodesk.com cover the basics.
For non-parametric workflows (importing STL files, working from SVG outlines): Fusion 360 can generate CAM toolpaths from imported meshes, but the results are less optimal than from parametric CAD. STL import is the right choice for downloaded designs you can’t recreate parametrically.
The Manufacture Workspace
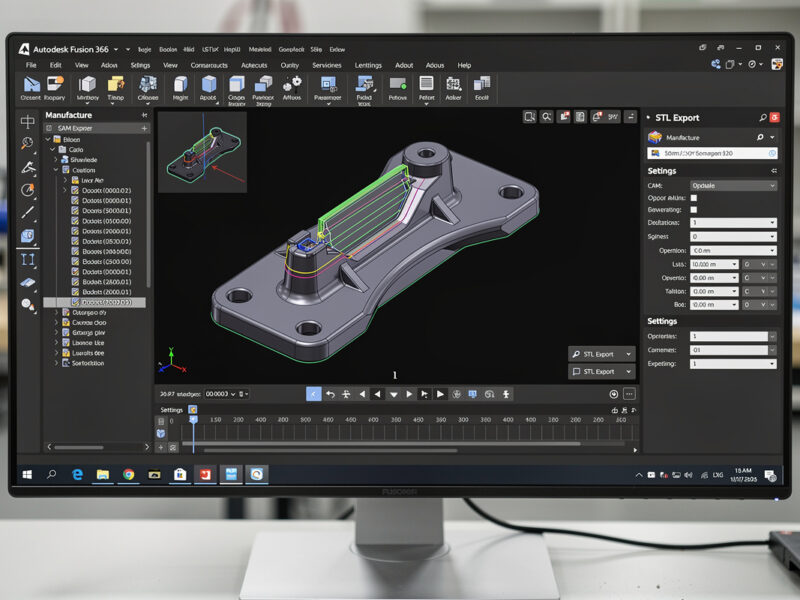
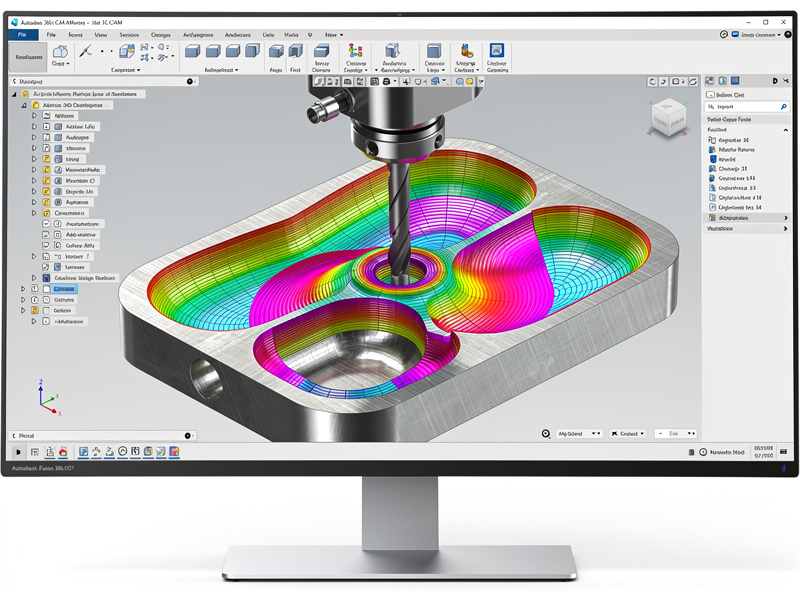
Fusion 360’s CAM lives in the Manufacture workspace (workspace selector in top-left, switch from Design to Manufacture). The workspace centers on the Setup, the Toolpaths, and the Simulation.
Setup: Defines stock material (the raw block you’re cutting from), the work coordinate system (where your CNC’s zero is on the stock), and the tool library available for this job. Always create a Setup before generating toolpaths.
Toolpaths: The actual machining operations. 2D Pocket, 2D Contour, Adaptive Clearing, Parallel, Scallop, Drilling, Engraving, and many more. Each operation gets its own settings panel where you specify the tool, depths, feeds, speeds, and lead-in/lead-out behavior.
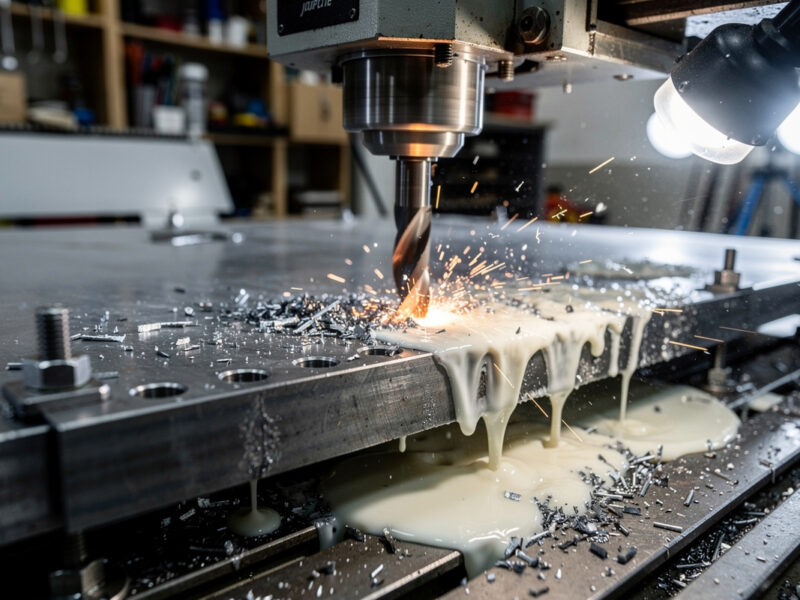
Simulation: Visualizes the toolpath running on the stock. Catches collisions, verifies cut order, and previews the machining time. Always run simulation before posting G-code — catching problems in simulation prevents broken tools and ruined material.
Adaptive Clearing: Fusion 360’s Killer Feature

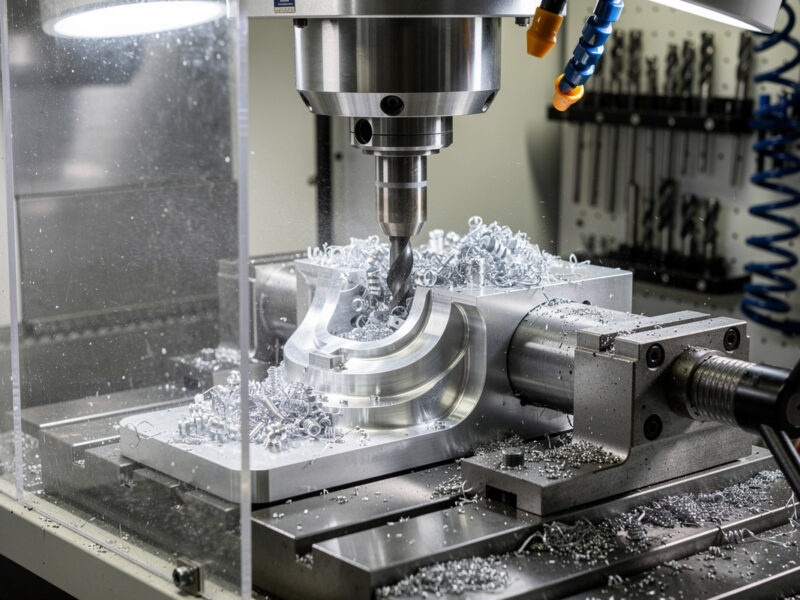
Adaptive clearing is Fusion 360’s most-loved CAM strategy and the main reason desktop CNC users choose Fusion 360 over alternatives for metal cutting. Adaptive clearing maintains constant chip load through complex cuts, avoiding the chatter and tool breakage that simpler strategies produce.
How it works: traditional pocket-clearing strategies cut at fixed step-over (e.g., 50% of bit diameter every pass). At corners and tight spaces, the actual chip load spikes well above 50% because more of the bit is engaged. Adaptive clearing dynamically adjusts the toolpath to maintain consistent engagement throughout the cut.
For desktop hobby aluminum work specifically, adaptive clearing is the standard. A 1/4″ end mill in 6061 aluminum on a Shapeoko 5 Pro can run 30,000 RPM, 1500mm/min feed, 5mm depth of cut with adaptive clearing — settings that would break the bit with traditional strategies.
Set up adaptive clearing: Manufacture workspace → 3D → Adaptive Clearing. Specify the tool, the stock height, the cut depth, and the optimal load (typically 30-40% of bit diameter). Run the simulation to verify the toolpath stays within the stock and doesn’t crash into clamps.
Feeds and Speeds in Fusion 360
Fusion 360 has a built-in tool library with feeds and speeds for many common bits and materials. The library is generic — adjust for your specific machine and material before committing to a cut.
Manufacturer-recommended values are the right starting point. Amana Tool, Harvey Tool, and other end mill makers publish chip load and feed recommendations per bit. Enter these into Fusion 360’s tool library; the application calculates feed rate from spindle speed × chip load × number of flutes.
For desktop hobby CNCs, conservative starting values: 1/4″ end mill in hardwood at 18,000 RPM, 0.005″ chip load, 2 flutes = 180mm/min feed; in 6061 aluminum at 24,000 RPM, 0.002″ chip load, 2 flutes = 96mm/min feed. Increase from these starting values once you’ve verified the cut sounds and looks correct. Our CNC tooling fundamentals guide covers the chip load math in depth.
For aluminum specifically, always run a test cut on scrap before production. Spindle RPM, feed rate, and depth of cut all interact non-linearly on metals — the value that worked for 1/4″ 6061 aluminum may not work for 1/4″ 7075 aluminum at the same settings.
Post-Processing G-Code
The post-processor converts Fusion 360’s internal toolpath data into the G-code dialect your specific CNC controller speaks. Different controllers (GRBL, Mach3, Carbide Motion, FluidNC, LinuxCNC) read G-code slightly differently — the post must match.
For Shapeoko owners: use the Carbide Motion post processor (free download from cncjs or from Carbide 3D’s documentation). The Carbide Motion post outputs G-code Carbide Motion can read directly.
For Onefinity, Sienci LongMill, X-Carve, generic GRBL machines: use the GRBL post processor (built into Fusion 360 by default). Most desktop CNCs run GRBL firmware.
For Mach3 / Mach4 controllers: use the Mach3 post processor. These are typically older or industrial-style desktop CNCs.
Wrong post selection produces G-code your CNC can’t execute. Verify the first job runs correctly by previewing in your CNC controller’s interface (Carbide Motion, gSender, OpenBuilds Control, etc.) before sending to the actual machine.
Learning Resources for Fusion 360 CAM
Fusion 360’s learning curve is real but well-supported. Plan 20-40 hours over the first month to internalize the basics; 100+ hours for production-level fluency.
Official Autodesk training at autodesk.com/products/fusion-360/learn covers the fundamentals from CAD through CAM. Free, well-organized, but generic.
NYC CNC’s YouTube channel is the go-to for desktop CNC users specifically. John Saunders has covered desktop hobby aluminum machining in extensive depth, with Fusion 360 as the primary CAM throughout. Hundreds of hours of content tailored to the hobbyist use case.
The “Lars Christensen” YouTube channel covers Fusion 360 CAD and CAM with a teaching focus. Slower pace than NYC CNC, more conceptual, useful for deep understanding.
r/Fusion360 on Reddit is active and helpful for specific questions. Search before posting; most beginner questions have been asked and answered.
For broader CNC learning, see our complete CNC workflow guide — Fusion 360 is one piece of the larger workflow that includes hardware setup, workholding, and post-cut finishing.
Frequently Asked Questions
Does Fusion 360 work on Mac and Linux?
Fusion 360 supports Windows and macOS officially. Linux support exists via Wine but is unofficial and unstable. For Linux users serious about Fusion 360, run Windows in a VM (KVM or VirtualBox) — performance is acceptable for hobby use. The native Mac version works well on M1/M2/M3 Apple Silicon Macs.
Is the free Fusion 360 license really enough for hobby CNC?
Yes, for almost all hobbyist workflows. The 10-project limit is generous for typical use; the disabled features (cloud rendering, advanced simulation) don’t affect basic CAM workflows. Most hobbyists never run into the free-tier limits. Upgrade to paid only when commercial use begins or when you genuinely need the locked features.
Why does my Fusion 360 G-code crash my CNC?
Most common cause: wrong post-processor for your controller. Fusion 360’s default GRBL post outputs G-code most desktop CNCs can run, but Carbide Motion users need the Carbide Motion post specifically. Verify the post matches your controller before running the job. Wrong post = wrong G-code dialect = crashes.
Can I use Fusion 360 for V-carving?
Yes via the Engrave or Trace toolpaths, but VCarve is significantly better for V-carving workflows. Fusion 360’s V-carving works for occasional V-carved letters and basic decorative work; for production wood signs, VCarve’s purpose-built toolpaths produce cleaner results faster. Use Fusion for metal/3D work and VCarve for woodworking signs if budget allows both.
How long does it take to learn Fusion 360 CAM?
20-40 hours to be productive on simple parts. 100+ hours to be confident on metal machining and 3D toolpaths. The CAD half adds another 10-30 hours if you’re new to parametric modeling. The learning curve is the steepest of any desktop CNC CAM, but the depth on offer is also the highest.
Should I learn Fusion 360 or VCarve first?
Depends on what you cut. If 70%+ of your work is wood signs, plaques, and decorative panels, learn VCarve first — the workflow is faster for those projects. If you do mixed work or expect to grow into metal machining, learn Fusion 360 first — the foundation transfers better. Most production users eventually learn both.
Can I use Fusion 360 with a 3-axis hobby CNC?
Yes, fully. Fusion 360 supports 3-axis machining as the default workflow; 4 and 5-axis are available but not needed for most desktop hobby CNCs. Specify your machine’s work envelope in the post-processor configuration so Fusion 360 doesn’t generate toolpaths exceeding your travel limits.