Safety first. The following information is for educational purposes. CNC machining involves high-speed rotating cutters. Always wear eye and ear protection, never leave a running machine unattended, and verify all feeds and speeds for your specific setup.
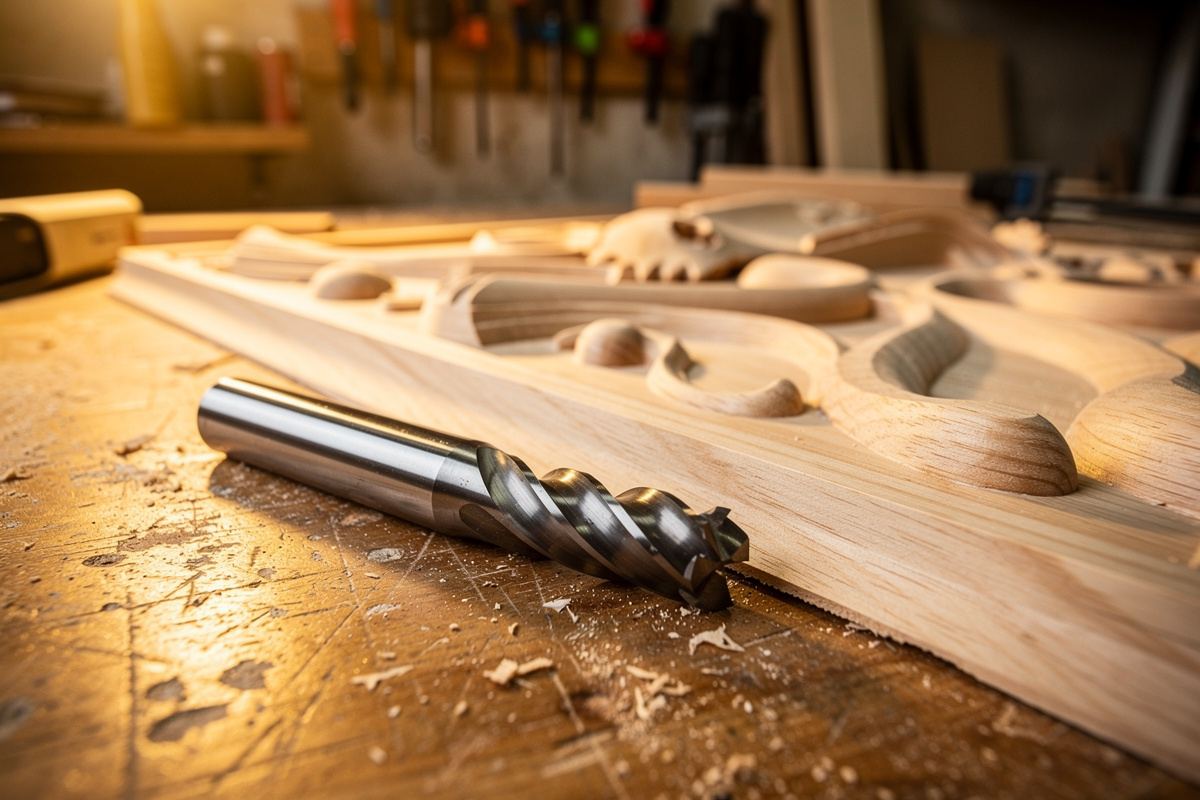
A ball nose end mill has a hemispherical tip instead of a flat one, making it the tool for 3D contouring and finishing — relief carvings, molds, curved signs, and organic surfaces. The rounded tip blends adjacent stepover passes into a smooth surface, and that stepover, not feed rate, is the dial that controls finish quality. Rough with a flat end mill, finish with the ball nose, and never plunge straight down on the dead-speed center tip.
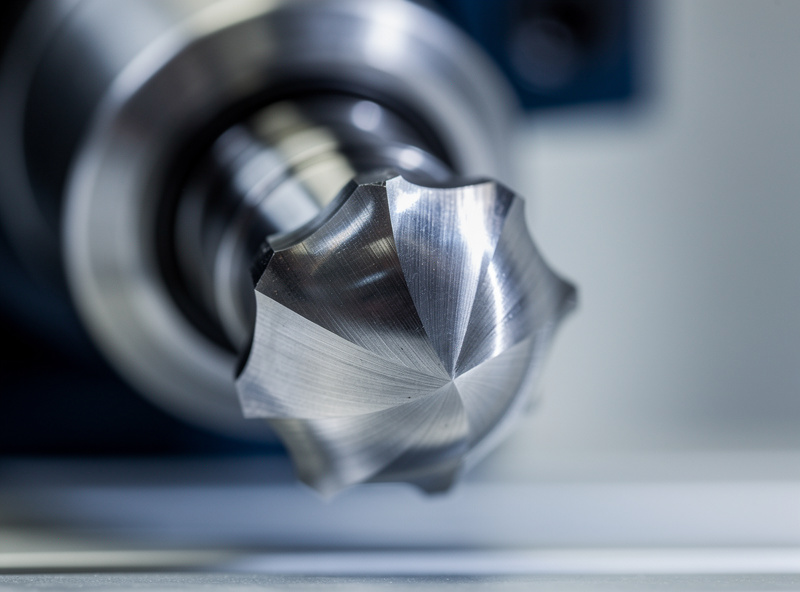
The ball nose is where the desktop CNC stops being a 2D sign cutter and starts carving sculpture. On my Shapeoko Pro and Onefinity I run a 1/8″ ball nose for most finishing and a 1/4″ for larger contoured work, and I learned the hard way that a ball nose is a finishing tool that punishes anyone who treats it like a roughing cutter. It is one of the five families in my CNC router bits guide, and the one most tied to the toolpath strategy you run it with on the desktop CNC.
What a Ball Nose End Mill Is
A ball nose (or ball end) mill is an end mill whose cutting end is ground to a full hemisphere with a radius equal to half the bit diameter — so a 1/4″ ball nose has a 1/8″ tip radius. That rounded profile means it never leaves a flat bottom or a sharp inside corner; instead it carves a smooth, rounded valley, which is exactly what you want when the goal is a continuous curved surface rather than a flat-walled pocket.
Compare it to a square end mill, which leaves a flat floor and a stepped “terrace” pattern on any sloped surface. The ball nose’s rounded tip lets adjacent passes overlap and blend, so a fine stepover produces a surface smooth enough to sand with minimal work. This is why every 3D relief carving, every molded form, and every contoured sign finish pass uses a ball nose — the square end mill that did the roughing simply cannot produce the curve.
Stepover — The Dial That Controls Finish
The most important number with a ball nose is not feed or speed — it is stepover, the distance the tool moves sideways between each finishing pass. Because the tip is round, a wide stepover leaves visible ridges (scallops) between passes, while a fine stepover blends them into a smooth surface. The height of those leftover ridges is called scallop height, and it is a direct function of stepover and tip radius.
I typically run a finishing stepover of around 5–10% of the bit diameter for a smooth surface — tighter for show surfaces, looser when I am going to sand anyway. Halving the stepover roughly quarters the scallop height but doubles the machining time, so it is a finish-versus-time trade you tune to the job. A 1/8″ ball nose at a 10% stepover gives a finish I can knock down with a quick sanding; drop to 5% on a presentation piece. The toolpath logic behind all this lives in my 3D roughing and finishing toolpaths walkthrough.
Why You Never Plunge a Ball Nose
Here is the trap that breaks ball nose bits and ruins surfaces: the very center of the hemispherical tip has a surface speed of zero. As you approach the centerline of the bit, the cutting velocity drops toward nothing, so the dead center does not cut — it rubs and smears, generating heat and a poor finish, and on a plunge it can simply stall and snap. A flat end mill has cutting edges right across its end; a ball nose effectively has a non-cutting point at its tip.
That is why a ball nose belongs to lateral, blending toolpaths — contour, parallel, and scallop finishing — and not to straight plunges or drilling. I rough out the bulk with a flat end mill first, then bring in the ball nose to sweep across the surface where the tip is always cutting on its flanks, never straight down on its dead center. If your CAM forces an entry, I use a ramped or helical lead-in so the tip eases in at an angle rather than stabbing.
The Roughing-Then-Finishing Workflow
A 3D carve is two operations, not one. First a roughing pass with a flat end mill (often an adaptive or pocketing strategy) removes the bulk of the material in stepped layers, leaving a rough staircase approximation of the final shape. Then a finishing pass with the ball nose sweeps that staircase smooth, taking only a thin, even amount of material everywhere so the cutting load stays light and constant.
Trying to do the whole job with a ball nose is the classic beginner mistake — it is slow, it loads the tip heavily, and it wastes the bit on bulk removal it was never designed for. I match the roughing bit to the part size and the ball nose to the finest detail radius the surface needs: a relief with tight detail needs a small ball nose to reach into the valleys, while a broad curved surface finishes fastest with the largest ball nose that still resolves the detail. Bigger ball nose, fewer passes; smaller ball nose, finer detail.
| Ball Nose Size | Best For | Typical Stepover | Trade-off |
|---|---|---|---|
| 1/16″ | Fine relief detail, small valleys | 5–8% of diameter | Slow, fragile, many passes |
| 1/8″ | General 3D relief and signs | 8–10% | Best all-round detail vs speed |
| 1/4″ | Larger contoured surfaces, molds | 8–12% | Fast finish, coarser detail |
| 1/2″+ | Broad sweeping surfaces | 10–15% | Very fast, no fine detail |
| Tapered ball nose | Deep relief with strength | Varies | Stiffer tip, draft on walls |

Tapered Ball Nose for Deep Relief
When a relief is deep and detailed, a straight 1/16″ ball nose becomes alarmingly fragile — long, thin, and prone to snapping or deflecting in the valleys. The fix is a tapered ball nose: it keeps a small ball tip for detail but the shank tapers up to a thicker body, dramatically increasing rigidity for the same tip radius. The taper does impose a slight draft angle on near-vertical walls, but for relief carving that is usually invisible and well worth the strength.
I keep a couple of tapered ball nose bits for deep sign relief and 3D work where a straight small-diameter bit would chatter or break. They are the difference between finishing a deep detailed carve in one pass and collecting a drawer of snapped 1/16″ cutters. For abrasive or demanding materials the same rigidity logic applies that I cover in tooling fundamentals — stiffness beats brute feed every time on a hobby gantry.
Ball Nose Across Materials
Ball nose finishing works in everything a flat end mill cuts, but the material changes the strategy. Hardwoods finish beautifully with a fine stepover and a sharp two-flute ball nose; my tested wood numbers are in cutting hardwood settings. Modeling board and machinable wax are the ideal practice materials — they finish like butter and let you see scallop height clearly. For 3D work in aluminum, a ball nose finishes molds and contoured parts, but you drop the stepover and the depth and lean on the feeds discipline from aluminum feeds and speeds.
Whatever the material, the finishing pass takes a light, even amount everywhere, so the feed can run fast — the limit is surface quality and machine rigidity, not cutting load. My starting feeds and speeds across materials are in the CNC feeds and speeds chart, and dialing the right combination is most of the battle on contoured work.
Which Ball Nose Bits to Buy
For most hobby 3D work, start with a 1/8″ ball nose end mill — it resolves enough detail for relief carving and signs while finishing reasonably fast. Add a 1/4″ ball nose for larger sweeping surfaces, and if you carve deep detailed relief, a tapered ball nose set gives you fine tips without the fragility.
Buy solid carbide two-flute for wood and plastic, keep the tips protected in storage, and remember that the ball nose only does the finishing — pair it with a good flat roughing end mill or you will wear it out doing work it was never meant to do.
Disclosure: As an Amazon Associate I earn from qualifying purchases. The links above point to the ball nose bits I actually run for 3D and relief work; buying through them supports this site at no extra cost to you.
Frequently Asked Questions
What is a ball nose end mill used for?
A ball nose end mill is used for 3D contouring and finishing: relief carvings, molds, curved signs, and organic surfaces. Its hemispherical tip blends adjacent passes into a smooth surface that a flat end mill cannot produce, so it is the standard finishing tool for any curved 3D shape.
What stepover should I use for a ball nose finishing pass?
Around 5 to 10 percent of the bit diameter gives a smooth finish for most work. Tighter stepover means lower scallop height and a smoother surface but longer machining time. Halving the stepover roughly quarters the ridge height and doubles the time, so tune it to the job.
Can you plunge straight down with a ball nose?
No. The center of the hemispherical tip has zero surface speed, so it rubs and smears instead of cutting and can stall or snap on a straight plunge. Use lateral finishing toolpaths and a ramped or helical lead-in so the tip eases in at an angle, never straight down.
What is the difference between a ball nose and a square end mill?
A square end mill has a flat end and leaves a flat floor with a sharp inside corner, ideal for pockets and profiles. A ball nose has a rounded hemispherical tip that carves smooth curved surfaces and blends passes, making it the finishing tool for 3D and contoured work.
Do I need to rough before using a ball nose?
Yes, for any real 3D carve. Rough out the bulk with a flat end mill first, then finish with the ball nose taking a thin even amount everywhere. Trying to remove all the material with a ball nose is slow, overloads the tip, and wears the bit on work it was not designed for.
What is a tapered ball nose end mill for?
A tapered ball nose keeps a small detail tip but tapers up to a thicker shank for far greater rigidity, so it resists breaking and chatter in deep detailed relief. The taper adds a slight draft to near-vertical walls, which is usually invisible and worth the added strength.