Safety first. The following information is for educational purposes. CNC machining involves high-speed rotating cutters. Always wear eye and ear protection, never leave a running machine unattended, and verify all feeds and speeds for your specific setup.
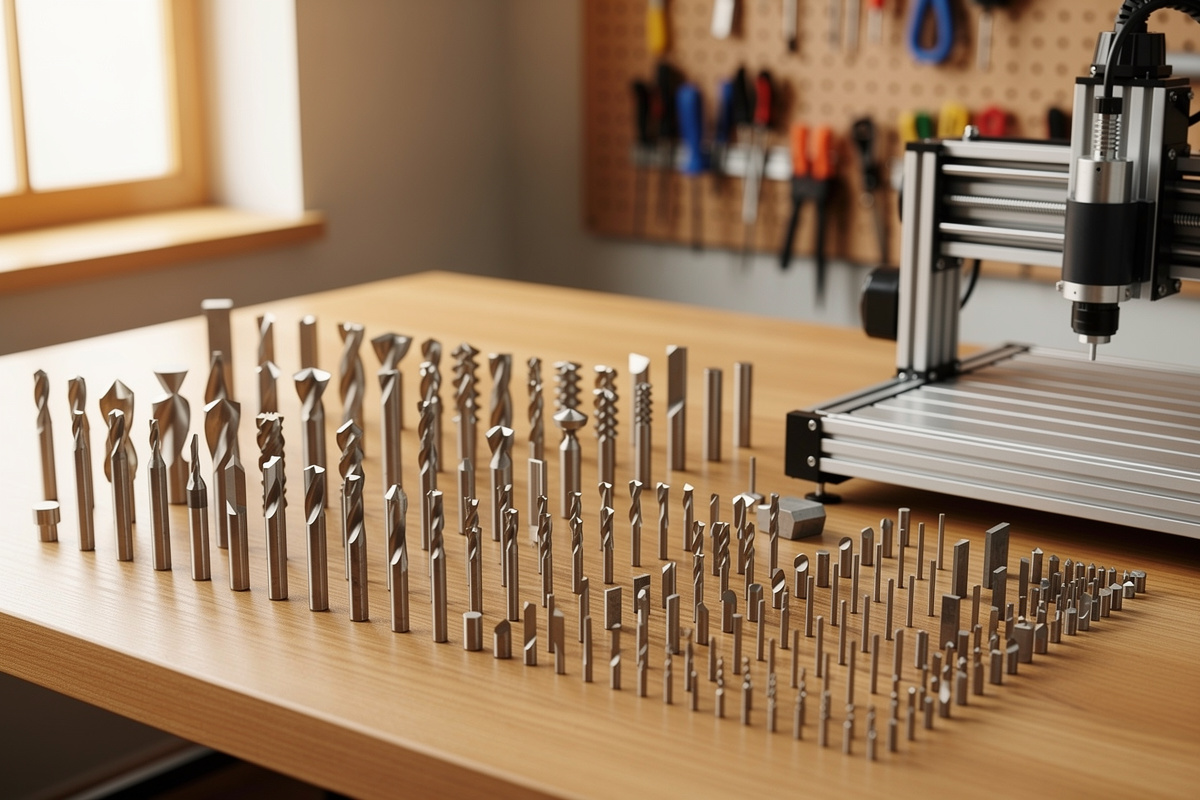
A CNC router bit guide comes down to five families: end mills for the bulk of profiling and pocketing, V-bits for engraving and inlay, ball-nose for 3D contouring, downcut/upcut/compression for edge quality, and specialty cutters for metal and composites. Pick the geometry that matches your material and toolpath, and 95% of broken-bit problems disappear before they start.
I have been buying, snapping, dulling, and re-buying router bits for years across the machines on my bench — a Shapeoko Pro running a 65mm air-cooled VFD spindle, an Onefinity Woodworker, and a pair of Genmitsu machines I keep around to stay honest about what the budget end can really do. What follows is the mental model I actually use at the controller, not a reprint of a tooling catalog. Every bit choice on a hobby gantry is really two questions: will the geometry cut this material cleanly, and will my workholding and feeds keep that geometry alive long enough to finish the part.
The Five Bit Families That Cover Almost Everything
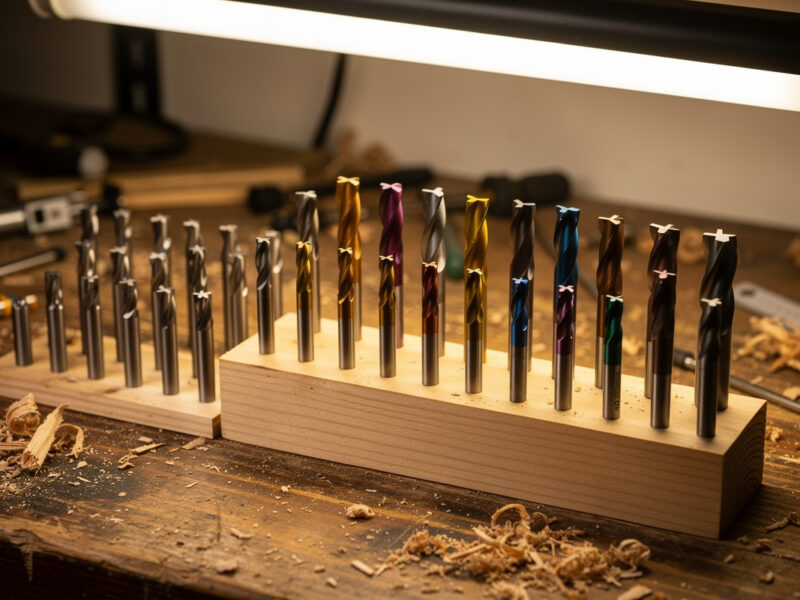
Desktop CNC tooling looks overwhelming on a vendor page, but in practice you live in five families: end mills, V-bits, ball-nose, the upcut/downcut/compression group, and a thin shelf of material-specific specialty cutters. I would estimate 90% of my spindle hours run on a 1/4″ two-flute upcut, a 1/8″ single-flute O-flute, a 60° V-bit, and a 1/8″ ball-nose. Everything else is situational.
The reason this matters is that beginners buy a 30-piece “CNC bit set” off a marketplace, get a drawer of cutters they cannot name, and then reach for the wrong one. Understanding the families is what lets you ignore 25 of those 30 bits and reach confidently for the right five. If you want the deeper theory behind cutting tools, my CNC tooling fundamentals primer walks through the vocabulary; this guide is the field manual for choosing among them.
End Mills — The Workhorse of Every Job
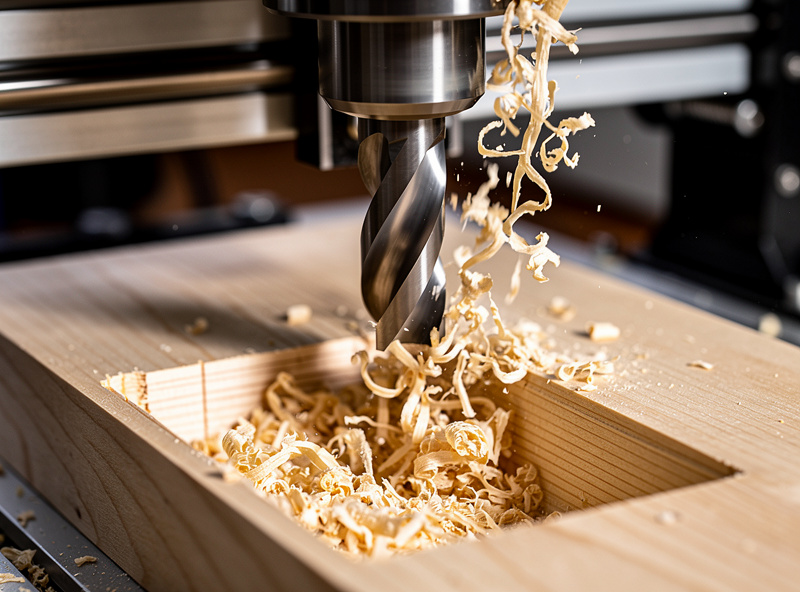
End mills are the cutters you will use most: straight-walled rotary tools that profile, pocket, slot, and surface. On my machines a 1/4″ two-flute upcut end mill is the default for hogging out wood, and a 1/8″ single-flute does the fine and small-radius work. Flute count, helix direction, and diameter are the three dials that decide how an end mill behaves.
Diameter is rigidity. A 1/4″ end mill deflects far less than a 1/8″, so it holds a truer wall and survives a more aggressive feed — I rough with the biggest bit a feature allows and only switch to a smaller cutter for the corners it cannot reach. Flute count trades chip clearance for finish: fewer flutes mean bigger gullets and better chip evacuation in gummy material, more flutes mean a finer finish in harder stock. I go deep on diameters, flute counts, materials, and the feeds I actually run in the dedicated guide to CNC end mills.
V-Bits — Engraving, Inlay, and Chamfers
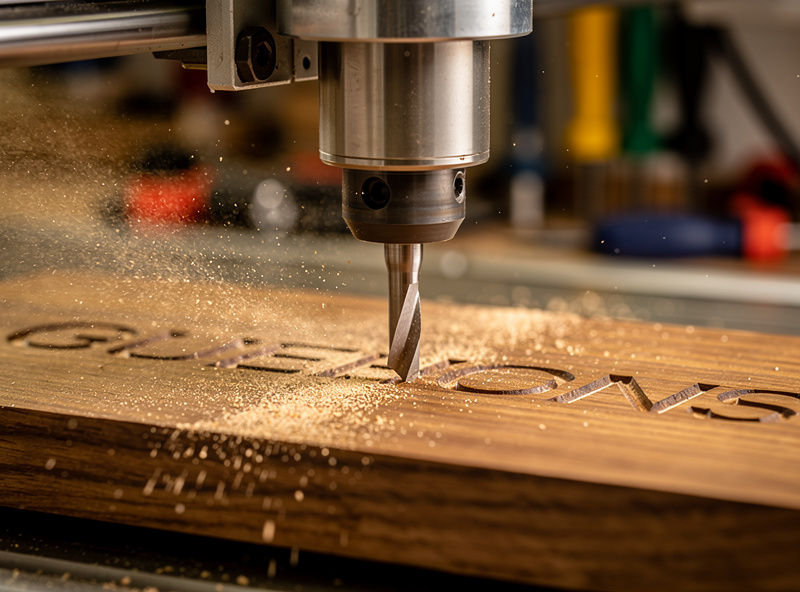
A V-bit is a cutter ground to a point at a set included angle — 60° and 90° are the two I keep loaded most. They are how you carve sharp-cornered lettering, prismatic signs, decorative inlay, and clean chamfers that an end mill physically cannot produce because a flat cutter leaves a radius in every inside corner. V-carving is also forgiving of a flexy machine: the tip engages a tiny amount of material, so the cutting forces stay low.
The trade is depth control. Because the bit is a cone, the width of cut changes with depth, so your Z-zero has to be dead accurate or the line weight drifts. I set V-bit jobs off a tripped Z-probe or a careful paper-feel zero every time. For the full breakdown of 60° versus 90°, inlay technique, and why your CAM matters more than the bit, see the CNC V-bits guide, and pair it with my V-carve toolpath tutorial for the software side.
Ball-Nose — 3D Contouring and Finishing
A ball-nose end mill has a hemispherical tip instead of a flat one, which makes it the tool for anything with curvature: relief carvings, contoured signs, molds, and organic 3D surfaces. The rounded tip blends adjacent stepover passes into a smooth surface instead of leaving the flat-bottomed terraces a square end mill would. On 3D finishing passes the stepover — how far the tool moves over between passes — is what controls surface quality, and it is a far bigger lever than feed rate.
The catch every beginner hits is the tip. The very center of a ball-nose has zero surface speed, so it does not so much cut as smear, which is why ball-nose bits love a finishing role and hate plunging straight down. I rough with a flat end mill, then let the ball-nose do only the finish pass. The full method — stepover math, tip-engagement angles, and the roughing-then-finishing strategy — lives in the ball-nose end mill guide, and the toolpath logic is in my 3D roughing and finishing walkthrough.
Downcut, Upcut, and Compression — Where Edge Quality Lives
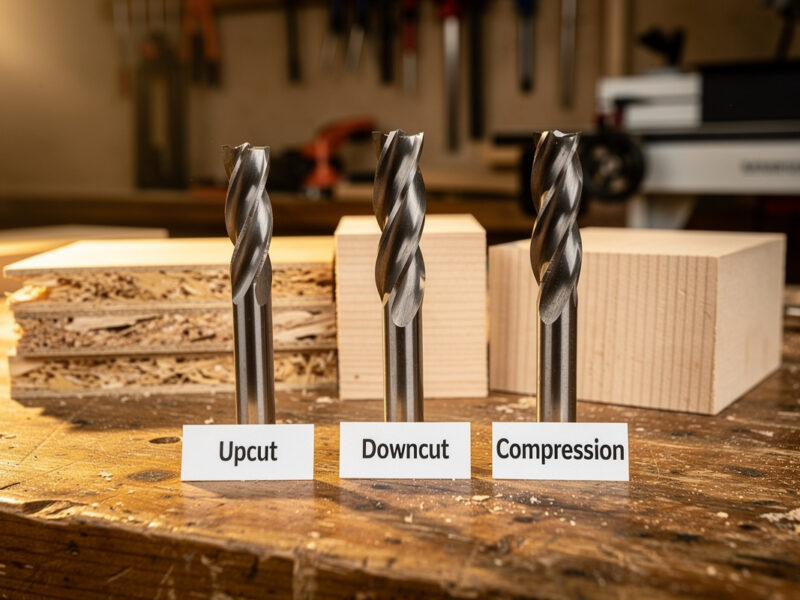
Helix direction decides which face of your material comes out clean. An upcut bit augers chips up and out of the cut, keeping the slot clear and the bit cool — but it lifts the top surface and can fray the top edge of plywood or melamine. A downcut bit pushes chips down, leaving a crisp top edge, at the cost of packing chips into the slot. A compression bit splits the difference: an upcut section at the tip and a downcut section above it, so you get clean edges top and bottom on plywood in a single pass.
This is the single most misunderstood choice on a desktop machine, and getting it wrong is the difference between a furniture-grade panel and a fuzzy mess. I run downcut for shallow sign work and pocket tops, compression for any through-cut in veneered ply, and plain upcut for everything in solid wood and plastics where chip evacuation matters more than the top edge. The complete decision tree — including why compression bits need a minimum depth to work — is in downcut vs upcut router bits.
Flute Count and Why Single-Flute Exists
Flute count is chip clearance versus finish, and on a hobby machine it matters more than most people realize. A single-flute O-flute bit has one enormous gullet, so it clears chips brilliantly in plastics, soft woods, and aluminum — materials that would otherwise re-weld their chips and either gum the bit or ruin the finish. The polished, almost mirror-finish flute of an O-flute is purpose-built for acrylic, where a two-flute bit’s poorer evacuation leaves a cloudy, re-melted edge.
Two flutes is the all-rounder for wood: decent finish, decent chip clearance, twice the cutting edges so you can push feed harder than a single-flute at the same spindle RPM. Three and four flutes show up in metal, where the extra edges improve finish and the harder material does not pack the smaller gullets. The rule I cut by: gummy or soft material wants fewer flutes, hard material tolerates more. My acrylic settings article shows exactly why the single-flute O-flute wins on plastic.
Bit Type vs Job — The Quick Reference Table
This is the table I wish someone had handed me on day one. It maps the bit family to the job it is actually good at, the material it shines on, and the trap that breaks it. Print it and tape it inside your tool cabinet.
| Bit Family | Best For | Top Materials | Common Mistake That Breaks It |
|---|---|---|---|
| Two-flute upcut end mill | Profiling, pocketing, hogging | Solid wood, MDF, HDPE | Too deep a pass on a small diameter |
| Single-flute O-flute | Slotting, fine detail, plastics | Acrylic, soft wood, aluminum | Spindle RPM too high for the feed (melts plastic) |
| Downcut end mill | Clean top-edge pockets and signs | Plywood, melamine, veneer tops | Deep slotting (packs chips, snaps bit) |
| Compression bit | Through-cuts in faced plywood | Cabinet ply, laminated panels | First pass shallower than the upcut section |
| V-bit (60°/90°) | Lettering, inlay, chamfers | Hardwood, MDF, acrylic | Sloppy Z-zero (wrong line width) |
| Ball-nose | 3D contour and finishing passes | Hardwood, modeling board, mold stock | Plunging on the dead-speed center tip |
| Aluminum-specific (ZrN/single-flute) | Non-ferrous metal cutting | 6061 aluminum, brass | No chip evacuation = chip welding |
Coatings, Carbide Grade, and the $6-vs-$40 Bit Question
The most common question I get is whether the expensive bit is worth it, and the honest answer is “for some jobs, dramatically, and for others, not at all.” A $6 bit and a $40 bit can both cut pine. The difference shows up in carbide grain quality, grind concentricity (runout), edge sharpness, and coating — and those differences compound the harder and more abrasive your material gets.
Solid carbide holds an edge far longer than high-speed steel and is the default for everything on a CNC. Coatings matter mostly in metal: a ZrN (zirconium nitride) or TiB2 coating reduces aluminum’s tendency to stick to the flute and chip-weld. For wood and plastic, an uncoated, sharp, well-ground carbide bit is usually all you need — I will happily run budget bits on pine and MDF and save the premium cutters for hardwood detail and aluminum. The full economic argument, including why a cheap bit’s runout can cost you more in re-cuts than you saved, is in the best CNC router bits comparison.

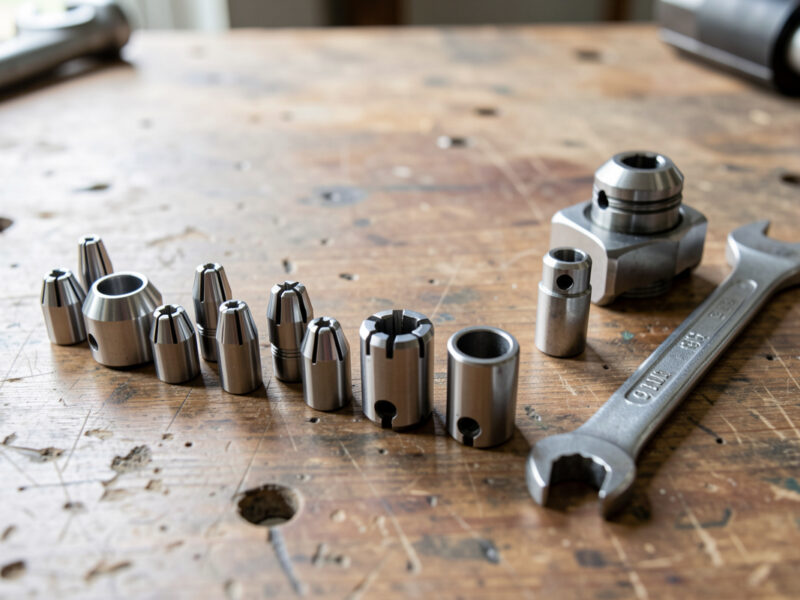
Shank Size, Collets, and Runout
Before you obsess over flute geometry, get the boring stuff right: shank size and collet fit. Desktop machines almost universally take 1/8″ and 1/4″ shanks, and the 1/4″ shank is meaningfully more rigid — I default to 1/4″ whenever the cut allows it and only drop to 1/8″ for fine detail or small-radius corners. The shank diameter has nothing to do with the cutting diameter, so a 1/4″ shank can carry a tiny 1/16″ cutter and gain rigidity for free.
The collet is where money quietly leaks. A worn, dirty, or wrong-size collet introduces runout — the bit wobbles off the spindle axis — and runout wrecks finish, shortens bit life, and snaps small cutters. I keep collets clean, replace them when they mark up, and always seat the bit with at least the full collet length of shank but never bottomed out against the spindle. A dial indicator on the shank tells you your true runout; if it is over a couple thousandths, the collet or spindle bearings are your problem, not the bit. When small bits keep breaking for no obvious reason, runout is usually the culprit — I cover the whole diagnosis in troubleshooting desktop CNC.
Matching Bits to Material
The bit is only half the equation; the feeds and speeds you run it at are the other half, and they are material-specific. Bit makers publish per-material feed-and-speed charts to start from — for example, Freud’s CNC router-bit feed and speed chart. The governing number is chipload — how much material each flute takes per revolution — and the right bit lets you hit a healthy chipload without the chip re-cutting or welding. Manufacturers publish chipload-per-tooth tables for exactly this — LMT Onsrud’s Cutting Data Recommendations also set the depth-of-cut rule of thumb (cut depth up to one tool diameter, and halve the chipload for twice the depth). A bit that is wrong for the material cannot be rescued by feeds alone.
For wood, a two-flute upcut at a moderate chipload clears chips and finishes well; my tested numbers for oak, maple, and walnut are in cutting hardwood settings. For plastics, slow the RPM and keep the feed up with a single-flute so the chip carries heat away instead of melting — the full logic is in acrylic settings. Aluminum is its own discipline: shallow depth of cut, adaptive clearing, single-flute or aluminum-specific geometry, and air or mist to flush chips, all detailed in aluminum feeds and speeds. The master starting-point numbers across all materials live in my CNC feeds and speeds chart.
The Bit Choice That Workholding Decides
Here is the thing the unboxing videos never tell you: half your “bad bit” experiences are actually bad workholding. A bit that snaps mid-cut usually did not fail because it was cheap — it failed because the part shifted, the cut grabbed, and the sudden load spiked past what the carbide could take. The smaller the bit, the less forgiving it is of a part that moves even a few thousandths.
I match the bit to the hold as deliberately as I match it to the material. A vacuum table or carpet tape under thin sheet lets me run a downcut without the part lifting; a flexy clamp setup forces me to a gentler bit and a lighter cut. Climb milling a small bit on a part that is not locked down is how you collect a drawer of broken cutters. If you have ever wondered why your bit broke and the part flew, start with CNC workholding and fixturing before you blame the tooling.
Specialty Bits — Metal, Composites, and Foam
Beyond the core five, a handful of specialty cutters earn their drawer space. Aluminum-specific bits — single-flute or two-flute with a polished flute and a ZrN or TiB2 coating — are built to shed non-ferrous chips before they weld; I never cut 6061 with a wood bit. Diamond-coated or solid-diamond cutters are the move for abrasive composites like carbon fiber and G10, which would dull ordinary carbide in minutes — and that work demands respirator-grade dust control, covered in carbon fiber CNC cutting.
For engraving metal there are tapered ball and drag-engraving bits; for soft foam, large single-flute upcut bits clear the fluffy chips that otherwise pack and melt. And for brass nameplates and trophy work, a fine V-bit with the right feed gives crisp prismatic letters — my settings for that are in brass CNC engraving. None of these are starter bits; buy them when a specific job demands one, not to fill a set.
How I Pick a Bit for a New Job
When a new file lands in CAM, my bit decision follows the same short checklist every time, and it takes about thirty seconds. First, the material: wood, plastic, or metal sets the flute count and helix family. Second, the feature size: the smallest internal radius in the part sets the largest bit that can reach it. Third, the edge that has to look good: top, bottom, or both decides upcut, downcut, or compression. Fourth, 2D or 3D: a flat profile takes an end mill, a contoured surface takes a ball-nose finish pass.
Only after those four do I think about brand or price — and by then the choice is usually obvious. This is the whole point of learning the families instead of memorizing a catalog: the part tells you which bit it needs. For the broader picture of how bit choice fits into the full design-to-part process, my complete CNC workflow ties CAM, toolpaths, workholding, and tooling together into one pass.
Building Your First Bit Kit Without Overbuying
If you are starting out, do not buy a 30-piece set. Buy five good bits you will actually use and add specialty cutters as projects demand. My starter recommendation: a 1/4″ two-flute upcut end mill for hogging, a 1/8″ single-flute O-flute for plastics and detail, a 60°/90° V-bit set for lettering, a 1/8″ ball-nose for 3D, and a 1/4″ compression bit for plywood through-cuts.
That kit cuts wood, plastic, signs, and panels — the overwhelming majority of what a desktop machine does. Add an aluminum-specific cutter only when you have a metal job, and a fresh collet so your runout stays low. Spend the money you saved on the 30-piece set on better workholding instead; it will break fewer bits than any premium cutter ever will.
Disclosure: As an Amazon Associate I earn from qualifying purchases. The links above are search links to the bit categories I actually run on my machines; buying through them supports this site at no extra cost to you. I only recommend tooling I use.
Frequently Asked Questions
What CNC router bits should a beginner buy first?
Start with five: a 1/4 inch two-flute upcut for hogging, a 1/8 inch single-flute O-flute for plastics and detail, a 60/90 degree V-bit set for lettering, a 1/8 inch ball-nose for 3D, and a 1/4 inch compression bit for plywood. That kit covers about 95% of desktop CNC work.
What is the difference between an end mill and a router bit?
On a desktop CNC the terms overlap heavily. End mills are precision rotary cutters designed to cut on the sides and end, common in metal and detailed work. Router bits is the broader hobby term that also includes profile and edge bits. For CNC, most cutters you buy are technically end mills.
Why do my CNC bits keep breaking?
The most common causes are too deep a pass for the bit diameter, poor workholding letting the part shift, excessive runout from a worn collet, or climb-milling a small bit on a flexy setup. Bit quality is rarely the real reason. Fix the depth of cut and the workholding first.
What bit do I use to cut clean edges in plywood?
A compression bit. Its upcut tip and downcut upper section give a clean top and bottom edge in a single pass through faced plywood. Run the first pass deep enough to engage the upcut section, or you lose the clean bottom edge and get fraying.
Can I use the same router bits in my CNC and a handheld router?
Sometimes, but be careful. Handheld router bits often have larger shanks and bearings unsuited to CNC toolpaths. CNC end mills are ground for plunge and lateral cutting at specific chiploads. Use CNC-rated end mills for CNC work; a handheld profile bit belongs in a router table.
How many flutes should a CNC bit have for wood?
Two flutes is the all-rounder for wood, balancing chip clearance and finish. Use a single flute for plastics, soft woods, and aluminum where chip evacuation prevents melting and welding. Three or more flutes are for harder materials and metal finishing passes, not general woodworking.
Is an expensive CNC bit worth it over a cheap one?
It depends on the material. For pine and MDF a budget carbide bit cuts fine. For hardwood detail, acrylic, and aluminum, a premium bit with better grind concentricity, sharper edges, and the right coating cuts cleaner and lasts far longer, saving money in fewer re-cuts and breaks.