Safety first. The following information is for educational purposes. CNC machining involves high-speed rotating cutters. Always wear eye and ear protection, never leave a running machine unattended, and verify all feeds and speeds for your specific setup.
CNC end mills are the straight-walled rotary cutters that do most of the work on a desktop CNC machine — profiling, pocketing, slotting, and surfacing. The three dials that decide how one behaves are diameter (rigidity), flute count (chip clearance vs finish), and helix direction (which edge comes out clean). Match those to your material and 90% of your cutting is covered by three or four bits.
On the machines I run — a Shapeoko Pro with a VFD spindle, an Onefinity Woodworker, and a couple of Genmitsu machines for the budget reality check — a 1/4″ two-flute upcut and a 1/8″ single-flute are loaded more than everything else combined. This is the bit family from my CNC router bits guide that you will reach for on nearly every job, so it is worth understanding properly instead of buying a mystery 30-piece set.
What Is a CNC End Mill?
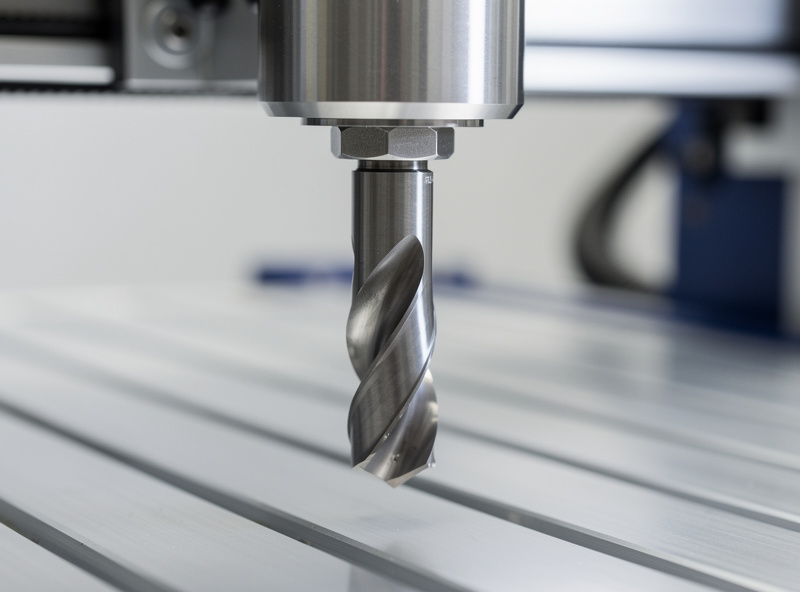
An end mill is a rotary cutting tool ground to cut on both its end and its sides, which is what separates it from a drill bit (end only) or a profile router bit (sides only). On a desktop CNC the terms “end mill” and “router bit” blur together, but the cutters you buy for CAM toolpaths are technically end mills: they are designed to plunge, ramp, slot, and cut laterally at a controlled chipload.
That dual-cutting ability is why one end mill can rough out a pocket, cut a profile, and clean up a wall. The geometry — number of flutes, helix angle, and corner form (square, ball, or radiused) — is tuned for the job. Square end mills leave a flat bottom and sharp inside corner radius equal to the bit radius; that corner radius is why your CAD inside corners need to be at least as large as the smallest bit you can fit, a detail I cover in the tooling fundamentals primer.
Diameter — The Rigidity Dial
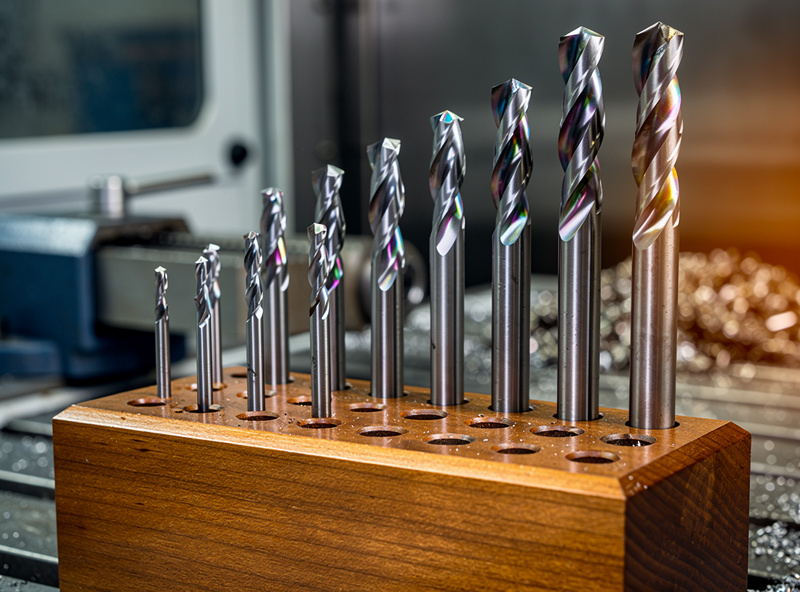
Diameter is the single biggest lever on end mill behavior, and it is really a rigidity story. A 1/4″ end mill is roughly eight times stiffer in bending than a 1/8″ of the same stick-out, so it deflects less, holds a truer wall, and survives a far more aggressive feed. My rule is simple: rough with the largest diameter the feature allows, and only drop to a smaller bit for corners and detail it physically cannot reach.
The trap beginners fall into is running a tiny bit for a whole job because they bought a kit full of them. A 1/16″ end mill cutting a deep slot in hardwood is a broken bit waiting to happen — the deflection is enormous and the chipload window is razor-thin. Use the small bit only where geometry forces it. Stick-out matters as much as diameter: keep the bit choked up in the collet so only as much shank protrudes as the cut depth needs, because deflection grows with the cube of stick-out length.
Flute Count — Chip Clearance vs Finish
Flute count trades chip clearance against finish and cutting-edge count. A single-flute end mill has one huge gullet that clears chips beautifully in gummy materials — plastics, soft woods, and aluminum — where a two-flute would pack its smaller gullets and re-cut or weld the chips. That is why a single-flute O-flute is the default for acrylic: it carries the chip out before it melts.
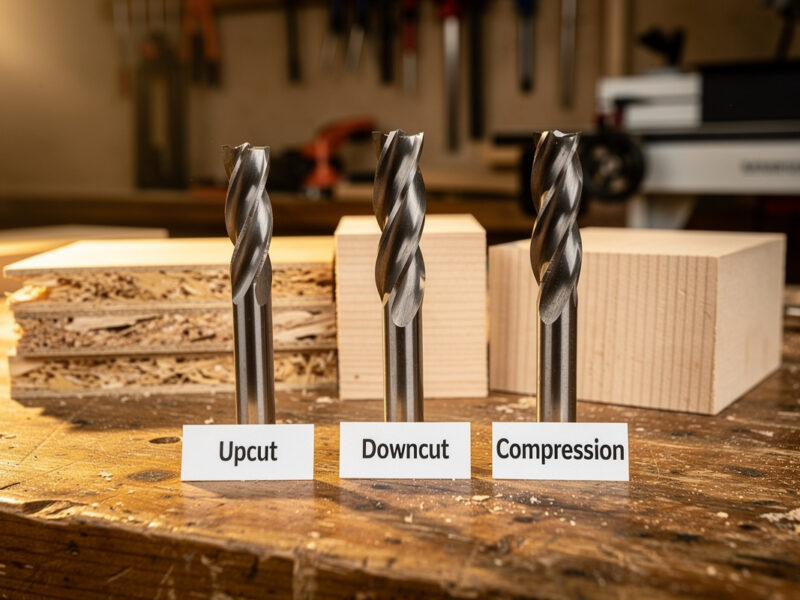
Two flutes is the all-rounder for wood, balancing a clean finish with adequate chip clearance and giving you twice the cutting edges, so you can push the feed harder at the same RPM. Three and four flutes appear in metal finishing, where the harder material does not clog the smaller gullets and the extra edges improve surface quality. The governing rule: gummy or soft material wants fewer flutes; hard material tolerates more. Choosing the helix direction is a separate decision I break down fully in downcut vs upcut router bits.
End Mill Selection by Job
Here is how I actually map end mill specs to the work in front of me. This is the quick reference for “which end mill do I load.”
| Job | Diameter | Flutes | Why |
|---|---|---|---|
| Roughing / hogging wood | 1/4″ | 2 | Max rigidity, fast material removal |
| Fine detail / small radius | 1/8″ or 1/16″ | 1–2 | Reaches tight corners |
| Acrylic and plastics | 1/8″ or 1/4″ | 1 (O-flute) | Clears chips before melting |
| Aluminum (non-ferrous) | 1/8″ or 1/4″ | 1–2 coated | Prevents chip welding |
| Surfacing spoilboard | 1″ surfacing bit | 2–4 | Flat, fast leveling pass |
| Hardwood finish pass | 1/4″ | 2–3 | Cleaner walls, less fuzz |
Coatings and Carbide Grade
For desktop CNC, solid carbide is the default — it holds an edge dramatically longer than high-speed steel and tolerates the higher surface speeds a router spindle runs. Coatings mostly matter in metal. A ZrN (zirconium nitride) or TiB2 coating reduces aluminum’s tendency to stick to and weld onto the flute, which is the number-one cause of a ruined finish and a snapped bit in 6061. For wood and plastic, an uncoated, sharp, well-ground carbide end mill is all you need.
What separates a $6 end mill from a $40 one is less about the coating and more about grind concentricity and edge sharpness. A cheap bit with high runout wobbles off-axis, which wrecks finish, shortens life, and breaks small cutters — so the “cheap” bit can cost you more in re-cuts. I happily run budget end mills in pine and MDF and save the premium cutters for hardwood detail and aluminum, an economic argument I make in full in best CNC router bits compared.

Running an End Mill — Feeds, Speeds, and Chipload
An end mill only performs if you feed it correctly. The governing number is chipload — the thickness of material each flute removes per revolution. Too little chipload and the bit rubs instead of cuts, generating heat that dulls the edge and burns wood. Too much and you overload the flute and snap the bit. The right diameter and flute count let you hit a healthy chipload at a feed your machine can actually push.
Chipload scales with diameter, so a 1/4″ bit takes a much bigger feed than a 1/8″ at the same RPM. I always start from a known chipload, calculate the feed, and adjust by ear and chip color — golden chips good, brown dust means rubbing. My tested starting numbers for wood, plastic, and metal live in the CNC feeds and speeds chart, with hardwood-specific values in cutting hardwood settings and plastics in acrylic settings.
The End Mill Mistakes That Break Bits
Most “bad end mill” stories are really operator stories. The top offender is too deep a depth of cut for the bit diameter — a 1/8″ bit trying to take a 1/4″ deep slot in one pass will deflect, chatter, and snap. The fix is shallower passes or a bigger bit. The second offender is workholding: a part that shifts mid-cut grabs the bit and spikes the load past what the carbide can take, no matter how good the bit is. Lock the part down, every time — start with CNC workholding and fixturing.
Third is runout from a worn or dirty collet, which makes small end mills break for no obvious reason. Fourth is climb-milling a small bit on a flexy setup, which pulls the bit into the work and invites chatter. Clean your collets, keep stick-out short, and match the depth of cut to the diameter, and your end mills will outlive your patience for buying new ones.
Which End Mills to Buy First
Skip the giant mystery set. For wood and plastic work, buy a 1/4″ two-flute upcut end mill for roughing and a 1/8″ single-flute O-flute for detail and plastics. If you want a sensible spread of diameters and flute counts in one purchase, a quality carbide end mill set beats a no-name 30-piece bargain bin.
Add an aluminum-coated cutter only when you have a metal job, and replace your collet before you blame the bit. Then put the money you saved on better workholding — it breaks fewer end mills than any premium cutter ever will.
Disclosure: As an Amazon Associate I earn from qualifying purchases. The links above point to the end mill types I actually run on my machines; buying through them supports this site at no extra cost to you.
Frequently Asked Questions
What is the difference between an end mill and a drill bit?
A drill bit cuts only on its tip and is built to make holes by plunging. An end mill cuts on both its end and its sides, so it can plunge, slot, profile, and pocket. On a CNC you use end mills for nearly all cutting and reserve drill bits for accurate round holes.
What size end mill should I use for desktop CNC?
Default to a 1/4 inch end mill for roughing and general cutting because it is far more rigid and removes material faster. Drop to a 1/8 inch only for fine detail and small inside corners. Use the largest diameter the feature allows to reduce deflection and broken bits.
How many flutes should a CNC end mill have?
Two flutes is the best all-rounder for wood. Use a single flute for plastics, soft woods, and aluminum where chip clearance prevents melting and welding. Three or four flutes suit hard materials and metal finishing passes where the smaller gullets will not clog.
Why does my end mill keep breaking?
Usually the depth of cut is too deep for the bit diameter, the workpiece shifted because of poor workholding, the collet has excessive runout, or you are climb-milling a small bit on a flexy setup. Bit quality is rarely the cause. Reduce depth of cut and lock the part down first.
Can I use HSS end mills on a CNC router?
You can, but solid carbide is strongly preferred. Carbide holds its edge far longer at the high surface speeds a router spindle runs and resists the heat that quickly dulls high-speed steel. HSS is fine for occasional soft-material cuts but carbide is the practical default.
What is chipload on an end mill?
Chipload is the thickness of material each flute removes per spindle revolution. It is the master feeds-and-speeds number. Too low and the bit rubs and overheats; too high and it overloads and snaps. Calculate feed from a target chipload, then fine-tune by chip color and sound.