Safety first. The following information is for educational purposes. CNC machining involves high-speed rotating cutters. Always wear eye and ear protection, never leave a running machine unattended, and verify all feeds and speeds for your specific setup.
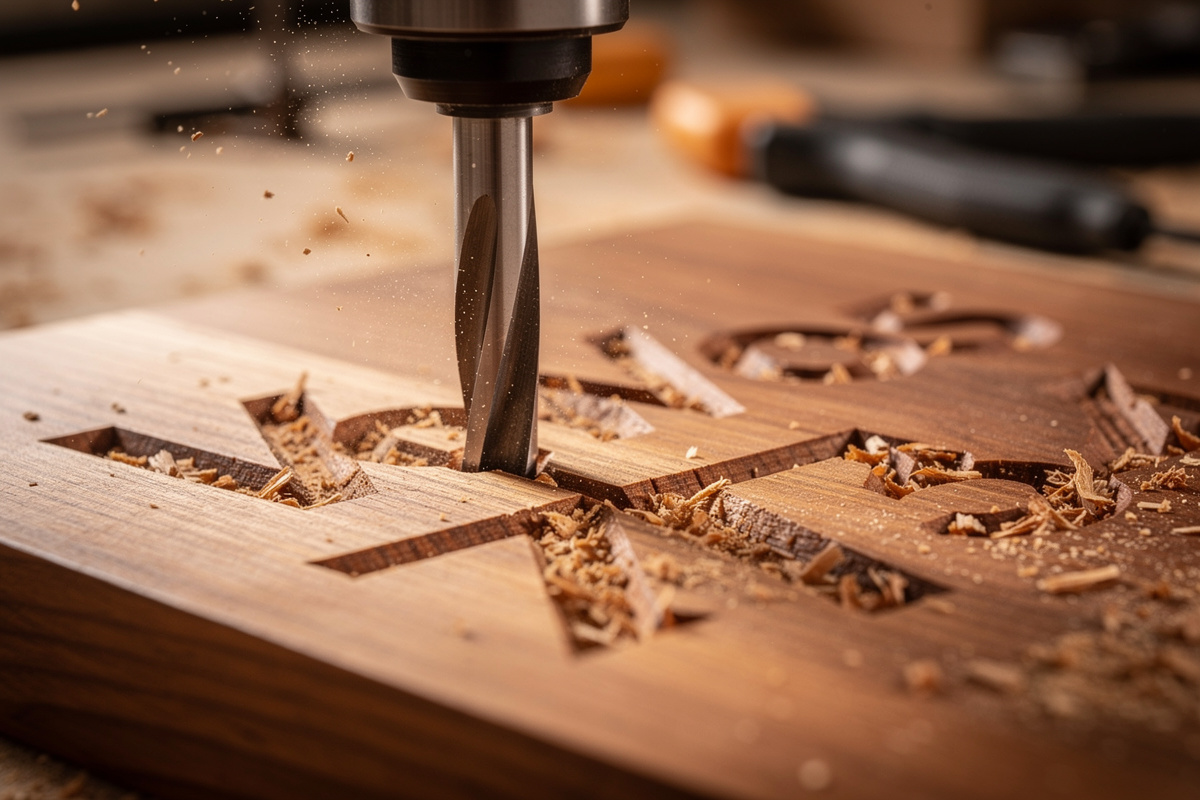
V-carve toolpaths are the technique that turns flat wood into three-dimensional decorative pieces. In ~40 words: V-carving uses a V-shaped bit (typically 60° or 90°) where the cut depth varies based on the geometry — narrow features cut shallower, wide features cut deeper. The variable-depth technique produces the iconic look of V-carved letters, decorative panels, and wood inlays found on quality wooden signs.
This guide walks through V-carve toolpath generation from setup through finished cut, covers the V-bit selection that affects every cut, and shows when V-carving is the right technique versus when straight-bit pocketing produces better results. The same principles work in VCarve, Carbide Create, and Fusion 360 — the specific UI differs, the geometry math doesn’t.
A quick note: a couple of links below are affiliate links — buy through one and I may earn a small commission at no extra cost to you. I only point to bits I would actually run on my own machine. Details on my disclaimer page.
How V-Carving Works
V-carving uses a tapered bit (V-shaped, like a sharpened pencil) instead of a flat-bottomed end mill. As the bit moves, the cut width is determined by depth — at zero depth the cut is a sharp line; at maximum depth the cut is the full width of the V-bit’s reach.
The CAM software calculates depth based on the geometry being cut. Narrow letter strokes cut shallower; wide letter strokes cut deeper, both ending in a sharp V-shape at the bottom of the cut. The result is letters with sloped sides instead of vertical-walled letter pockets.
For the broader CAM context, see our CAM software comparison — VCarve specializes in V-carving while Fusion 360’s V-carving is functional but less refined. For dedicated V-carving production, Vectric VCarve is the right tool.
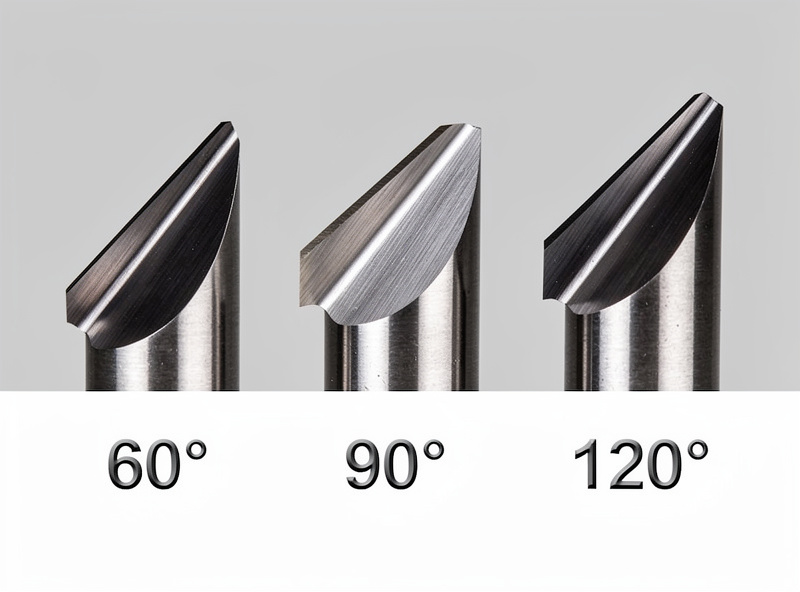
V-Bit Selection: 60° vs 90° vs 120°
V-bits come in different angles. The angle affects what the cut looks like and how deep narrow features go.
60° V-bit: Narrow profile, deeper cuts on narrow features, sharp pointed shadows. Best for fine letter detail and intricate decorative work. Most-used V-bit angle for general V-carving.
90° V-bit: Medium profile, balanced cuts. Best for typical wood signs where letters are medium-sized and detail isn’t extreme. The most-shipped V-bit with new desktop CNCs.
120° V-bit: Wide profile, shallower cuts. Best for very wide letter pockets where you want a subtle V-shape rather than dramatic depth. Less common.
For typical wood-sign work, a 60-degree V-bit produces the most-recognized V-carved aesthetic, and I keep a 60/90 pair on the shelf because the angle in CAM has to match the bit in the collet or every depth comes out wrong. For thicker materials with bigger letters, 90° works better because the bit can reach the full letter width without going excessively deep.
VCarve Toolpath Setup
In VCarve (any version), select the vector geometry you want V-carved (typically text after converting to outlines). Choose Toolpaths → V-Carve / Engraving.
Set tool: pick your V-bit from the tool library. Verify the angle matches your physical bit (a profile selecting “60° V-bit” but cutting with a 90° bit produces wrong-depth results).
Set start depth (typically 0 for surface engraving) and depth limit (typically 6mm or whatever your V-bit can reach without binding the shaft). The depth limit prevents the bit from cutting deeper than your bit can handle.
Set the feed rate based on your bit and material. For 60° V-bit in hard maple at 18,000 RPM, 600-800mm/min is typical. Manufacturer-recommended values for your specific bit are the right starting point. Our CNC tooling fundamentals guide covers the chip load math.
Click “Calculate Toolpaths” and run the simulation. The simulation should show clean V-carved letters with consistent depth transitions. If letters look choppy or non-uniform, the V-bit angle in CAM doesn’t match your physical bit — that mismatch, and a dull tip, wreck a V-carve faster than any feed setting. A clean carve needs a sharp V-bit as much as the right toolpath.
V-Carved Inlays
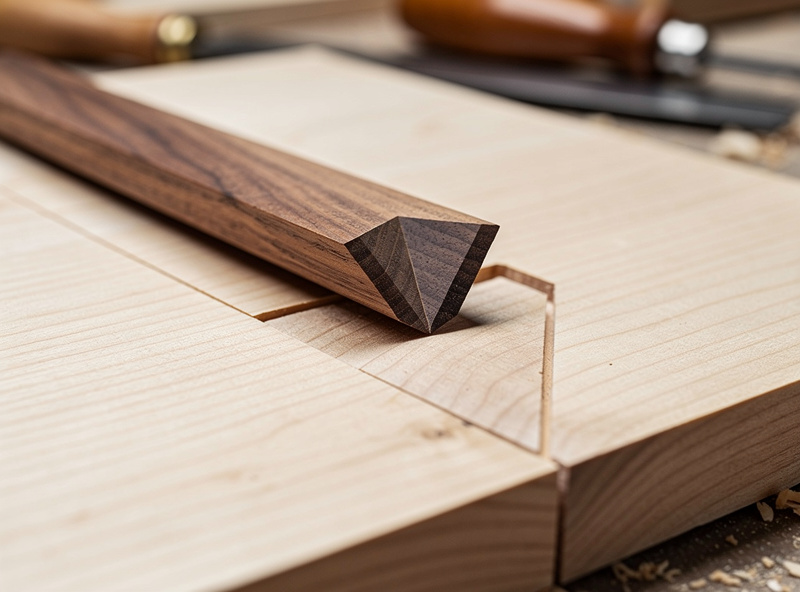
V-carved inlays use two V-cuts to create a male/female pair that fits together with no gaps. The female piece is V-carved into a base material; the male piece is V-carved separately and inserted into the female pocket.
The math: with a 60° V-bit and 6mm depth, the female V-pocket has 60° sloped walls that taper down to a point. The male V-piece has matching 60° outer walls that taper down to the same point. When assembled, the two surfaces meet along the V-walls with no gap.
VCarve Pro and Aspire have specific “True V-Inlay” toolpaths that calculate the male piece dimensions from the female. VCarve Desktop and Carbide Create handle V-inlays manually — you generate the female toolpath, then mirror the geometry to create the male.
V-inlays produce wedding ring boxes, decorative jewelry boxes, and inlay artwork that commands $100-300 on Etsy. The technique is one of the highest-margin small-CNC products. Material cost is low; finished value is high.
Prismatic Carving
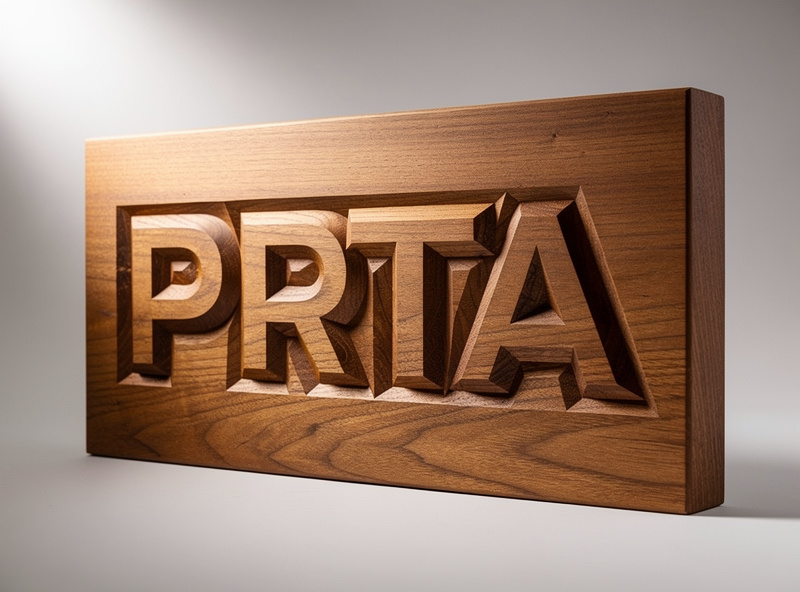
Prismatic carving creates flat letters that appear three-dimensional. The technique uses V-carving to cut a sloped border around each letter, with the letter itself remaining at the original wood surface height while the surrounding area drops away.
The result: letters appear to rise from the wood surface like miniature pyramids. Photographed straight-on, the letters look 3D-printed; photographed from an angle, the V-cut walls become visible.
VCarve handles prismatic carving as a specific toolpath option (“Prismatic Carving” in the toolpaths menu). Carbide Create and Fusion 360 require manual setup — you create offset borders around each letter, then V-cut the offset region. VCarve’s automation makes this technique 5-10x faster than manual approaches.
Prismatic name signs and welcome plaques sell at $50-150 on Etsy. The technique is the bread-and-butter of small CNC sign businesses. For production volume, VCarve’s prismatic-specific toolpath pays for itself in the first week of regular use.
Material Considerations
V-carving works best on dense, fine-grained woods where the V-cut produces clean walls without tear-out. Material choice affects both result quality and tool wear.
Best: Hard maple, walnut, cherry. Dense, fine-grained, holds V-cut walls cleanly. Premium choice for production work.
Good: Birch plywood (good face only), basswood, poplar. Acceptable cut quality with proper feeds and speeds. Budget choice for high-volume production.
Difficult: Oak, ash (open-grained, V-cut walls can tear out). Pine, fir (soft, V-cut depth is inconsistent). Use only when material aesthetic specifically matches the project.
Avoid: MDF (V-cut walls fuzz), particleboard (chunks out badly under V-cuts).
For mixed material work where V-carving isn’t suitable, switch to straight-bit pocketing. See our CNC tooling fundamentals guide for material-specific feeds and speeds.