Safety first. The following information is for educational purposes. CNC machining involves high-speed rotating cutters. Always wear eye and ear protection, never leave a running machine unattended, and verify all feeds and speeds for your specific setup.
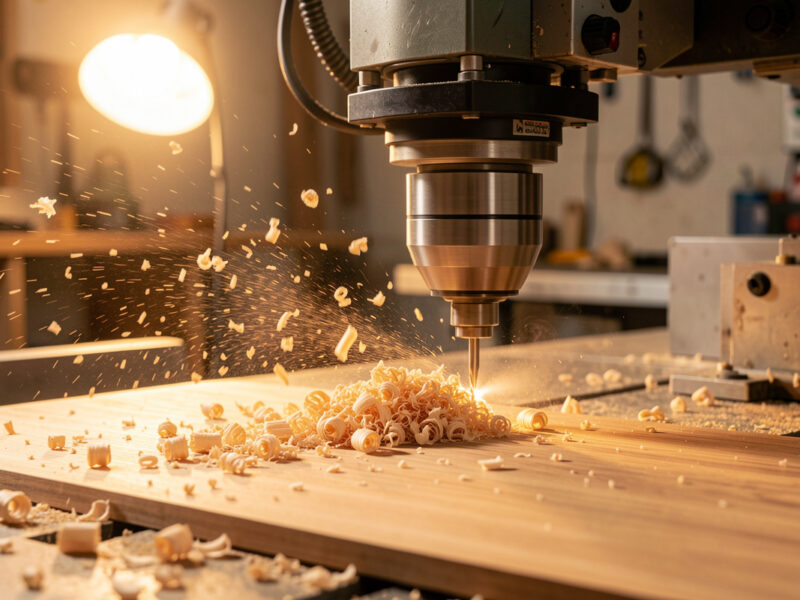
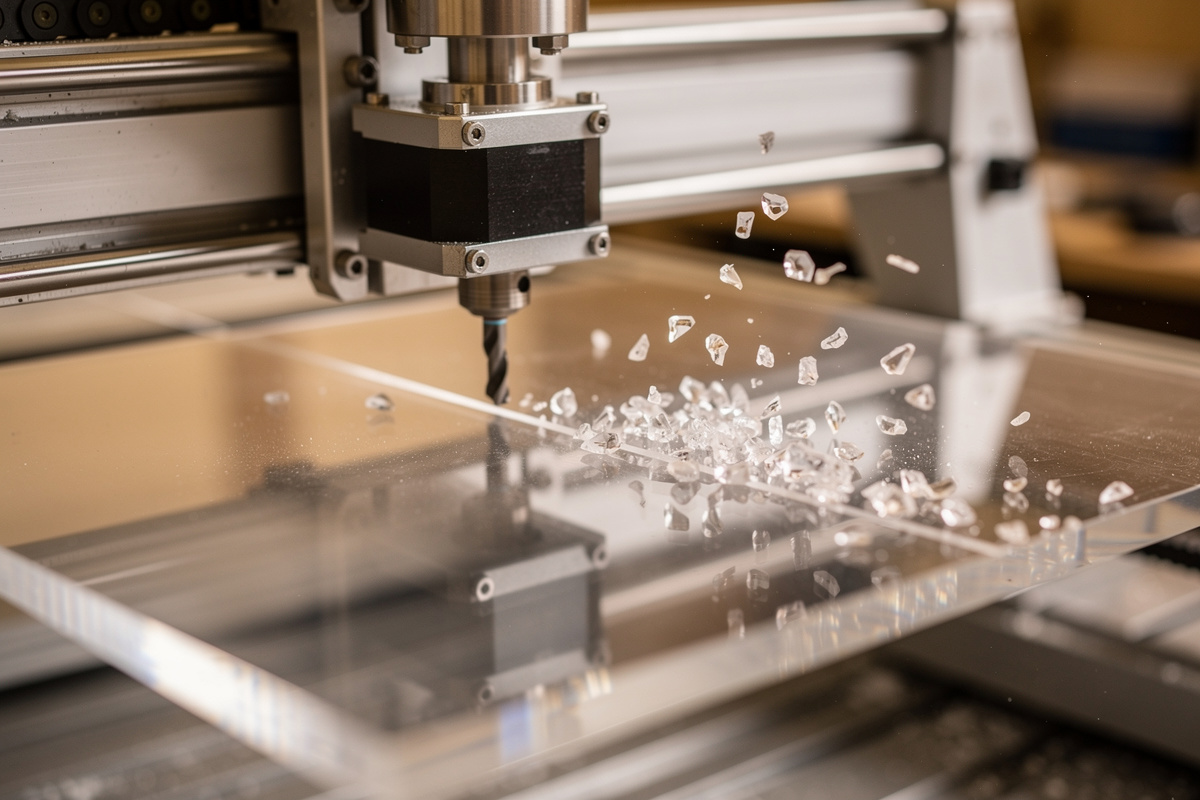
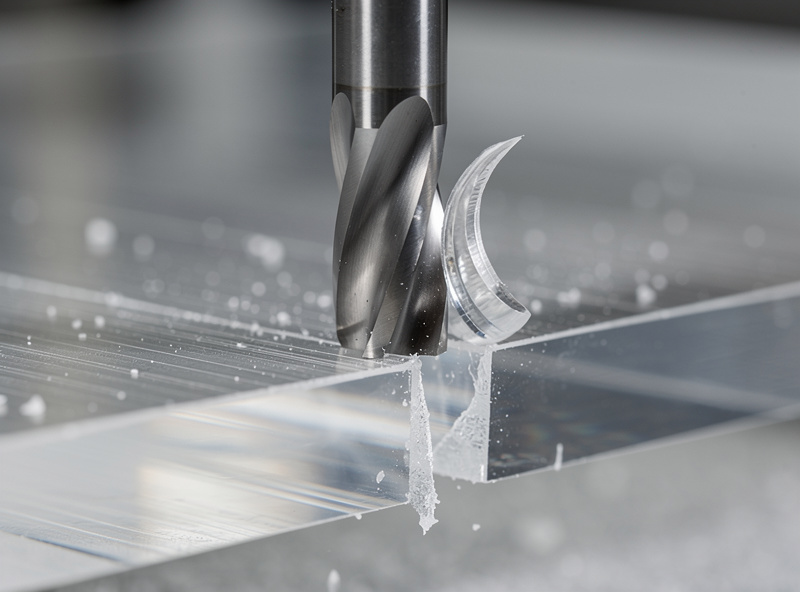
Cutting acrylic on CNC produces clean polished edges when you use a single-flute O-flute end mill at the right speed and feed. Use the wrong tool — standard 2-flute upcut spirals or anything without proper chip room — and the acrylic melts, gums up the bit, and produces ugly slag along the cut edge. After running 50+ acrylic CNC cuts in 2026 across cast and extruded sheets, the working profile centers on a 1/4″ 1-flute O-flute carbide end mill at 12,000 RPM, 48 IPM, 2 mm depth of cut.
This article covers acrylic-specific CNC settings, the cast vs extruded difference, the chip-evacuation technique that prevents melted edges, and the engraving toolpaths that produce clean V-carved acrylic signs. It is the acrylic deep-dive companion to our CNC feeds and speeds hub.
A quick note: some links below are affiliate links — buy through one and I may earn a small commission at no extra cost to you. I only point to bits and gear I would actually run on my own machine. Details on my disclaimer page.
Why O-Flute End Mills for Acrylic
Acrylic melts at ~160 °C and the friction from any cutting tool produces enough heat to reach that temperature within seconds. The fix is chip evacuation — get the chips out of the cut path fast enough that heat does not accumulate. Standard 2-flute upcut spirals have small chip channels relative to their diameter; the chips clog, melt, and weld to the tool. Single-flute O-flute end mills have one large open chip channel — there is no second flute to clog the path, and the molten chip ejects cleanly out of the cut zone.
The result: an O-flute at 48 IPM produces clean comma-curl acrylic chips that fly out of the cut. A 2-flute upcut at the same feed produces gummy molten plastic that welds to the tool. The same difference applies between brands and tool grades — Onsrud, Amana, and Vortex all make solid single-flute O-flute end mills. Avoid generic “acrylic-cutting” bits that are actually rebadged 2-flute carbides; the geometry is wrong regardless of marketing claims, and I have melted enough edges on the cheap ones to stop buying them. Our tooling fundamentals article covers end mill geometry.
Cast vs Extruded Acrylic for CNC
Same difference as for laser cutting — cast acrylic produces clean polished CNC cut edges; extruded acrylic produces hazy white edges that need flame polishing or sanding to look acceptable. The cause is the same: cast acrylic has a uniform polymer matrix that cuts smoothly, while extruded acrylic has internal stresses that release as micro-fractures during cutting. Always specify cast acrylic for visible-edge CNC projects.
The CNC tells the difference more aggressively than laser cutting. On laser, extruded vs cast is mostly a finish difference. On CNC, extruded acrylic is harder to cut cleanly — the internal stresses make the material chip and crack at the cut edge. Stick to cast 6 mm or thicker for any CNC work; cast acrylic is widely available from TAP Plastics, Inventables, and OnlineMetals at slight premium over extruded. Our feeds and speeds hub covers material sourcing across CNC use cases.
Acrylic Settings by Thickness
| Thickness | RPM | Feed (IPM) | DOC | Stepover |
|---|---|---|---|---|
| 3 mm | 12,000 | 50 | 1.5 mm | 50% |
| 5 mm | 12,000 | 48 | 2.0 mm | 50% |
| 6 mm | 12,000 | 45 | 2.0 mm | 50% |
| 10 mm | 12,000 | 40 | 2.5 mm | 45% |
| 12 mm | 10,000 | 35 | 2.5 mm | 40% |
The pattern: lower RPM and slower feed for thicker acrylic to give chips more time to evacuate. The 12,000 RPM setting matches the typical Makita RT0701C router minimum speed; some hobby CNCs go lower (Onefinity, Sienci) and benefit from 8,000–10,000 RPM on thicker acrylic. If your spindle minimum is higher than 10,000 RPM, increase feed rate proportionally to maintain the chip-load ratio. One thing these numbers quietly assume is that the sheet is not moving: thin acrylic is light, and a climb-direction grab will launch it off the spoilboard. For anything under 6 mm I hold it down with double-stick carpet tape across the whole footprint, not just the corners — on my own machine that single change ended most of the “the part shifted and the edge stepped” cuts.
V-Carving and Engraving Acrylic
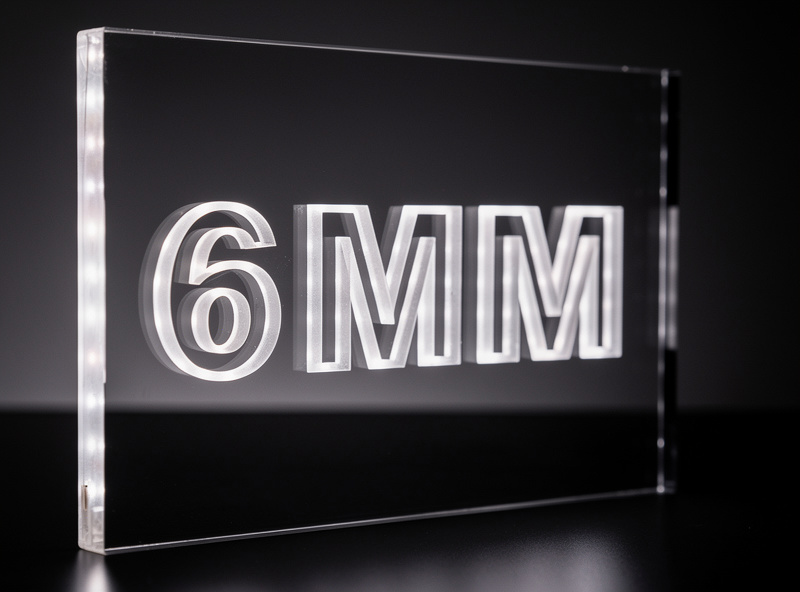
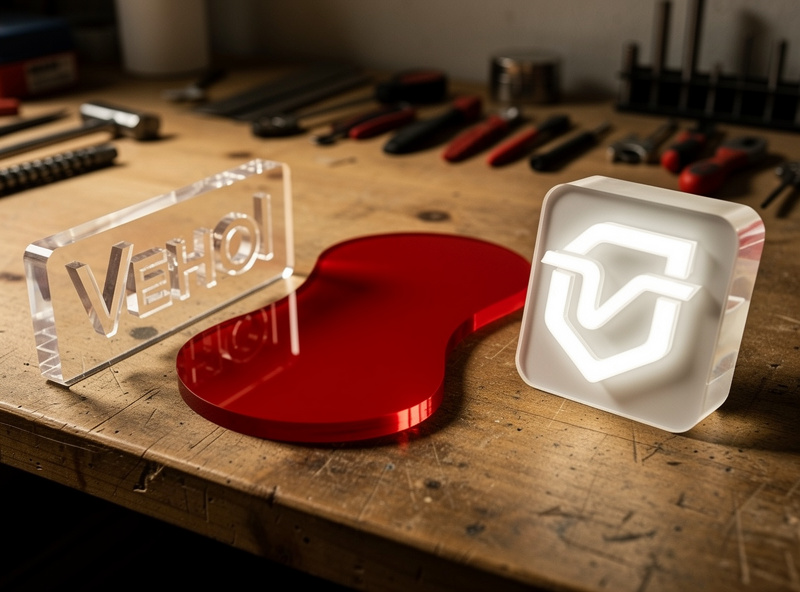
Acrylic V-carving (cutting beveled letters or designs into the acrylic surface) produces dramatic three-dimensional signs that backlight beautifully. The toolpath uses a 60-degree V-bit at lower feeds than profile cutting — the V-bit’s increased contact area produces more heat per unit feed. Settings: 12,000 RPM, 30 IPM, 1 mm deep V-cut. For deeper V-cuts, run multiple shallow passes rather than one deep pass.
Surface engraving (text and designs cut just into the surface, not through) uses similar settings to V-carving but with even shallower depth. 0.3 mm deep produces a visible engraved surface that holds paint or oil filling. For backlit acrylic signs (popular for restaurant and bar logos), V-carve the design 2 mm deep into the back surface, then place an LED strip behind the cut surface — the carved design glows brightly while surrounding acrylic stays dark. Our V-carving article covers letter and design toolpath strategy.
Dust Collection and Chip Recutting
Acrylic chips are flammable and can ignite from the cutting heat if they accumulate in the cut path. Dust collection is essentially mandatory for safe acrylic CNC work — a shop vacuum with dust shoe directed at the cut zone clears chips before they accumulate. Without dust collection, chips can accumulate in the cut path, recut into smaller fragments, and produce melted slag that ruins the cut.
The setup that works: a shop vacuum (Festool, Fein, or Ridgid 14-gallon) connected to a dust shoe directly over the cut zone. For 2D flat cuts, the dust shoe captures 95%+ of chips. For 3D V-carving, some chip drift is unavoidable; periodic vacuuming during the cut helps. Compressed air assist (a small nozzle directed at the cut zone) supplements vacuum dust collection on demanding cuts. Our workshop setup article covers dust collection design.
Post-Processing CNC Acrylic Cuts
Even properly tuned CNC acrylic cuts have slight haze along the cut edge from the cutting friction. For projects where edge polish matters (museum-quality display cases, signs with visible edges), flame-polishing finishes the edge. Pass a propane torch flame quickly along the cut edge — 2–3 seconds per inch — and the surface melts and re-flows into a glassy finish.
For projects where edge polish is less critical (back panels, jigs, prototypes), a quick wipe with a microfiber cloth and isopropyl alcohol removes the slight residue and leaves a clean enough finish. Sanding the cut edge with 600-grit then 1500-grit wet sandpaper produces near-flame-polished results without the fire risk; this approach works well for thin acrylic where flame heat could distort the part. The general rule: cast acrylic at correct settings cuts clean enough that minimal post-processing is needed; extruded acrylic always needs post-processing regardless of how well the CNC is tuned.
Frequently Asked Questions
What end mill for cutting acrylic on CNC?
1/4-inch single-flute O-flute carbide end mill. The single open chip channel prevents melted plastic from welding to the tool. Onsrud, Amana, and Vortex all make solid O-flutes. Avoid 2-flute upcut spirals on acrylic.
What feed rate for cutting acrylic?
48 IPM at 12,000 RPM with a 1/4-inch single-flute O-flute, 2 mm depth of cut, 50% stepover for 5–6 mm cast acrylic. Slower for thicker material; faster for thinner. Maintain consistent chip-load to prevent melting.
Why does my CNC acrylic cut have melted edges?
Either the wrong end mill (use single-flute O-flute), RPM too high (drop to 12,000 RPM), or chip recutting from inadequate dust collection. The fix is chip evacuation — get chips out of the cut path before heat accumulates.
Can I CNC cut extruded acrylic?
Yes, but the cut edges are hazy and need flame polishing or sanding to look acceptable. Cast acrylic produces clean polished edges directly. Always specify cast acrylic for visible-edge CNC projects.
What RPM for cutting acrylic?
12,000 RPM for most cuts. Drop to 10,000 RPM for thicker acrylic (10–12 mm) to give chips more time to evacuate. Higher RPM produces more friction heat and increases melting risk.
Do I need dust collection for cutting acrylic?
Yes, essential. Acrylic chips are flammable and can ignite from cutting heat if they accumulate. A shop vacuum with dust shoe directed at the cut zone clears chips before accumulation. Compressed air assist supplements vacuum collection.
How do I get polished edges on CNC acrylic cuts?
Use cast acrylic, single-flute O-flute end mill, correct feed and speed. For absolute polish, follow with flame polishing — pass a propane torch flame quickly along the cut edge for 2–3 seconds per inch. The surface melts and re-flows.