Safety first. The following information is for educational purposes. CNC machining involves high-speed rotating cutters. Always wear eye and ear protection, never leave a running machine unattended, and verify all feeds and speeds for your specific setup.
A CNC engraving vcarve guide comes down to one decision made before the spindle ever turns: which tool removes material, and what shape it leaves behind. V-carving uses an angled bit whose flat width changes with depth, so a single 60-degree V-bit cuts hairline serifs and broad letter bodies in one pass. Raster engraving rides a ball-nose line-by-line like a printer; diamond drag scratches the surface with zero spindle load. Pick the wrong one and the part is scrap.
I have run all three operations across the machines on my bench, and the truth that no unboxing video tells you is that engraving exposes a hobby gantry’s weaknesses more brutally than any other job. A pocketing cut hides chatter under volume; a V-carved serif at 0.2mm flat-width shows every thousandth of deflection, every step the steps-per-mm calibration got wrong. This guide is the operation-level map: what each method actually is, when it is the right call, and the workholding-and-chipload lens that decides whether your letters come out crisp or fuzzy. The bit choices live in my guide to CNC V-bits; the click-by-click toolpath setup lives in the VCarve toolpath tutorial. This page is the why-and-when that routes you to both.
The Four CNC Engraving Methods at a Glance
There are four ways a desktop CNC marks a surface, and they are not interchangeable. V-carving cuts variable-width lines with an angled bit. Raster engraving sweeps a small ball-nose across a region to reproduce greyscale. Diamond drag plows a non-rotating diamond point through the surface for hairline metal marking. Profile/relief engraving cuts a fixed-width groove with a straight bit. Each demands a different rigidity budget, and that budget is the first thing I check.
The reason the method matters more than the machine is geometry. A V-bit’s cutting width is a function of plunge depth — that is what lets one bit render an entire sign font. A ball-nose’s mark width is fixed by its diameter, so to fake variable shading it varies line spacing and depth across thousands of passes. Diamond drag does not cut at all; it displaces. Understanding that distinction is the entire game, because it tells you what the spindle is being asked to do and therefore how hard the workholding has to fight back.
Below is the comparison I keep in my head when a job comes in. It is the single most useful table for choosing an operation before you open CAM. Notice the rigidity column — that is where the budget machines start to lose, and where the same job that runs clean on the Onefinity’s ball-screws goes fuzzy on a belt-driven 3018.
| Method | Tool / Bit | Best materials | Depth / relief | Typical use | Rigidity demand |
|---|---|---|---|---|---|
| V-carving | 60° or 90° V-bit | Hardwood, MDF, acrylic, soft aluminum | Variable, depth sets line width (0.2–6mm) | Signs, decorative lettering, V-carve inlay | Medium – serifs reveal deflection |
| Raster / photo engraving | Small ball-nose (0.5–1.5mm) or tapered ball | Hardwood, Corian, dark acrylic, anodized aluminum | Shallow, greyscale by depth (0.1–0.8mm) | Photographs, logos, fine portraits | High – thousands of passes punish any slop |
| Diamond drag | Spring-loaded diamond tip (non-rotating) | Brass, aluminum, anodized metal, glass, stone | Surface scratch only (no measurable depth) | Trophy plates, dog tags, serial marking | Low – zero spindle load, no chips |
| Profile / relief engraving | Straight 1/16″ or 1/8″ end mill | Plastics (two-tone), wood, brass | Fixed-width groove (0.5–3mm deep) | Two-tone signage, gauge faces, badges | Medium – small-diameter bits snap easily |
| Laser (context only) | Diode or CO₂ laser, no contact | Wood surface, leather, acrylic edge, coated metal | Surface char / mark (no relief depth) | Photo burns, fine raster art, fast batch marking | N/A – no cutting forces, different machine |
That bottom row is there on purpose. Half the people asking “how do I engrave a photo on my CNC” actually want a laser. If the edge or the surface burn is the point and you do not need relief depth, a laser is the right tool — I cover exactly where that line falls in CNC vs laser for wood signs. The router earns its place when the mark has to have depth: an inlay pocket, a deep V-cut letter you can run a thumbnail across, a relief carving that catches a raking light.
One more thing the table does not show: the order in which you should learn these. If you are new to the machine, learn V-carving first because it teaches you the relationship between depth and detail, then add diamond drag because it is nearly impossible to mess up and gives you a metal-marking capability for almost no money. Save raster photo engraving for last — it is the one that demands a calibrated, trammed, low-backlash machine, and attempting it on a fresh-out-of-the-box budget router before you have surfaced your spoilboard and dialed your steps-per-mm is how people conclude their machine “cannot engrave,” when really it was never set up to. The operation is downstream of the calibration, every single time.
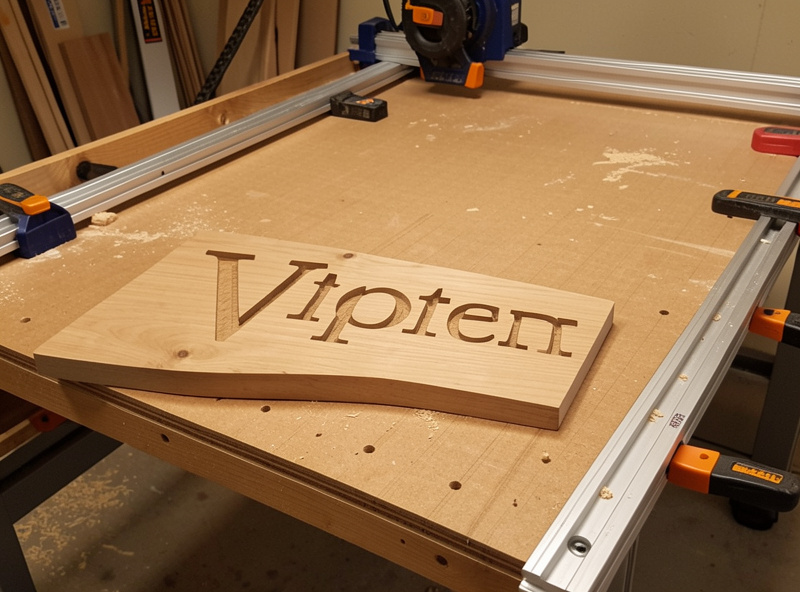
V-Carving: The Workhorse Operation
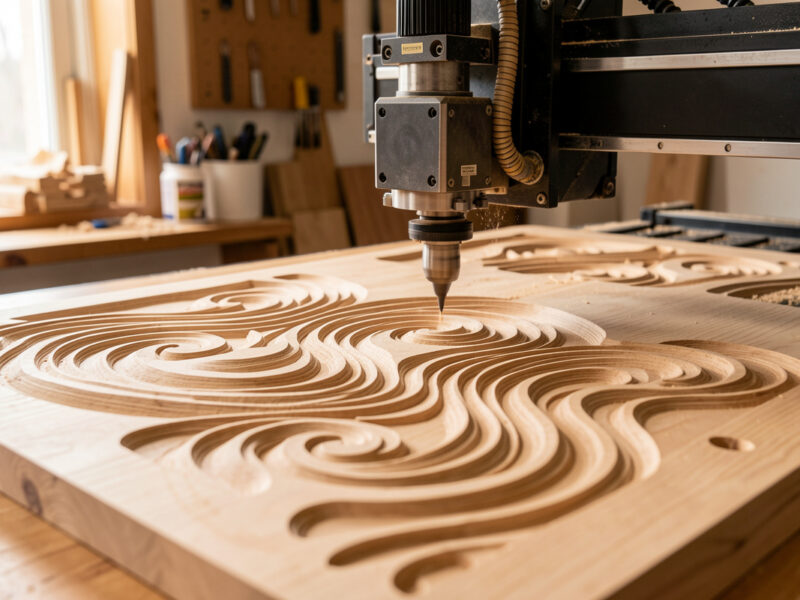
V-carving is the operation most people buy a CNC to do, and for good reason: one 60-degree bit renders an entire font, from a 0.2mm hairline serif to a 6mm-wide letter stem, because the cutting width grows with plunge depth. The CAM solves the geometry — you give it a vector and a bit angle, and it computes the depth at every point so the flat edges of the letter meet at a clean apex.
The bit angle is the first real decision. A 60-degree V-bit gives crisper, deeper detail and is my default for hardwood lettering; a 90-degree bit is shallower and stronger, better for soft or chip-prone material and for wider letter bodies. On my Shapeoko Pro with the VFD spindle I run a 60-degree bit at around 18,000 RPM in walnut, a shallow final pass, and I let the V-carve toolpath set the depth rather than forcing a flat depth-of-cut. Forcing depth is how beginners blow out the bottom of a serif.
Here is the rigidity tax in plain terms: a V-carved serif is the most unforgiving feature a hobby gantry will ever cut. The flat at the tip can be 0.2mm wide, so 0.1mm of gantry deflection is a visible defect — a fuzzy or wandering serif. This is why I tram the machine and verify steps-per-mm calibration before any sign job, and why the Onefinity’s ball-screws produce visibly sharper apexes than a belt-driven budget machine on the identical file. The machine I run does not lie about its rigidity when there is a V-bit in the spindle.
Two sub-operations branch off V-carving, and each gets its own deep dive. The first is V-carve inlay — cutting a male plug and a female pocket with the same V-bit so a contrasting wood drops in and locks tight when glued and flushed. It is the single most impressive trick a hobby CNC does, and it depends entirely on getting the flat-depth and start-depth relationship right; I walk the whole technique in CNC V-carve inlay technique. The second is production signmaking, where V-carving meets pocket-clearing, layered backgrounds, and finishing for a sellable result — that lives in CNC V-carving for signmaking.
For pure lettering jobs, the other branch is simple text engraving — names, dates, plaques, and gift items where the geometry is a single line of type and the whole problem is font choice, depth, and clean fillets. That has enough specific gotchas (single-line fonts vs. outline fonts, tiny-serif blowout, fill vs. outline toolpaths) to warrant its own page: CNC text engraving. If you only ever cut names into cutting boards, start there.
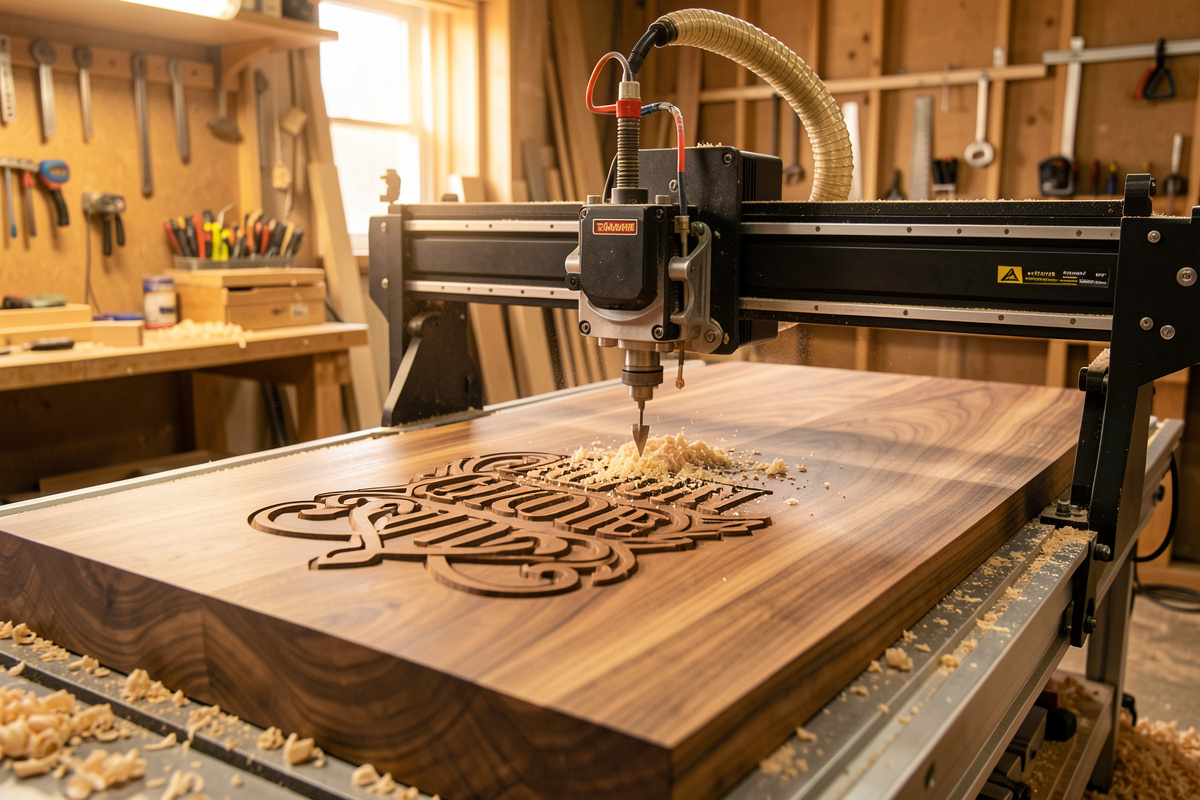
A point worth making here because it trips up everyone the first time: V-carving and pocketing are not the same toolpath, and a sign usually needs both. The V-carve toolpath cuts the letters and the fine detail with the angled bit. A separate pocket-clearing pass with a flat end mill removes the background so the letters stand proud, or hollows a recess for a painted fill. The CAM treats these as two operations stacked on the same vectors, and the rookie mistake is trying to V-carve a deep background — you end up with a soft, scalloped floor instead of a flat one. Let the V-bit do the detail and a 1/8-inch end mill do the volume. That division of labor is the whole logic of how a sign job is built, and it is why the bit-and-toolpath choice matters more than raw machine power.
Raster and Photo Engraving: When Detail Beats Depth
Raster engraving reproduces a photograph or fine logo by sweeping a tiny ball-nose across the surface line by line, varying depth to create greyscale — darker tones cut deeper into the wood, lighter tones barely scratch it. A typical portrait runs thousands of closely-spaced passes at a 0.1mm step-over, which is why a single small photo can take two to four hours on a hobby machine.
This is the operation that punishes a machine hardest, because the error budget is brutal. With a 0.1mm step-over, any backlash, any belt stretch, any steps-per-mm error of half a thousandth shows up as banding or moire across the whole image. Raster engraving is the best real-world test of a gantry’s calibration I know — if the machine has slop, a photo engraving will find it where a sign never would. I run these jobs only after a fresh tram and a backlash check, and I keep the feeds modest so the controller’s acceleration limits do not round off the line ends.
Bit choice here is a tapered ball-nose: a small tip for fine detail with a tapered shank for stiffness, because a straight 0.5mm ball-nose would deflect or snap. The full job runs through Fusion 360 or a dedicated raster-to-toolpath tool, and the CAM choice matters more than for any other engraving type — I cover which package handles photo work well in best CNC CAM software. For most people, the honest answer is that a laser does photographs faster and with less risk; the router wins only when you specifically want the tactile, depth-carved look on real wood. The full method, material choice, and image-prep workflow live in CNC photo and raster engraving.
Diamond Drag: Marking Metal With Zero Spindle Load
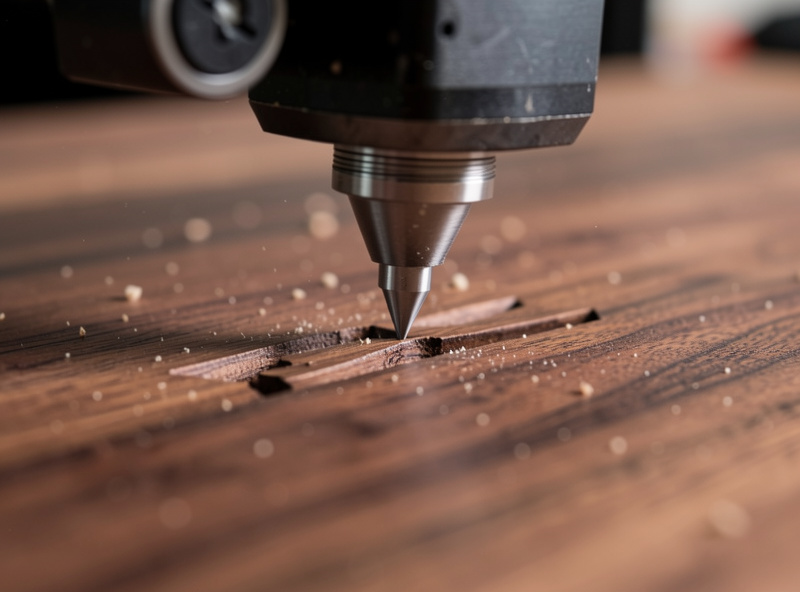
Diamond drag engraving uses a spring-loaded diamond point that does not rotate — the spindle stays off — and the tip is dragged through the surface to plow a hairline scratch. Because there is no cutting force and no chip, it marks brass, aluminum, anodized metal, glass, and stone cleanly on a machine that could never cut those materials. It is the operation that lets a wood-focused hobby router produce professional metal nameplates.
The mechanics are the opposite of everything else in this guide. There is no chipload, no RPM, no chip evacuation — the only variables are the spring tension (how hard the diamond presses) and the feedrate (which sets line darkness, slower equals deeper and darker). Z-zeroing is the whole game: the diamond holder is spring-loaded so it tolerates a slightly low surface, but you set Z to the surface and let the spring do the rest. This is why diamond drag has the lowest rigidity demand in the table — the gantry is barely loaded, so even a flexy budget machine produces clean results.
I reach for diamond drag for trophy plates, dog tags, instrument panels, and serial-number marking on aluminum. For brass specifically — trophy plates and engraved tags — there is a rotary-engraving alternative that cuts a wider, brighter line, and I compare the two approaches in brass CNC engraving. The deep dive on diamond-drag setup, spring tension, and which materials take a mark cleanly is in CNC diamond drag engraving.
The trade-off to understand is contrast versus permanence. A diamond-drag line is fine and shallow — it reads beautifully on polished or anodized metal where the scratch breaks the finish, but it is faint on bare, matte aluminum because there is no color change to catch it. That is where rotary engraving with a tiny spinning bit, or a fill in the scratched line, earns its place: a deeper, wider cut that you can pack with paint or lacquer for a high-contrast mark that survives handling. For a dog tag that lives on a keyring, I will diamond-drag and then rub a contrasting wax into the line; for a serial plate that has to stay legible after years of abrasion, a rotary-cut, paint-filled groove outlasts a surface scratch. Match the method to how hard the part’s life will be.
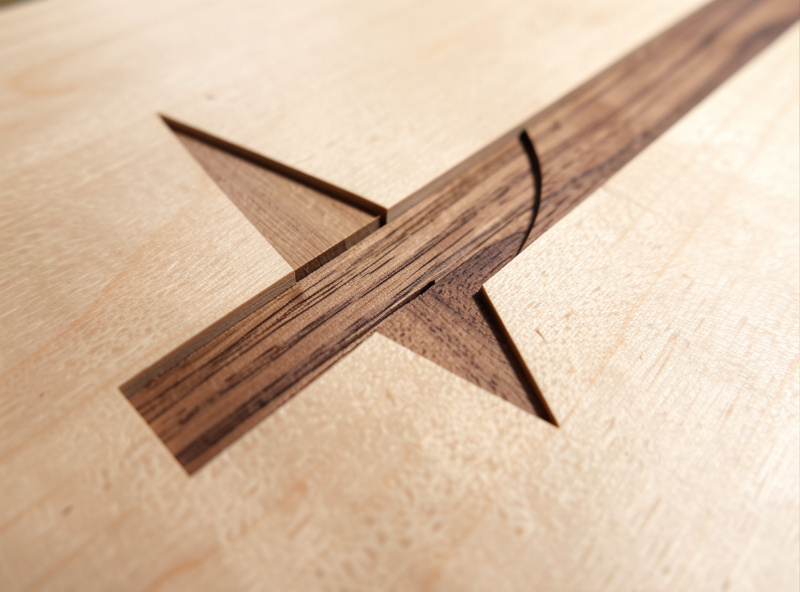
Inlays: Where Engraving Becomes Joinery
An inlay is where engraving stops being decoration and becomes joinery — you cut a pocket in one material and a matching piece to drop into it, and the fit has to be tight enough to disappear under glue. There are two families: flat pocket inlays (a straight-walled pocket and a flat plug, like a contrasting wood band or a brass logo) and V-carve inlays (angled walls cut with the same V-bit, which self-center as they seat).
The flat inlay is a workholding-and-tolerance problem. The pocket is cut with a small straight end mill, the plug is cut to match, and the gap that decides whether the seam vanishes is on the order of 0.1mm. Cut the pocket slightly undersize and the plug too snug and it will not seat; cut it loose and you have a glue line. This is pure feeds-and-speeds discipline meeting calibration — the same steps-per-mm accuracy that makes raster engraving clean makes a flat inlay invisible.
The V-carve inlay is the more forgiving and more impressive technique, because the angled walls mean the plug self-centers and the fit is set by depth, not by an exact-width match. You cut a female pocket and a male plug with the same V-bit, glue, clamp, and surface off the excess — and the contrasting wood reveals a crisp design with no visible glue line. It is genuinely the trick that makes people think you have a far more expensive machine than you do. Because it is the highest-value operation in this whole guide, it gets the most detailed treatment in CNC V-carve inlay technique — start-depth, flat-depth, and the math that makes the plug seat.
The polymath crossover shows up here more than anywhere: the same machine that cuts a turntable plinth or a sim-rig brace cuts an inlay pocket, and the inlay is just another instance of “make two materials hold their shape against each other under load.” Wood-in-wood, brass-in-walnut, even a CNC-cut acrylic light pipe seated in a routed panel — it is all the same operation asked in different materials.
The detail that decides a flat inlay’s success is the corner radius, and it catches everyone once. A straight end mill leaves a rounded internal corner equal to its radius, so a sharp-cornered plug will never seat into a pocket cut by a round bit — the plug’s square corner hits the pocket’s leftover radius and stops. Two fixes: either add a small relief (a dog-bone or T-bone overcut) in the pocket corners so the plug’s corner has somewhere to go, or design the plug with matching radiused corners so the two geometries agree. I default to radiused corners on decorative inlays because the dog-bone relief is visible if the inlay shifts, and to corner reliefs on functional pockets where the inlay is a structural fit and a hidden notch does not matter. It is a tiny detail that is the difference between an inlay that drops home with thumb pressure and one you end up sanding the corners off in frustration.
Workholding Decides Everything (Yes, Even Engraving)
Workholding is the single biggest cause of ruined engraving jobs, and it is the most overlooked because engraving forces feel small. They are small — until a 0.2mm-flat serif demands the part not move 0.05mm, or a two-hour raster engraving demands it not shift once across thousands of passes. The cutting force is low; the tolerance is brutal, and that inverts the usual workholding logic.
For thin sheet stock — the plaques and signs most engraving lives on — I use double-stick carpet tape or a vacuum table, never just edge clamps, because clamps leave the middle of a thin panel free to lift and chatter under a V-bit. For small parts too little to clamp, painter’s-tape-and-CA glue is the standard hobby trick: tape both surfaces, CA between them, and the bond holds for engraving forces yet peels off clean. The vacuum table is the upgrade that ended most of my “the part shifted” stories on flat work — it holds the entire underside, so there is no unsupported span to chatter.
The rule I follow: the workholding has to fight movement, not just cutting force. A V-carve job that looks like it needs almost no holding power will still ruin itself if the panel can flex up 0.1mm in the unsupported middle. Match the method to the part — tape and CA for small, vacuum or tape for thin sheet, clamps and toe-clamps for thick stock — and verify there is no unsupported span under the engraving area before you hit cycle start. The broader principle is in my CNC tooling fundamentals guide, and it ties straight into the complete CNC workflow from design to finished part.
Feeds, Speeds, and the Bit-Maker Chart Trap
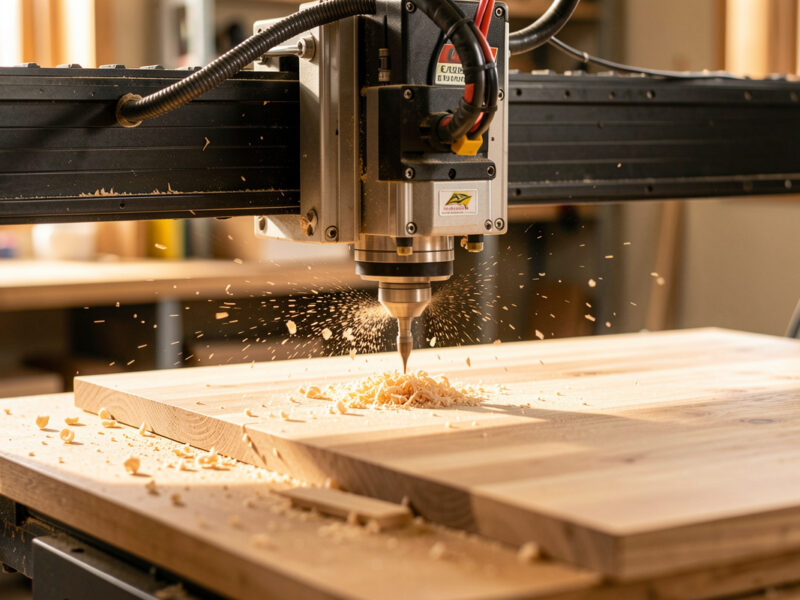
The manufacturer’s feeds-and-speeds chart is a starting point, not a recipe — and for engraving it is often actively wrong, because the charts assume a rigid machine and a full-engagement cut, while engraving is a shallow, partial-engagement operation on a flexy hobby gantry. My approach is chipload-first: pick a chipload the bit and material can survive, then back into the feedrate from the RPM.
For a V-bit in hardwood I keep the spindle moderate (around 16,000–18,000 RPM on the VFD spindle) and the feed conservative, because the tip is the weakest point of the bit and a too-fast feed snaps it at the apex. For a small ball-nose doing raster work, RPM goes up and feed comes down hard — the tip is fragile and the step-over is tiny, so chip evacuation barely matters but deflection matters enormously. Single-flute bits earn their place in plastics and soft wood because they clear chips cleanly and let you run a higher feed without chip welding. The full reference numbers live in my CNC feeds and speeds chart.
One non-negotiable safety point, because a wrong direction here breaks bits and parts: on a flexy hobby setup, conventional milling is the safer default for engraving fine detail, because climb milling on a machine with any backlash lets the cutter pull into the work and chatter. The CAM lets you choose; for crisp serifs on a budget machine, conventional wins. This is the kind of dialed-in setting that separates a clean cut from a story about a broken bit. If you want a small V-bit set worth owning to learn on, this is a sensible starting kit:
CNC 60-degree V-bit engraving set on Amazon.
As an Amazon Associate I earn from qualifying purchases.
Choosing CAM: VCarve, Carbide Create, or Fusion 360
The CAM package matters more for engraving than for almost any other job, because V-carving and inlay are features that not every CAM does well. VCarve Pro is the sign-and-inlay specialist — its V-carve toolpath and inlay tools are the cleanest in the hobby space, and it is what I reach for on any lettering or inlay job. Fusion 360 is my day-to-day for parts and 3D work but is clumsier for pure V-carving. Carbide Create handles quick V-carves and is free, but caps out on complex inlay work.
If your work is mostly signs, lettering, and inlay, VCarve earns its price fast — I break down why in my VCarve desktop review and compare it head to head with the free option in Carbide Create vs VCarve. The actual click-by-click of building a V-carve toolpath — selecting vectors, setting the flat depth, choosing the clearance tool — is its own walkthrough in the V-carve toolpath tutorial, so I will not duplicate it here. The short version: match the post-processor to your controller, let the V-carve toolpath compute depth, and add a flat-bottom clearance tool when letters are wider than the V-bit can reach in one pass.
The through-line across all of it: engraving is a CAM-and-calibration problem wearing a decorative costume. The machines that cut clean letters are the ones that are trammed, calibrated, and held rigid — not the ones with the prettiest unboxing. That is the same lesson the rest of my tooling fundamentals and complete workflow guides hammer, and it is why I frame every engraving job by the rigidity tax before I frame it by the finished photo.
Frequently Asked Questions
What is the difference between engraving and V-carving on a CNC?
Engraving is the broad category of marking a surface; V-carving is one method within it. V-carving uses an angled bit whose cut width grows with depth, letting one bit render a whole font. Other engraving methods include raster, diamond drag, and straight-bit profiling.
Can a hobby CNC engrave photos?
Yes, via raster engraving with a small tapered ball-nose that varies depth to create greyscale. It takes two to four hours per image and punishes any machine slop with banding. A laser does photos faster, so use the router only when you want tactile, depth-carved wood.
What V-bit angle should I use for sign lettering?
A 60-degree V-bit is the default for hardwood lettering, giving crisp, deep detail. Choose a 90-degree bit for soft or chip-prone material and wider letter bodies, where its shallower, stronger geometry resists blowing out the bottom of a serif.
How does CNC V-carve inlay work?
You cut a female pocket and a male plug with the same V-bit. The angled walls let the plug self-center, so fit is set by depth rather than an exact width match. Glue, clamp, and surface off the excess to reveal a crisp inlay with no visible glue line.
Do I need to rotate the spindle for diamond drag engraving?
No. Diamond drag uses a spring-loaded, non-rotating diamond point dragged through the surface, so the spindle stays off. With zero cutting force and no chips, it marks brass, aluminum, glass, and stone on a machine that could never cut those materials.
Why do my engraved letters come out fuzzy?
Fuzzy serifs almost always mean deflection or movement. A V-carved tip flat can be 0.2mm wide, so 0.1mm of gantry flex or part lift shows. Tram the machine, verify steps-per-mm, and use vacuum or tape holding so no unsupported span chatters under the bit.
Related Guides
- CNC V-Carve Inlay Technique — the male/female plug-and-pocket method, start-depth and flat-depth math.
- CNC Text Engraving — names, dates, and plaques, with single-line vs outline font gotchas.
- CNC Photo & Raster Engraving — greyscale-by-depth workflow, image prep, and ball-nose choice.
- CNC Diamond Drag Engraving — spring tension, Z-zeroing, and marking metal with the spindle off.
- CNC V-Carving for Signmaking — layered backgrounds, pocket-clearing, and finishing a sellable sign.