Safety first. The following information is for educational purposes. CNC machining involves high-speed rotating cutters. Always wear eye and ear protection, never leave a running machine unattended, and verify all feeds and speeds for your specific setup.
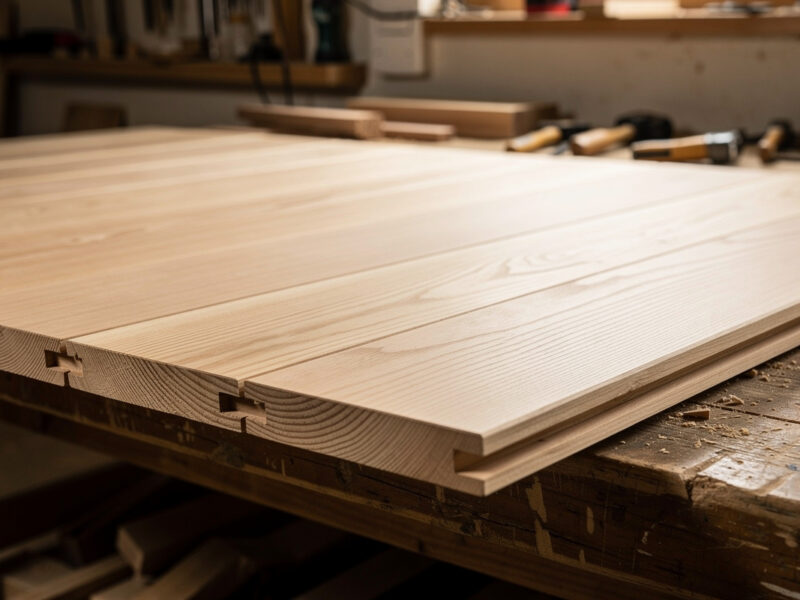
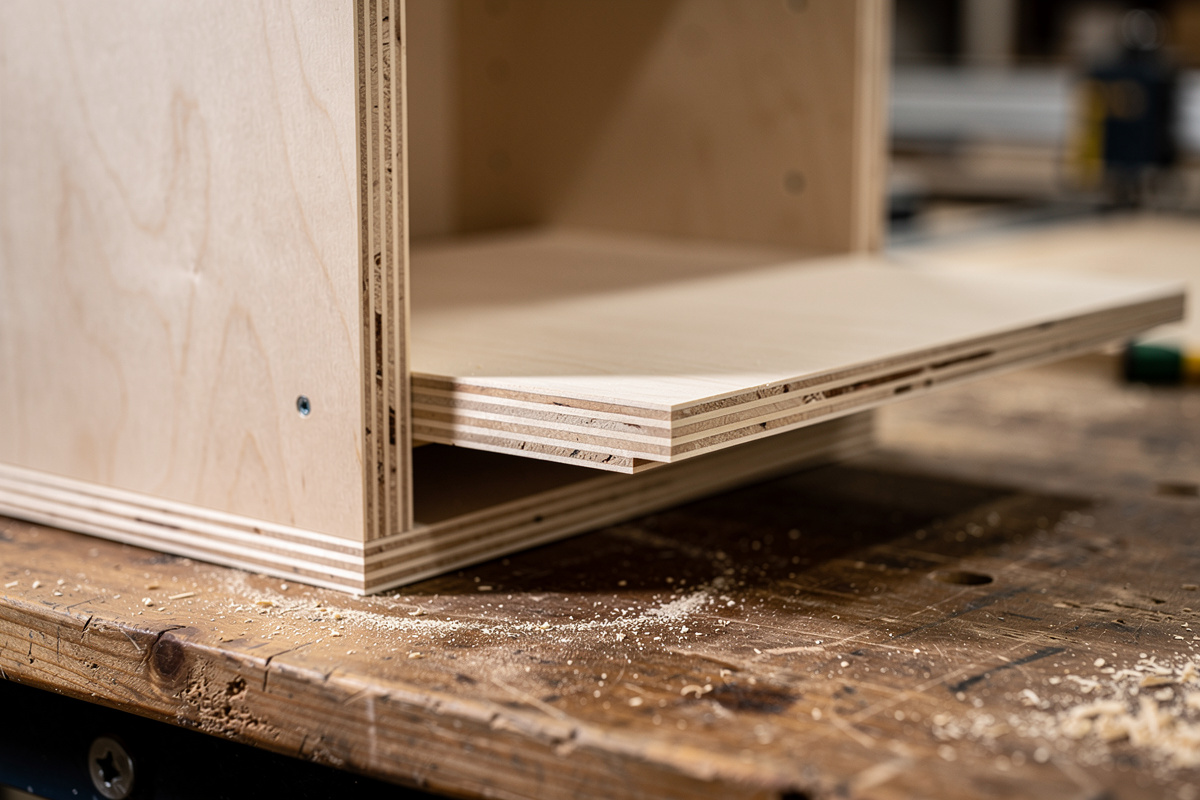
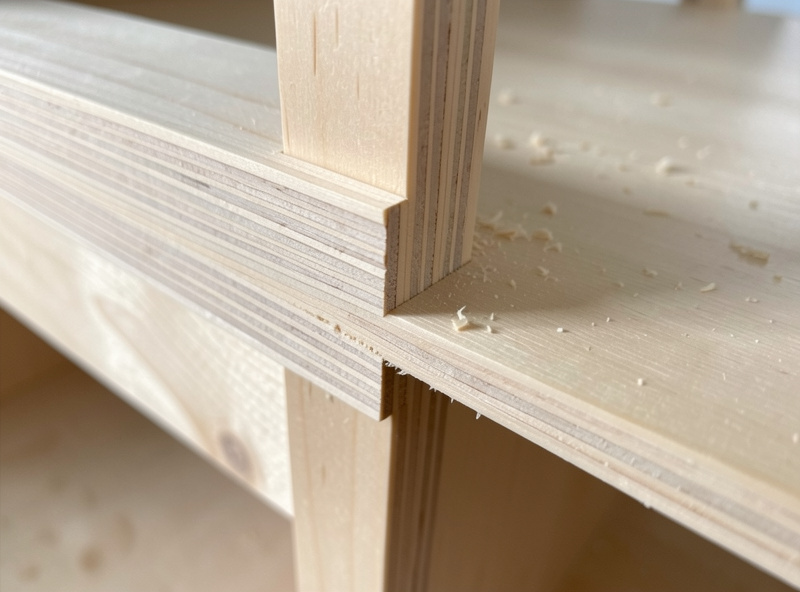
Dadoes and rabbets are the workhorse joints of casework — the flat-bottomed slots that capture shelves, the edge recesses that seat a cabinet back — and on a CNC router they are the easiest joints to cut cleanly. On my Shapeoko Pro a dado is just a straight pocket at a set depth; a rabbet is the same cut run along an edge; a groove is a dado that runs with the grain. The CNC’s edge is dead-flat bottoms, exact depth, and the ability to cut stopped slots that end mid-panel with a clean wall — something that is fussy by any other method. This is how I cut all three, plus the one measurement that fixes the loose-shelf problem everyone hits.
These slot joints sit in the family I cover in my CNC router joinery guide. They are not the strongest joints — a dado resists shelf sag well but offers little pull-out resistance — but for shelving, drawer bottoms, and cabinet backs they are fast, accurate, and plenty strong for the static loads casework actually sees.
Dado vs Rabbet vs Groove
The three are the same cut in different places, and naming them right keeps your CAM clear. A dado runs across the grain, fully enclosed on both sides — the slot a shelf sits in. A rabbet is a step cut into the edge of a board, open on one side — where a cabinet back drops in flush. A groove runs with the grain, otherwise identical to a dado — the slot that captures a drawer bottom or a panel. Here is how I use each.
| Joint | Direction | Open or enclosed | Typical use |
|---|---|---|---|
| Dado | Across grain | Enclosed both sides | Shelves into cabinet sides |
| Rabbet | Along an edge | Open one side | Cabinet backs, drawer bottoms, lap corners |
| Groove | With grain | Enclosed both sides | Drawer bottoms, captured panels |
| Stopped dado | Across grain | Enclosed, blind end | Shelves hidden from the front edge |
Measure the Real Stock, Not the Label
The number-one reason CNC dadoes come out loose is cutting to the nominal plywood thickness. Plywood labeled 18mm is almost never 18mm — it commonly measures 17.3–17.7mm, and the gap between label and reality is exactly the slop in your joint. I put calipers on the actual sheet and cut the dado to that measured number, not the label. This single habit turns a sloppy shelf joint into a snug one.
Even better than guessing a bit diameter: cut the dado in two passes. I run the slot slightly undersized on the first pass, then measure the shelf and take a second light pass that opens the dado to a snug push-fit. Because the CNC repeats exactly, once I dial that second-pass offset for a given sheet I can cut every dado in the project to the same perfect fit. A dado wants a fit that pushes together by hand and holds the shelf without forcing — tight enough to locate, not so tight it splits the cabinet side on assembly.
Bit Choice for Slots
I cut dadoes and rabbets with a straight bit sized at or just under the slot width, or a compression bit when the slot breaks through a veneered face and I want clean top and bottom edges. A compression bit is my default in plywood casework because it leaves the veneer crisp on both faces — no fuzz on the show side. For a wide dado I take it in multiple side-by-side passes rather than one oversized bit, which also lets me hit an exact width by adjusting the stepover. Bit selection across the board is in my router bits guide, and the downcut-vs-upcut tradeoff in the edge-quality breakdown.
Depth matters: a dado should be about one-third to one-half the panel thickness deep — deep enough to locate and support the shelf, not so deep it weakens the side panel. I cut to depth in passes for clean walls, and on the final wall pass I climb-cut for the smoothest surface against the shelf. A glass-smooth dado wall makes for a tighter glue line and a shelf that slides home without chatter marks.
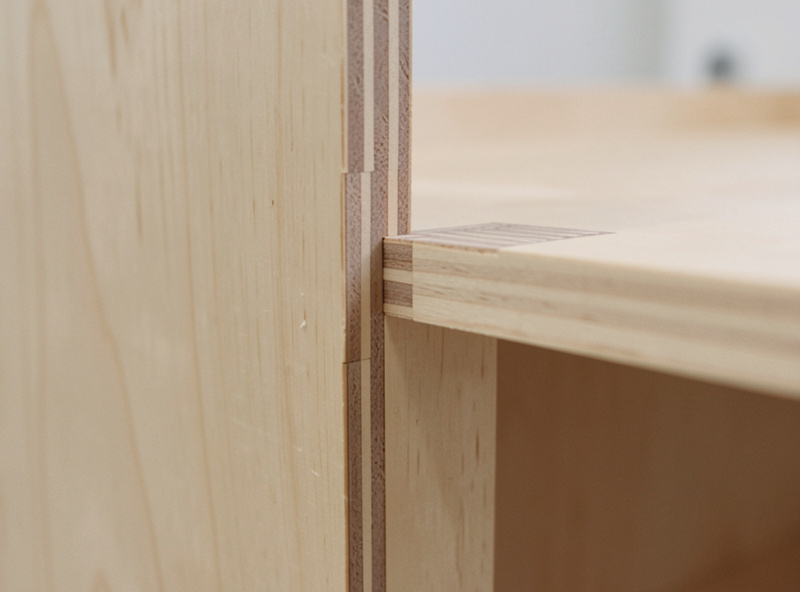
The Stopped Dado: Where the CNC Wins
A stopped dado ends partway across the panel so the slot doesn’t show on the front edge of the cabinet — a hallmark of clean casework. By hand or on a router table this is fussy: you have to stop the cut precisely and square up the rounded end. On the CNC it is trivial. I program the slot to end exactly where I want, accept the rounded end the bit leaves, and notch the front corner of the shelf to clear that radius so it slides fully home. The result is a shelf that looks let-in from the front with no visible slot — the kind of detail that separates built-to-last casework from screwed-together boxes.
This is the same corner-radius reality that governs every CNC joint: the bit leaves a radius, and you either relieve it or design the mating part to clear it. On a stopped dado, notching the shelf corner is the cleanest fix. The broader logic on cutter radius and relief is in my joinery guide, and you will recognize it from the corner relief on box joints.
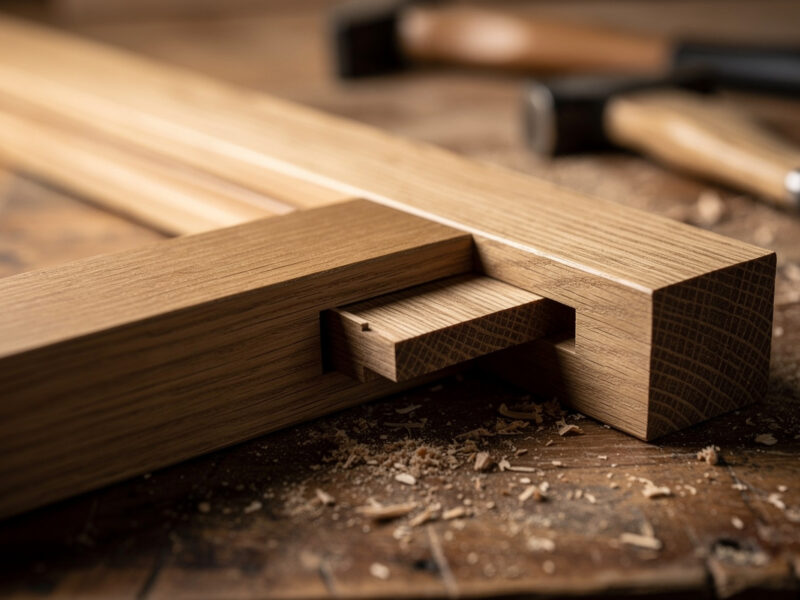
Cutting Rabbets and Lap Joints
A rabbet is an edge dado, and the CNC cuts it as a pocket open to one side — usually the recess for a cabinet back or the step in a rabbeted drawer corner. Because it is an edge cut, workholding matters: I clamp the panel so the edge being cut is fully supported and the bit’s side load can’t shift it. A rabbeted back recess wants to be a hair deeper than the back panel thickness so the back sits flush or slightly proud, then gets trimmed.
The rabbet also forms half of a simple lap joint — two mating rabbets that overlap into a flush corner. It is weaker than a finger or box joint but quick and perfectly adequate for utility boxes and drawer corners that get reinforced with fasteners. The CNC’s repeatability means both mating rabbets come out identical, so the lap closes flush every time. Holding the work square for these edge cuts is where my workholding guide earns its keep.
How Dadoes Build a Carcass
Where dadoes really pay off is whole-carcass casework cut as a single CNC program. I lay out a cabinet’s sides, top, bottom, and fixed shelves as flat parts, with every dado and rabbet machined in place and located precisely relative to the panel edges and any shelf-pin holes. When the parts come off the machine they assemble like a kit — each shelf drops into its dado, the back seats in its rabbet, and the box pulls square because the joints locate everything — the same kit-of-parts approach extends to a face frame with cope and stick cabinet doors. There is no measuring during assembly; the machine already did it.
That is the difference between CNC dado casework and screwing boxes together by eye. The dado carries the shelf load in shear, the glue in the slot adds rack resistance, and the precise location means doors and drawers fit because the openings came out the size the file said. For a run of identical cabinets it is transformative — the tenth carcass is identical to the first. This is the same repeatability argument that makes the CNC win on a batch of box-jointed drawers.
Strength and Where Not to Rely on It
A dado is strong in shear — it holds a loaded shelf from sagging extremely well — but weak in pull-out, so a dado alone won’t resist a force trying to pull the shelf straight out of the slot. For a fixed shelf in glued casework that is fine; the glue and the surrounding box handle the rest. Where I add reinforcement is any joint that sees tension or racking on its own: I pin a through-dado, add a screw into a rabbeted corner, or step up to a stronger joint entirely. A rabbeted box corner, for instance, is quick but wants a fastener or a glued-and-pinned reinforcement to match the strength of a finger joint. Matching the joint to the actual load is the judgment that runs through my whole joinery guide.
Frequently Asked Questions
Why is my CNC dado too loose for the shelf?
You almost certainly cut to the nominal plywood thickness. Real plywood is thinner than its label, often by a third of a millimeter or more. Measure the actual sheet with calipers and cut the dado to that number, or take a second pass to a measured push-fit.
What is the difference between a dado, a rabbet, and a groove?
A dado runs across the grain enclosed on both sides, holding a shelf. A rabbet is a step cut into the edge of a board, open on one side, for a cabinet back. A groove runs with the grain, otherwise like a dado, capturing drawer bottoms or panels.
How deep should a dado be?
About one-third to one-half the panel thickness. Deep enough to locate and support the shelf, shallow enough not to weaken the side panel. Cut to depth in several passes for clean walls, and climb-cut the final wall pass for the smoothest surface.
How do I cut a stopped dado on a CNC?
Program the slot to end where you want it and accept the rounded end the bit leaves. Then notch the front corner of the shelf to clear that radius so it slides fully home. The result is a shelf that looks let-in from the front with no visible slot.
What bit is best for dadoes in plywood?
A compression bit, because it leaves the veneer crisp on both the top and bottom faces with no fuzz on the show side. Size it at or just under the slot width and use the stepover to dial an exact dado width across multiple passes.