Safety first. The following information is for educational purposes. CNC machining involves high-speed rotating cutters. Always wear eye and ear protection, never leave a running machine unattended, and verify all feeds and speeds for your specific setup.
The hard half of a mortise and tenon was always the mortise — the clean, square-bottomed pocket that a hand chisel fights and a mortising machine charges a premium for. A CNC router cuts that half almost effortlessly: a 1/4″ bit pockets a 20mm mortise to depth in three or four passes, square-walled and exactly where the CAD says. That flips the difficulty of CNC mortise and tenon work. The mortise stops being the bottleneck, and the round-ended pocket the bit leaves becomes the fit detail to plan around rather than fight.
A mortise and tenon carries load through a frame — tables, chairs, doors, the casework backbone of a shop — because the tenon’s long-grain glue surfaces lock into the mortise walls and resist racking. It is the joint I reach for whenever a part has to take force through a corner, and it sits at the structural heart of the family covered in my CNC router joinery guide.
Cutting the Mortise
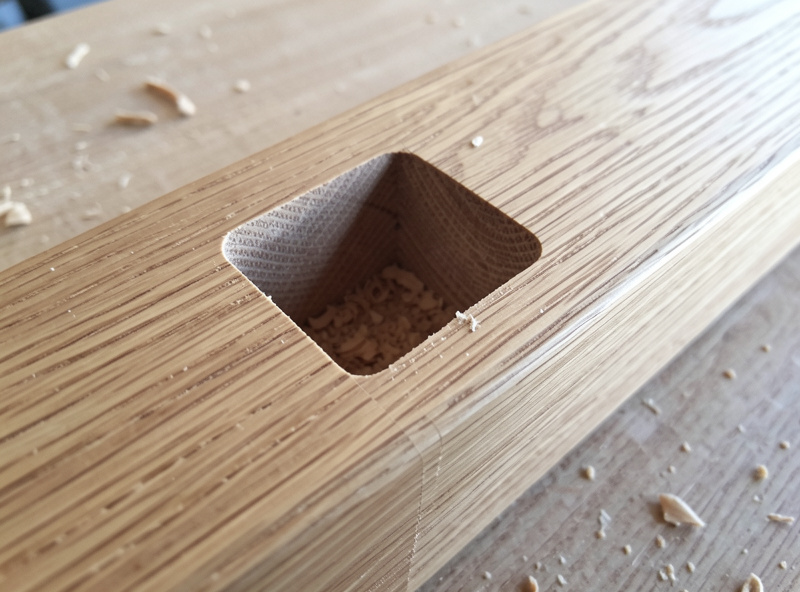
The mortise is a flat-bottomed pocket, and the CNC excels at it: exact location, exact depth, square sides, every time. I pocket it with a bit roughly one-third the tenon-stock thickness — a 1/4″ bit for a typical 18–20mm rail — and cut to depth in multiple passes rather than one plunge, because a full-depth plunge in hardwood deflects the bit and can wander the wall. I leave the mortise depth a millimeter deeper than the tenon length so glue and any debris have somewhere to go rather than holding the joint open.
The one thing the bit leaves is rounded ends on the mortise — the same corner-radius reality that governs all CNC joinery. You have two honest choices: square the mortise ends with a chisel so a square-shouldered tenon fits, or round the tenon to match the mortise. I almost always round the tenon, because it skips chisel work entirely and the joint is every bit as strong. More on that below.
The Round-Tenon Trick
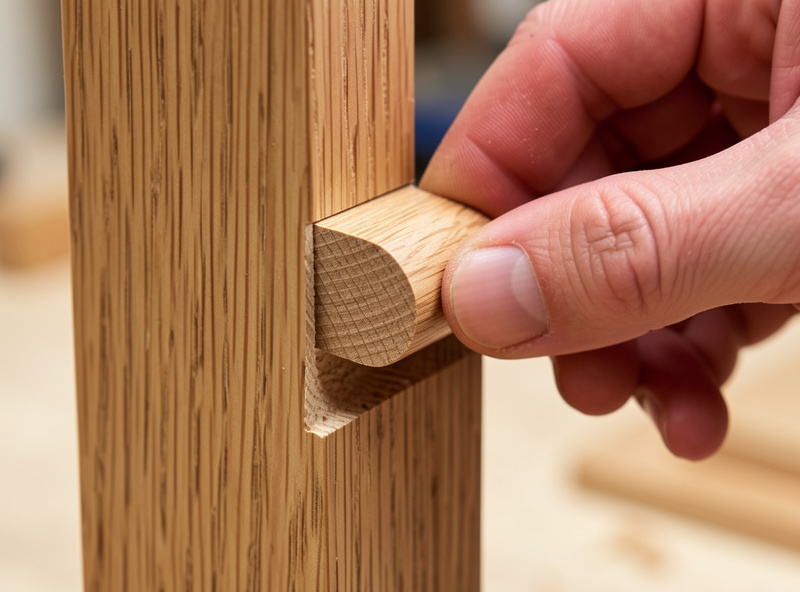
This is the single technique that makes CNC mortise-and-tenon faster than any other method. Instead of fighting the mortise’s rounded ends with a chisel, I round over the tenon’s edges to match that radius exactly. A round-cornered tenon drops straight into a round-ended mortise with full contact on every face — no gaps, no chisel, no fuss. The glue surface is identical to a square joint, so there is zero strength penalty.
I do this by either routing the tenon on the CNC with a corner radius that matches the mortise bit, or by easing the tenon corners with a few file strokes to the same radius. Either way the joint mates perfectly. The mistake beginners make is cutting a crisp square tenon, finding it won’t seat in the round-ended mortise, and then forcing it — which crushes the tenon corners and leaves a sloppy joint. Match the radius and the problem disappears. This is the same corner-radius logic that drives the dogbone relief on finger and box joints, just solved from the other side: see my finger joints guide and box joints guide for the relief approach on square joints.
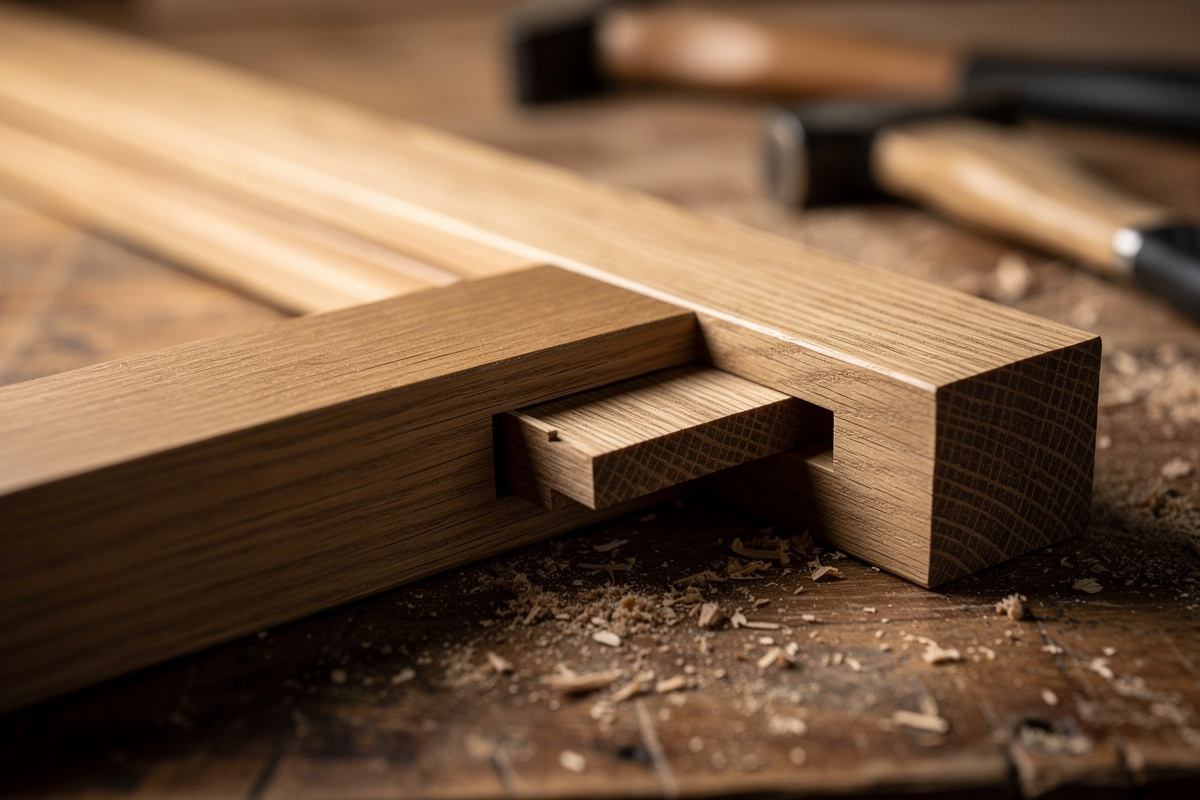
Cutting the Tenon
The tenon is the easy half. I cut tenons one of two ways depending on the job. On the CNC, I machine the tenon as a raised tongue by pocketing away the cheeks around it — precise, and it lets me round the corners to match the mortise in the same setup. Off the CNC, I cut tenons on the table saw or with a router, which is faster for simple straight tenons when I am not chasing a matched radius.
My rule of thumb: cut the mortise on the CNC where its precision and location pay off, and cut the tenon wherever is quickest for that part. For a one-off, the table saw tenon plus a quick corner-round is fastest. For a batch of identical frames, I cut both on the machine in one program so every joint is identical. The tenon should fit the mortise with a firm push-to-light-tap fit — snug enough that the glue bonds well, loose enough that it doesn’t split the mortise walls on assembly.
Fit and Glue Surface
A mortise and tenon gets its strength from long-grain-to-long-grain glue contact on the tenon cheeks — the wide faces, not the ends. I size the tenon so the cheeks are a snug fit against the mortise walls and the shoulders pull up tight against the mating face, because the shoulder is what hides any imperfection and resists racking. A gap at the shoulder shows; a slightly loose cheek is invisible and still strong once glued.
I aim for a tenon thickness around one-third of the rail thickness — thick enough to be strong, thin enough to leave solid mortise walls on either side. Too thin and the tenon is the weak point; too thick and the mortise walls blow out. That one-third ratio is the time-tested starting point, and the CNC lets me hit it exactly every time rather than sneaking up on it with test fits.
One subtlety that pays off: I relieve the very bottom of the tenon a hair so it never bottoms out before the shoulders seat. A tenon that bottoms in the mortise holds the shoulders open and leaves a visible gap at the most important line on the joint. Cutting the mortise slightly deeper than the tenon length, as I mentioned, achieves the same thing — the shoulders, not the tenon end, control how the joint closes. Get that right and every frame I assemble pulls tight at the shoulder with no fuss.
Mortise-and-Tenon Variants Worth Cutting
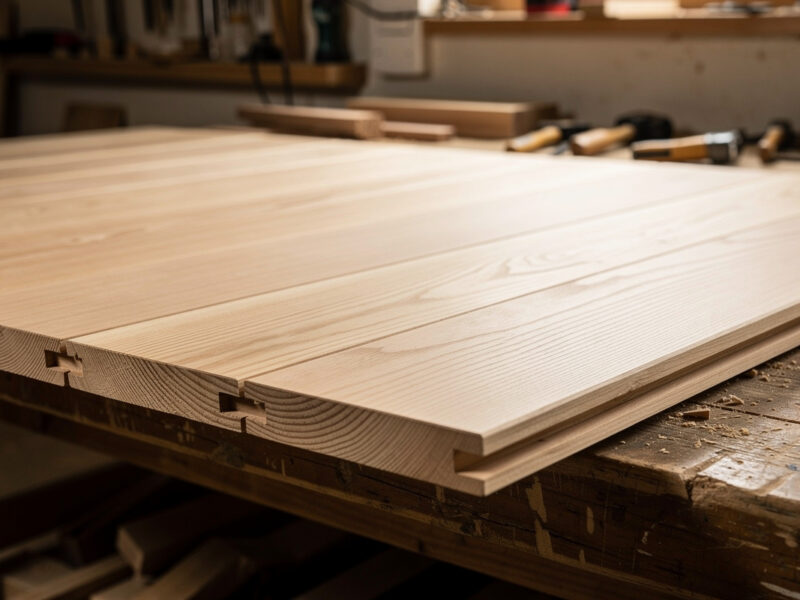
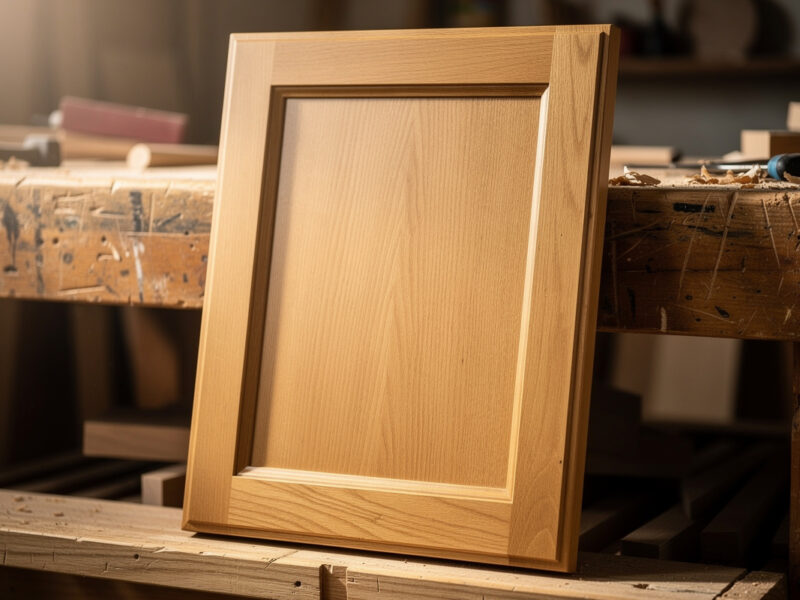
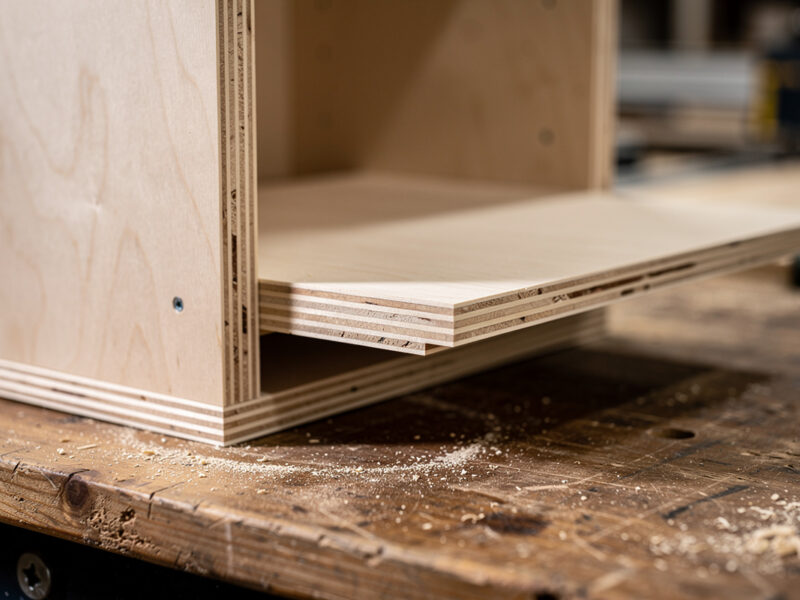
The basic blind mortise and tenon covers most frame work, but a few variants earn their keep and the CNC makes them straightforward. A through tenon passes all the way through the mortised member and shows on the far face — the CNC cuts the through-mortise cleanly with a sacrificial backer to stop blowout, and a through tenon wedged or pinned is both strong and a deliberate design feature. A haunched tenon leaves a short stub at the top to fill a groove in a frame-and-panel door, which the CNC pockets in the same operation. A twin or double tenon spreads the glue surface across a wide rail without one oversized tenon weakening the walls.
I pick the variant by the load and the look. A workbench or a table apron gets a stout blind tenon; a visible piece where I want to show craft gets a through tenon, wedged for mechanical lock. The CNC’s contribution is the same across all of them: exact, repeatable mortises located precisely relative to every other feature on the part, which is exactly where hand-mortising gets tedious and inconsistent.
When I Skip the CNC for This Joint
Honesty matters: the CNC is not always the fastest way to a mortise and tenon. For a single joint in thick stock, a plunge router with an edge guide or a dedicated mortiser is quicker than tramming and zeroing the machine. The CNC pulls ahead the moment the part count climbs, the mortise has to land in an exact spot relative to other machined features, or the geometry is awkward — angled mortises, mortises in a curved rail, or a batch of identical frames. Match the tool to the job rather than forcing every joint onto the machine; that judgment is part of the broader trade I lay out in the joinery guide.
Workholding for Frame Members
Mortises usually go into the edge or face of a long, narrow rail, which is awkward to hold securely. I clamp the rail down flat against a fence so it cannot shift under the side load of the pocketing cut, keeping clamps clear of the toolpath. For mortises in the narrow edge of a board, I stand the board in a vise or a dedicated edge-holding fixture so the top face is dead level to the bit. Any movement during a mortise cut throws the location off, and a mortise in the wrong spot is scrap. The full workholding logic is in my workholding guide, with the clamps and hold-downs I trust for frame stock.
Frequently Asked Questions
How do you deal with the rounded mortise ends a CNC leaves?
Round the tenon corners to match the mortise radius instead of squaring the mortise with a chisel. A round-cornered tenon drops into a round-ended mortise with full contact and identical glue surface, so there is no strength penalty and no chisel work.
What size bit should I use for a CNC mortise?
Roughly one-third the tenon-stock thickness, so a 1/4 inch bit for a typical 18 to 20mm rail. Cut to depth in several passes, not one plunge, since a full-depth plunge in hardwood deflects the bit and can wander the mortise wall.
How thick should the tenon be?
About one-third of the rail thickness. Thick enough to be strong, thin enough to leave solid mortise walls on either side. Too thin and the tenon becomes the weak point; too thick and the mortise walls can blow out under assembly load.
Should I cut the tenon on the CNC too?
Cut the mortise on the CNC where its precision and exact location pay off. Cut the tenon wherever is fastest: the table saw for simple one-off tenons, or the CNC when you want matched corner radii or a batch of identical frames in one program.
Why does my mortise and tenon rack or feel weak?
Strength comes from long-grain glue contact on the tenon cheeks and tight shoulders. If the cheeks are loose or the shoulders leave a gap, the joint racks. Size the tenon for a snug cheek fit and make sure the shoulders pull up flush against the mating face.