Safety first. The following information is for educational purposes. CNC machining involves high-speed rotating cutters. Always wear eye and ear protection, never leave a running machine unattended, and verify all feeds and speeds for your specific setup.
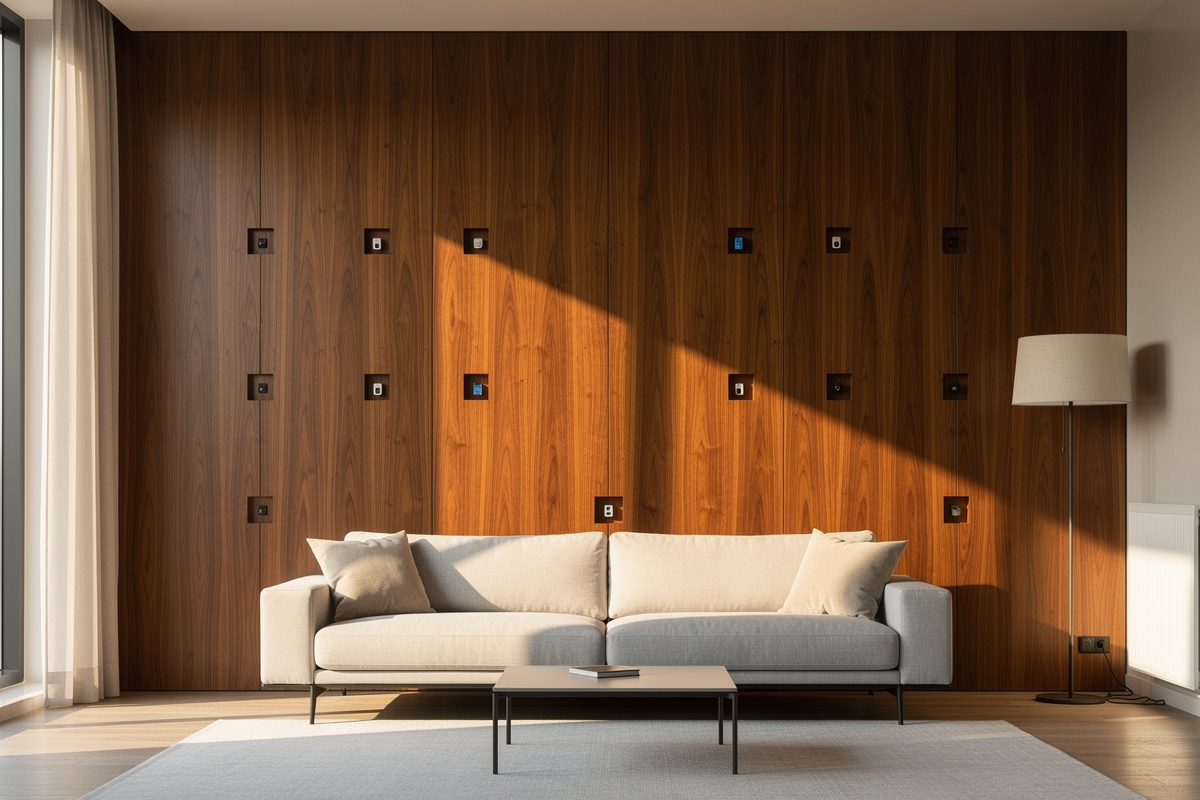
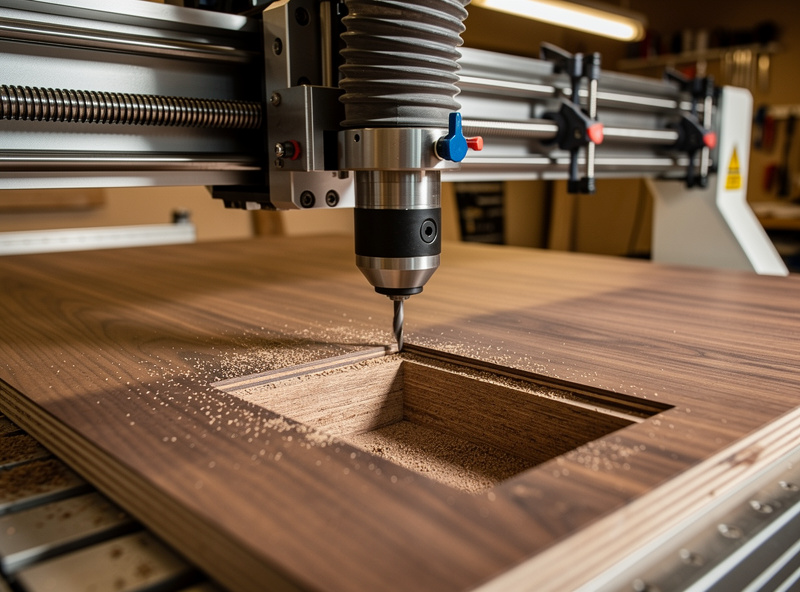
A CNC-cut wall panel hides smart-home sensors inside a flush hardwood or plywood surface — motion sensors, leak sensors, temperature probes, and even small Zigbee hubs disappear into pocket cavities milled exactly to the device dimensions. The result is a sensor-rich room with no visible electronics. Material cost runs 30-90 USD per panel depending on wood species and panel size; cut time runs 30-90 minutes on a desktop CNC.
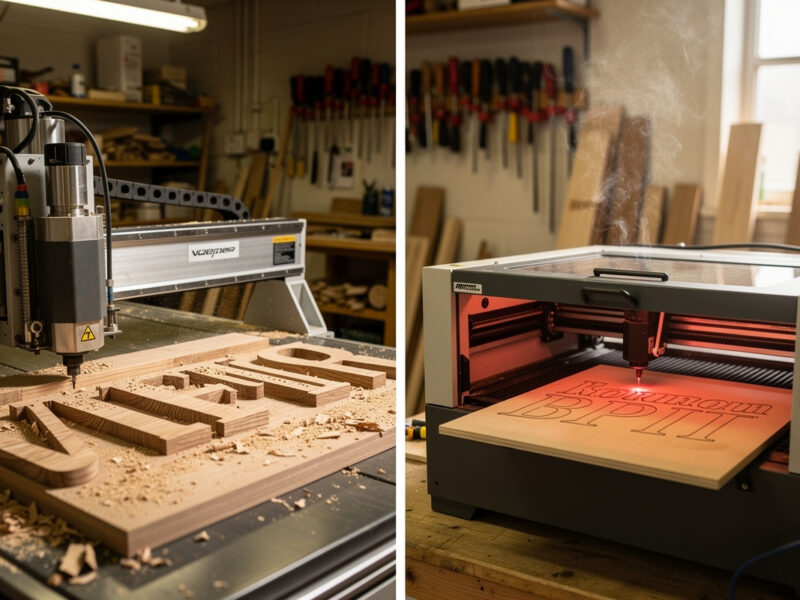
This guide covers panel design, the toolpaths that produce a clean cavity at the exact sensor depth, and the wiring trick that lets you remove and replace a sensor without re-cutting the panel. Target hardware is a Shapeoko 5 Pro, Onefinity, or Sienci LongMill MK2; anything with a 600x400mm work area handles single-room panels. Larger four-foot panels split into two fixtures and join with a tongue-and-groove edge.
Why Hide Sensors Inside Wall Panels
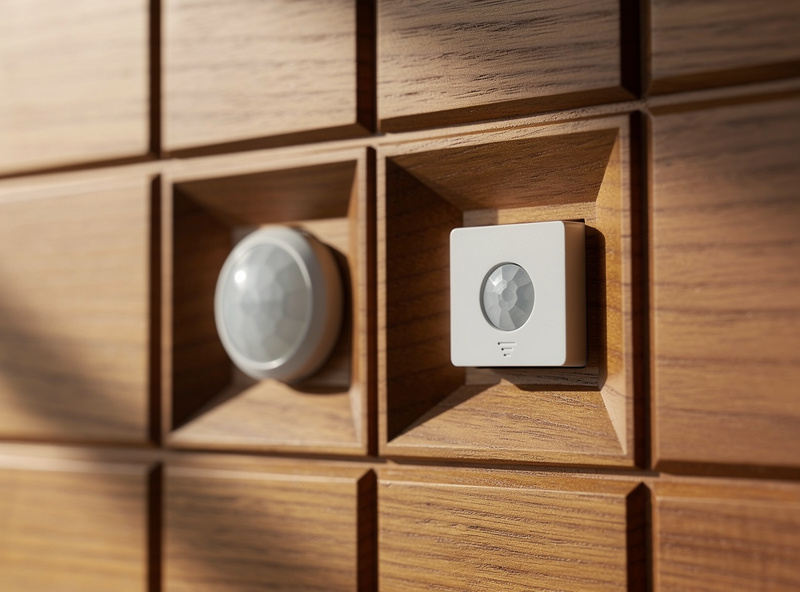
Visible sensors signal “tech project,” not “finished home.” A motion sensor stuck to a hallway wall looks like an afterthought; a four-by-eight foot oak panel with the same sensor recessed into a 6mm-deep cavity reads as architectural. The function is identical, the perception differs entirely. Couples disagree about smart homes when the visible hardware looks unfinished — and disagree less when sensors disappear into wood.
The second reason is acoustic and thermal. Hidden sensors do not pick up direct sunlight (which biases temperature sensors by 2-3 degrees) or vibration from foot traffic (which triggers cheap motion sensors falsely). A sensor recessed 6mm into oak with a 0.4mm acrylic IR-transparent cover behaves more accurately than the same sensor stuck to a corner. The hidden placement also extends sensor battery life because the device runs cooler.
The third reason is upgrade flexibility. A panel cut with a 6mm cavity for an Aqara TVOC sensor accepts the next-generation sensor with the same overall form factor without re-cutting the panel. Standardizing on common sensor footprints — Aqara’s 35x35x9mm cube, Eve’s 40mm puck, Sonoff’s similar puck — protects the panel investment for 5-7 years across multiple sensor generations.
Sensor Cavity Geometry: Three Common Footprints
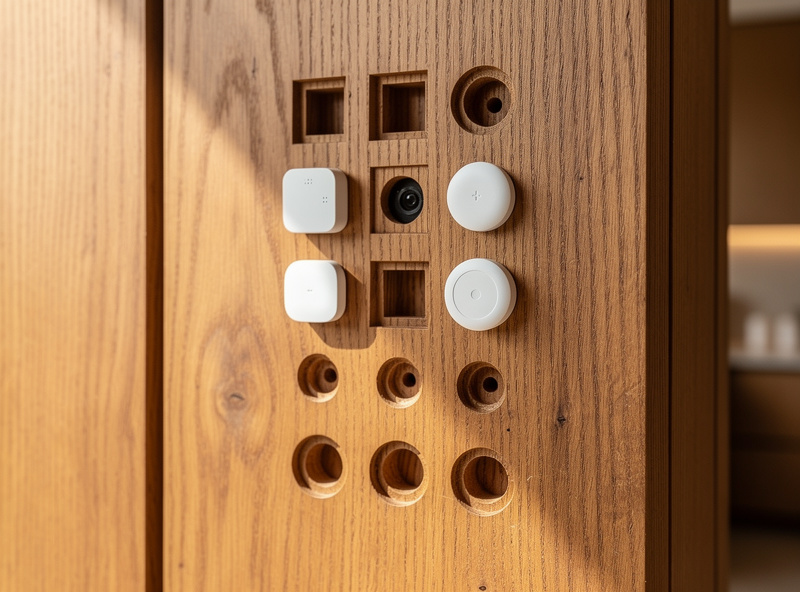
Three pocket geometries cover 80% of smart-home sensors. The cube pocket is 35x35x10mm for Aqara TVOC, Aqara Air, and Sonoff temperature sensors. The puck pocket is 40mm round x 12mm deep for Eve Motion, Eve Door, Hue Motion. The strip pocket is 60x15x6mm for thin door-contact sensors and small thermometers. Combine these three on one panel to match every sensor in a room without unique geometry per device.
Each pocket gets a chamfered top edge — a 1mm V-mill cut along the cavity perimeter softens the visible transition between hardwood and the recessed sensor, so the eye reads the cavity as intentional design rather than a hole. The chamfer pass takes 30 seconds per pocket and dramatically improves the finished look. The technique mirrors the inlay approach used in the V-carve toolpath tutorial for letters and prismatic features.
| Sensor Type | Pocket Shape | Pocket Size | Depth | Common Devices |
|---|---|---|---|---|
| Cube sensor | Square | 35x35mm | 10mm | Aqara TVOC, Aqara Air, Sonoff Temp |
| Puck motion | Round | 40mm dia | 12mm | Eve Motion, Hue Motion, Aqara P1 |
| Strip contact | Slot | 60x15mm | 6mm | Door/window contact sensors |
| Hub cavity | Square | 120x90mm | 30mm | Aqara M3, SmartThings Hub |
| LED strip | Channel | 15x10mm | 5mm | Hue Lightstrip, Govee Glide |
Material Selection for the Panel
Solid hardwood panels look the best but warp over time in dry winter homes. The compromise is a hardwood-veneered MDF or plywood: 18mm baltic birch with a 0.6mm walnut, oak, or cherry veneer face glued before cutting. The veneer reads as solid wood from across the room, the MDF or plywood substrate stays dimensionally stable through humidity changes, and the cost is 40% of solid hardwood for the same panel size.
For premium installs, solid quarter-sawn oak or walnut panels handle the cavity geometry beautifully but cost 90-150 USD per panel and need climate control to stay flat. Skip flat-sawn lumber — the cavity edges open as the panel moves, exposing the sensor below. The exact wood selection criteria for stable CNC stock are in the CNC cutting hardwood guide, which tested oak, maple, and walnut for cavity dimensional stability.
Avoid construction-grade plywood for visible panels. The void content makes pocket bottoms ragged, and the surface veneer is too thin to take the chamfered edge cleanly. Cabinet-grade or marine plywood works — both have higher veneer thickness and tighter glue lines. The next-tier upgrade is paint-grade poplar plywood with a high-quality painted finish; this looks intentional in modern interiors and costs 60% of veneered birch.
Toolpath Strategy: Pocket, Chamfer, Through-Hole
Each pocket needs three toolpaths in this order: rough pocket with a 6mm flat end mill, finish pocket with a 3mm flat end mill for clean walls, then chamfer the top edge with a 60-degree V-bit. After all pockets, drill a 5mm through-hole at the back of each cavity for the sensor’s wiring or for ventilation if the sensor is battery-powered. The hole exits behind the panel where it cannot be seen from the room.
Feeds and speeds for the pocket: 18,000 RPM spindle, 1500mm/min feed, 3mm depth-of-cut for the rough pass, 0.3mm finish allowance. The full feeds-and-speeds matrix for hardwood pockets is on the CNC feeds and speeds chart. The chamfer pass runs at 12,000 RPM, 800mm/min, 0.5mm chamfer width — slow and clean, since this is the visible edge.
For the back-side wiring channel that links sensor cavities to a junction box, use a separate fixturing pass: flip the panel, register against a rear-side fence, and route a 6mm-wide x 10mm-deep channel between cavities. The channel does not need to be pretty since it is on the back of the panel — speed and chip clearance matter more than finish.
Mounting and Wiring the Finished Panel
Standard French cleats handle panels up to 100 lbs without visible hardware. A 30-degree angled cleat strip on the rear of the panel mates with a matching strip lag-bolted to wall studs. The panel lifts off in seconds for sensor swaps, painting, or relocation. For permanent installs, behind-mounted threaded inserts and 1/4-20 bolts through the wall stud bay provide a flush appearance with no visible fastening.
Wiring runs through the back-channel routed during the CNC pass into a single junction box behind the panel or behind the wall. For battery-powered sensors, no wiring is needed — the through-hole simply provides ventilation so the sensor’s onboard temperature reading reflects the room rather than a sealed cavity. For mains or POE-powered sensors, the channel carries low-voltage cable to a junction box, then a single home-run cable exits the panel. The same wiring topology used to integrate CNC-cut chicken coop plans with smart sensors applies cleanly here.
For the connected-home overall design and which sensors map to which rooms, the smart home VLAN setup guide on Home Auto Central provides the network-side context for the panel’s hidden devices.
Frequently Asked Questions
What CNC do I need to cut a wall panel?
Any desktop CNC with a 600x400mm work area handles single-room panels. Shapeoko 5 Pro, Onefinity Woodworker, and Sienci LongMill MK2 all work. Larger four-foot panels split into two fixtures and join with a tongue-and-groove edge cut on the same machine.
Can I hide a smart home hub inside a wall panel?
Yes, with a 120x90x30mm cavity. Aqara M3, SmartThings, and similar hubs fit. Add ventilation by drilling a 5mm rear hole and ensure the front face leaves clear line-of-sight for the hub Wi-Fi or Zigbee antenna by using a thin acrylic IR-transparent cover.
What wood is best for a sensor wall panel?
Walnut-veneered baltic birch plywood is the practical default. The 0.6mm veneer reads as solid wood while the plywood substrate stays dimensionally stable. Solid quarter-sawn oak or walnut is the premium pick but needs climate control to stay flat.
How deep should the sensor pocket be?
Match the sensor thickness with 1-2mm of clearance for ventilation. Aqara cube sensors at 9mm thick get a 10mm pocket. Eve Motion pucks at 12mm thick get a 13mm pocket. Add a 1mm V-bit chamfer at the cavity top for a clean visible edge.
Will a hidden sensor read accurately?
Yes, often more accurately. A 6mm-deep cavity in oak isolates the sensor from direct sunlight, foot vibration, and HVAC drafts that bias readings on surface-mounted sensors. Add a 5mm rear vent hole so the sensor reads ambient room air rather than a sealed cavity.
How long does cutting a wall panel take?
30-90 minutes per panel depending on cavity count and toolpath complexity. A standard living-room panel with 6 cavities cuts in 45 minutes on a Shapeoko 5 Pro. The chamfer pass adds 5 minutes. Wiring channel on the back side adds another 10-15 minutes.