Safety first. The following information is for educational purposes. CNC machining involves high-speed rotating cutters. Always wear eye and ear protection, never leave a running machine unattended, and verify all feeds and speeds for your specific setup.
The T-track and wasteboard are the foundation every other workholding method sits on. A flat, surfaced spoilboard with a sensible T-track grid is the workbench your clamps anchor into, your tape jobs press against, and your vacuum gasket seals to. Get this layer right — surfaced true to the gantry, T-track laid out for the parts you actually cut — and every hold downstream gets easier and more repeatable. Get it wrong, with a board that isn’t flat or a track layout that never puts a clamp where you need it, and you fight your workholding on every single job.
This is how I set up and maintain the foundation layer, and it pairs with the method-by-method decisions in my CNC workholding guide. The clamps deep dive covers what bolts into the track, and the DIY vacuum table build is the natural next layer once your wasteboard is dialed in.
A quick note: some links below are affiliate links. Buy through one and I may earn a small commission at no extra cost to you. I only point to gear I’d actually bolt to my own machine — details on my disclaimer page.
Why a Flat Wasteboard Is Non-Negotiable
Flatness is the whole point of a wasteboard, and it’s the thing most beginners underestimate. Every adhesive and vacuum hold depends on full contact, and a board that isn’t co-planar with the cutter’s travel leaves gaps a part can rock in or a gasket can’t seal across. Even clamped work suffers — a part bridging a high spot rocks under cutting force, and parts cut to depth on a non-flat board come out with inconsistent thickness.
The fix is to surface the wasteboard in place: mount it, then run a surfacing bit across the whole top with the same machine and the same trammed spindle that will cut your parts. By definition that makes the board co-planar with the cutter’s travel — any high or low spots in the mounting get machined away. This is why I never rely on a board being flat out of the box; I make it flat relative to my machine, which is the only flat that matters.
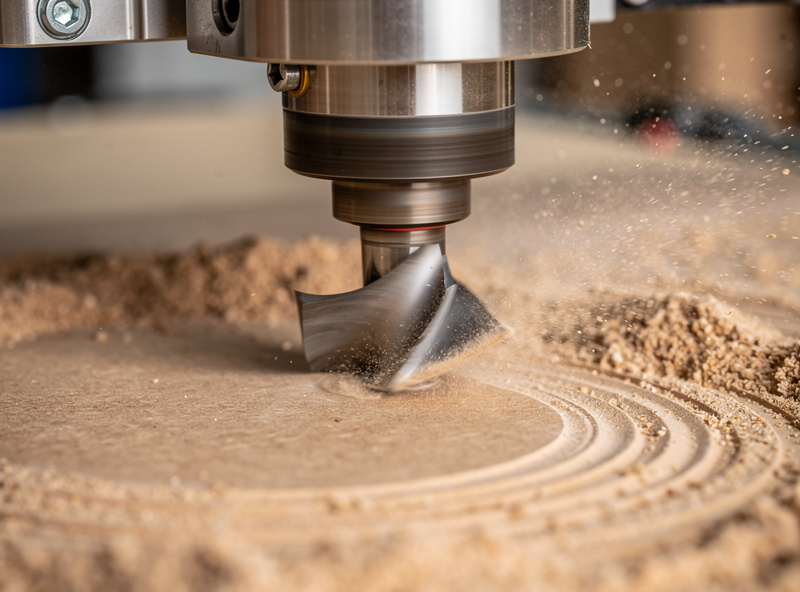
Surfacing the Spoilboard
Surfacing uses a wide, flat-bottomed bit — a surfacing or “fly” cutter — taking light passes with generous step-over to skim the board flat. The first surfacing pass on a new board removes the most material and establishes the reference plane; after that, you re-surface only when the board picks up enough cut scars, glue residue, and screw dimples to stop sitting parts flat. A good CNC surfacing bit in a 1-inch or larger diameter makes quick work of it and leaves a clean, even surface.
The feeds-and-speeds for surfacing follow the same chipload-first logic I use for everything else — a wide bit wants a moderate RPM and a feed that keeps the chipload sensible, not a screaming spindle that just burnishes and dulls the cutter. My feeds and speeds chart covers the reasoning; for surfacing specifically, light depth of cut and overlapping passes give the flattest, cleanest result. Surfacing is also a maintenance habit, not a one-time setup — I treat a fresh pass as routine whenever the board has earned it.
A couple of practical notes save grief here. Step-over on a surfacing bit wants to be well under the bit diameter — overlapping the passes by a third to a half hides the slight scallops a flat-bottom bit leaves and gives a uniform finish. Climb versus conventional matters less on a surfacing pass than on a profile, but I still favour the direction that leaves the cleaner edge on MDF, which tends to fuzz. And dust is no joke when surfacing MDF — the fine powder it throws is exactly why a good dust shoe and collection matter, both for the finish and for the shop air. A board surfaced under good extraction comes out cleaner and lasts longer between passes.
Laying Out the T-Track Grid
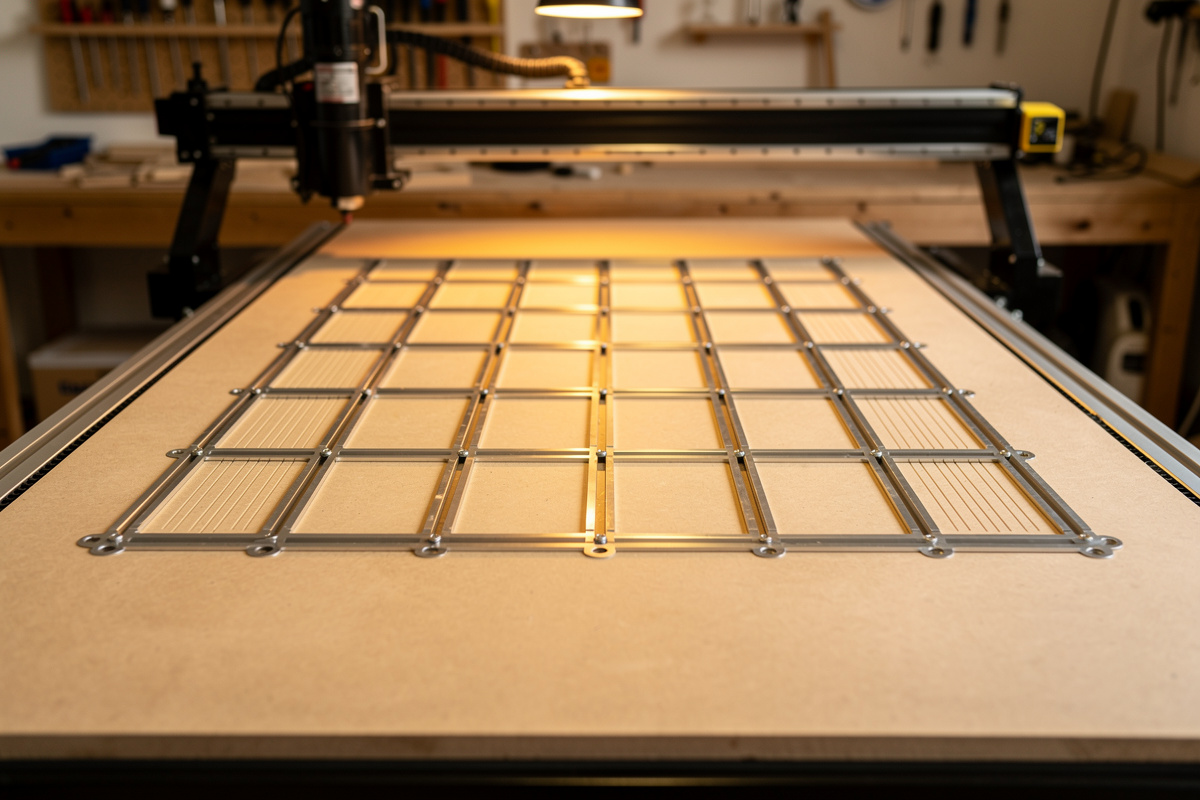
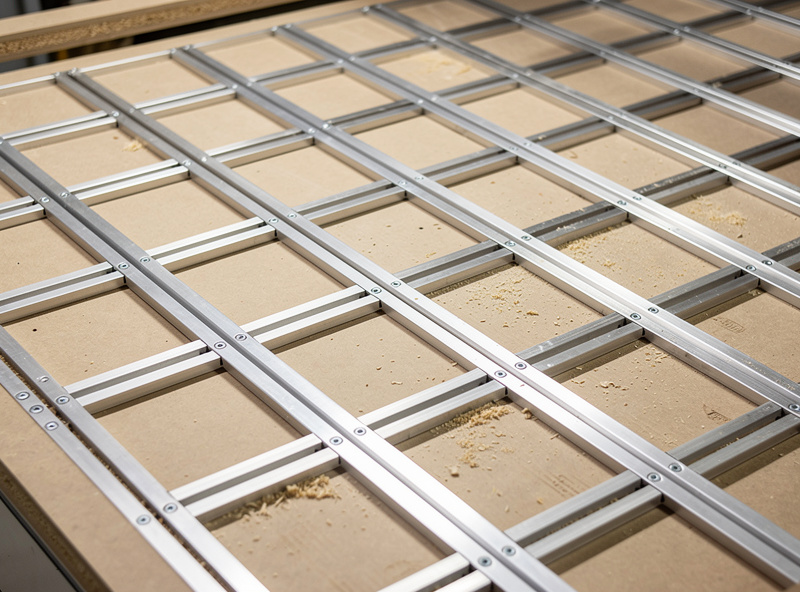
T-track turns a plain spoilboard into a flexible clamping system. The two common approaches are extruded aluminum T-track set into dadoes in the MDF, or threaded inserts on a grid. Aluminum T-track gives infinite clamp positions along each rail and is what I run, because a clamp can slide to exactly where the cut needs it. Threaded-insert grids are cheaper and lower-profile but lock you to fixed hole positions.
The layout that matters is spacing the tracks so a clamp is always within easy reach of your common part sizes — that loops straight back to the placement rule that clamps must sit near the cut. I space my rails so no point on a typical part is more than a few inches from a track. A length of quality aluminum T-track cut to fit your bed, set into dadoes slightly below the surface so it never fouls a cutter, is the upgrade that makes clamping fast instead of fiddly.
Why MDF, and How to Mount It
MDF is the standard wasteboard material for good reasons: it’s flat, cheap, dimensionally stable indoors, and — importantly for vacuum work — porous enough to pass air through its thickness. It also sacrifices itself gladly, taking the occasional cut-through so your real bed doesn’t. I mount the wasteboard to the machine bed with countersunk screws set well below the surface so a surfacing pass never hits them, or with the T-track itself bolting through to the bed.
Keep the wasteboard sacrificial and replaceable — it’s a consumable, not a permanent fixture. When it’s too chewed up to surface flat anymore, you swap it. For shops that cut a lot of vacuum sheet work, a dedicated porous-MDF top over a plenum becomes the wasteboard, which is exactly the build covered in the vacuum table guide. Either way, the principle holds: flat first, then track layout, then whatever holding method the job calls for.
One caution about MDF: it moves with humidity. In a damp shop a board can swell slightly and lose its flatness reference, which is part of why I re-surface rather than assume a board stays true forever. Seasonal shops in particular benefit from a quick skim pass after a big swing in conditions. There are alternatives — phenolic and Baltic birch ply boards last longer and resist moisture better — but they’re more expensive and not porous, so they don’t suit vacuum work. For most hobby shops, plain MDF re-surfaced when needed is the right balance of cost, flatness, and vacuum compatibility, which is why it remains the default.
Squaring, Zeroing, and Living With the Board
A flat board is only half the foundation; it also wants to be square and predictable so you can locate work against it. I add removable fence rails or locating stops along one or two edges of the wasteboard, indicated square to the machine axes, so a part registers in the same place every time. For repeat jobs this turns “measure and re-zero” into “drop it against the stops and go,” which is the same locating logic the vise and fixture methods rely on. Hardware-wise, that means keeping a stock of T-track T-nuts and bolts matched to your rail profile, so a stop or a clamp is always a few seconds away from being mounted.
Zeroing off the wasteboard is the other daily habit. Because the board is co-planar with the cutter after surfacing, I can set Z-zero to the board’s top surface and trust it across the whole bed — a luxury you simply don’t have on a board that isn’t surfaced true. When I cut all the way through a part, the toolpath ticks a fraction into the sacrificial board, which is exactly what it’s there for. I just keep an eye on cumulative wear, and when the surface stops registering parts flat, a fresh surfacing pass resets the whole reference.
T-Track vs Threaded-Insert Wasteboards
| Feature | Aluminum T-track | Threaded-insert grid |
|---|---|---|
| Clamp positioning | Infinite along rail | Fixed hole locations |
| Profile height | Slightly raised | Flush / low |
| Cost | Higher | Lower |
| Vacuum compatibility | Track interrupts porous top | Cleaner porous surface |
| Best for | Varied part sizes, frequent clamping | Budget builds, repeatable jigs |
Frequently Asked Questions
How do I make my CNC wasteboard flat?
Surface it in place. Mount the board, then run a wide surfacing bit across the whole top with the same machine and trammed spindle that cuts your parts. That makes the board co-planar with the cutter travel, machining away any high or low spots from mounting.
What is the best material for a CNC wasteboard?
MDF is the standard: flat, cheap, dimensionally stable indoors, and porous enough to pass air for vacuum work. It sacrifices itself gladly when a cut goes through. Treat it as a replaceable consumable and swap it when it is too chewed up to surface flat.
How often should I resurface my spoilboard?
Only when it picks up enough cut scars, glue residue, and screw dimples to stop sitting parts flat. The first surfacing establishes the reference plane; after that it is occasional maintenance, not a routine before every job. A fresh pass takes minutes once set up.
How should I space T-track on a CNC bed?
Space the rails so a clamp is always within a few inches of your common part sizes. Clamping force is local, so a track layout that never puts a clamp near the cut undermines every hold. Match the grid to the parts you cut most often.
T-track or threaded inserts for a wasteboard?
T-track gives infinite clamp positions and suits varied part sizes and frequent clamping. Threaded-insert grids are cheaper, lower-profile, and leave a cleaner porous surface for vacuum work but lock you to fixed hole locations. Many shops run both zones.